The Internet today is full of surprises and hidden things that users may not be aware of. Having a traffic monitor to monitor your network speed from time to time can be crucial to let you know if there is anything that is using the internet bandwidth without your knowledge. It is also a great way to know how much internet speed an app is using when it is downloading or uploading something.
Back in Windows 10 and older versions of Windows, there was a simple and popular third-party app called “NetSpeedMonitor” that can display the real-time network or internet speed directly on the taskbar. Sadly, this app is not supported in Windows 11.
Also see: How to Know Which App is Using The Internet in Windows 11
Page Contents
How to add a network speed monitor in Windows 11
Fortunately, there are a few other apps that are able to do the same thing as NetSpeedMonitor to display a real-time network speed monitor on the taskbar in Windows 11. This guide will show you how to add a net speed monitor to the Windows 11 taskbar.
Traffic Monitor for Windows 11
Traffic Monitor is a free and open-source app that lets users display the live network speed on either the taskbar or as a floating gadget on the desktop in Windows. Most importantly, it works perfectly fine on Windows 11.
One huge feature that makes the app stands out among other similar network speed monitor apps is that Traffic Monitor can also display the CPU and Memory usage alongside the Network traffic usage.
Follow the steps below to install Traffic Monitor and add its net speed monitor to the Windows 11 taskbar or desktop.
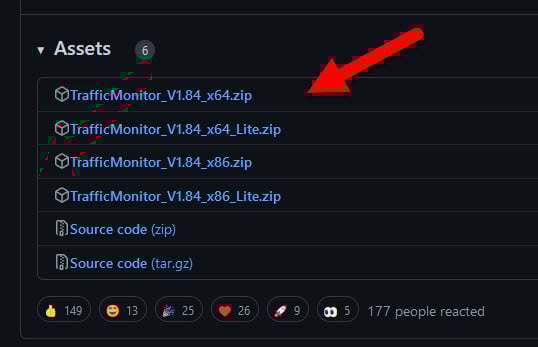
- Go to https://github.com/zhongyang219/TrafficMonitor/releases to download Traffic Monitor. Check the latest release and select the x64.zip under “Assets” to download it. You can download the Lite version but it has much lesser features.
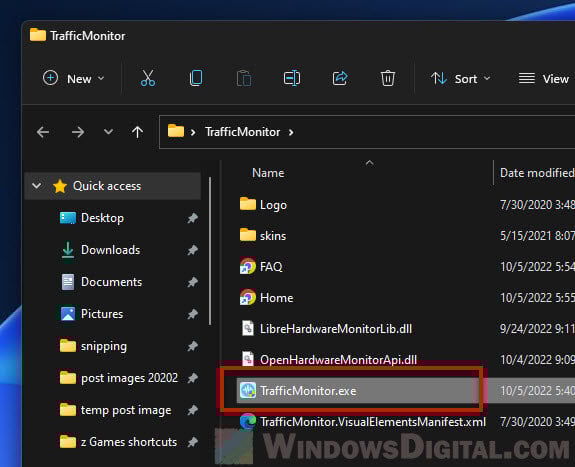
- Once downloaded, unzip the file and open the TrafficMonitor.exe from the extracted folder.
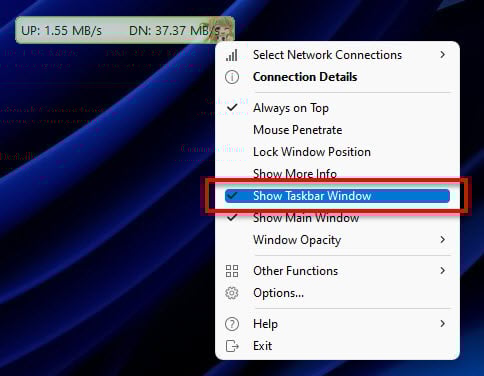
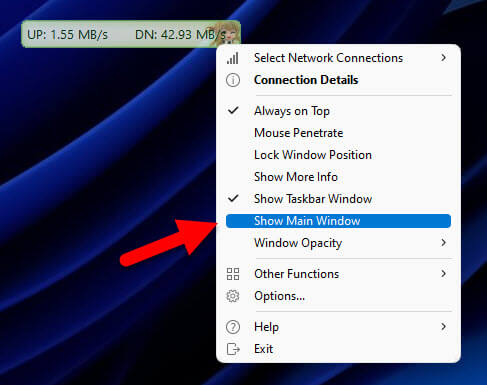
- The app will start off with a floating network speed monitor gadget on the desktop which you can move around easily. To enable it to show on the taskbar instead, right-click the floating network meter and select “Show Taskbar Window“.
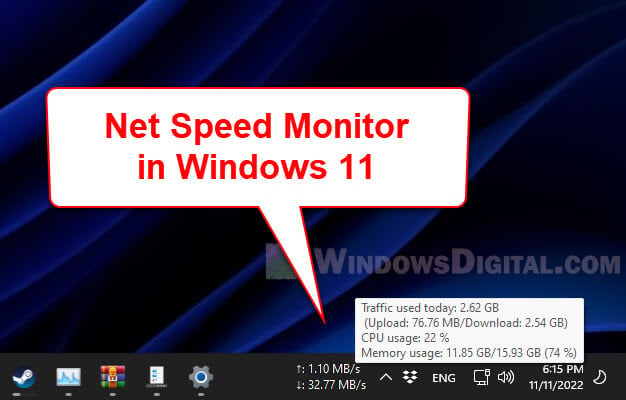
- The net speed monitor will now be displayed on the Windows 11 taskbar.
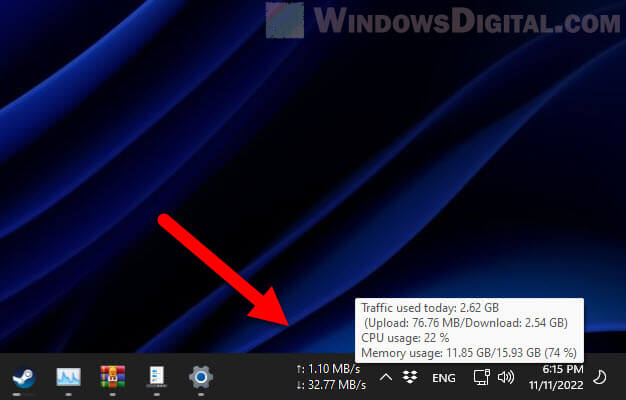
When you hover your mouse cursor over the speed meter, it will display more details such as the total traffic used today (upload and download), as well as the CPU and Memory usage in percentage.
If you don’t want the floating network meter to display on the desktop, right-click on the gadget and uncheck “Show Main Window”. This option will disable traffic monitor from showing on the desktop.
Read next: How to Change Ethernet Network Speed from 100 Mbps to 1 Gbps
Configure Traffic Monitor to auto start on Windows startup
As Traffic Monitor needs to be running in Windows 11 in order for the net speed monitor to continue displaying on the taskbar, to save you the hassles from having to run the app every time you startup your computer, you can set the app to automatically run when Windows starts.
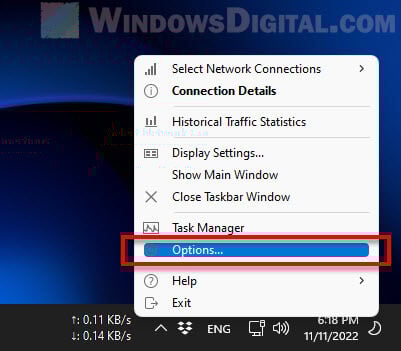
To do so, right-click the net speed monitor on the taskbar and select Options.
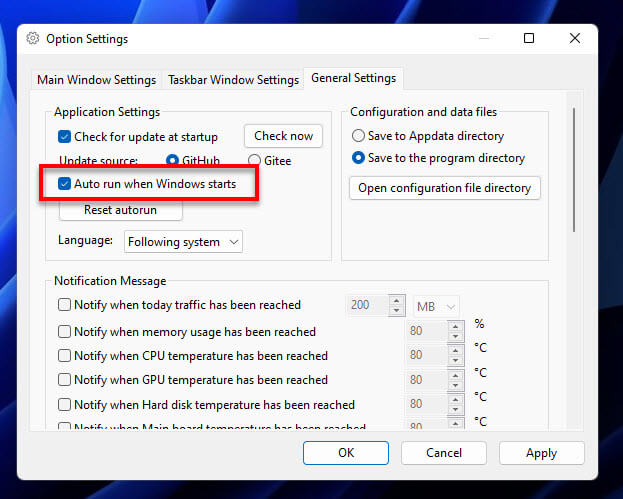
Next, go to the “General Settings” tab and enable the checkbox for “Auto run when Windows Starts” under Application Settings.
In the mean time, you can also configure other settings from the “Taskbar Window Settings” tab for the net speed monitor on the taskbar or the “Main Window Settings” tab for the floating meter.
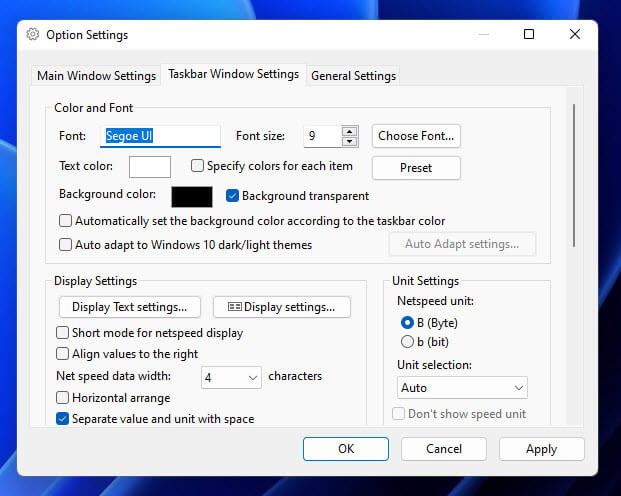
You can change settings such as the color and font of the speed meter, netspeed unit used (Byte or bit), and other display settings.
Related issue: Ethernet Internet Speed Capped at 100 Mbps (Fix)
Internet speed monitor app from Microsoft Store
Alternatively, you can look for a network or internet speed monitor app from the Microsoft Store.
- First, open Microsoft Store via Start menu.
- Search for “Net Speed Meter” using the search bar in the Microsoft Store’s window.
- Select Net Speed Meter and click Get to install the app.
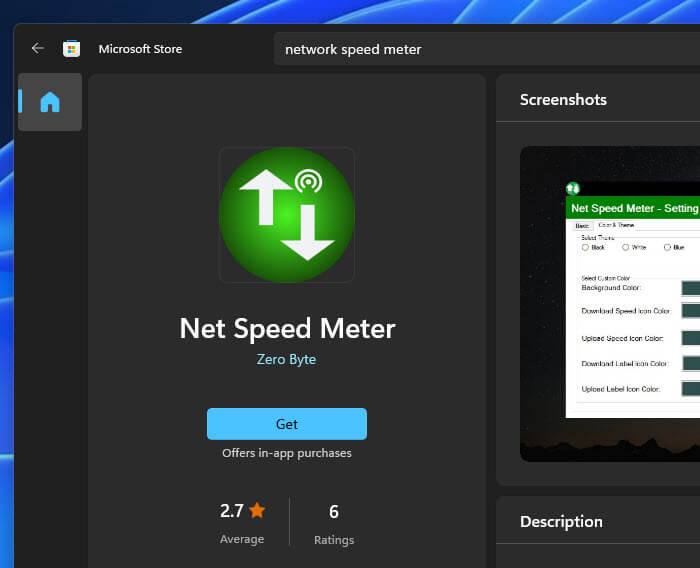
- Once the installation is completed, click Open to launch the app.
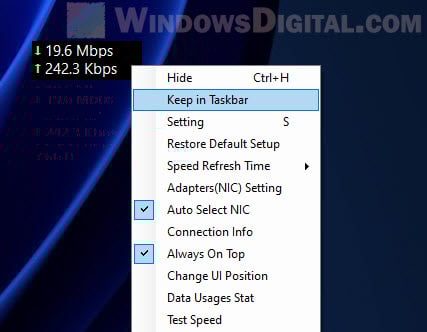
- The app will start out as a floating network meter on the desktop. To move it to the taskbar instead, right-click the floating meter and select “Keep in Taskbar“.
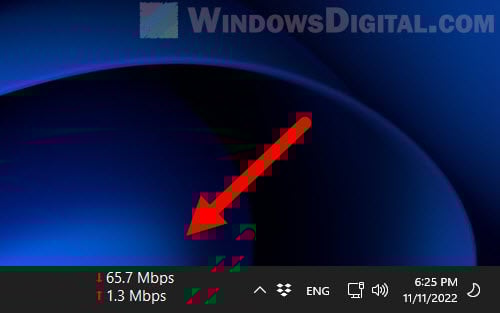
- The net speed monitor will then display on the taskbar in Windows 11.
Task Manager’s Performance tab or Resource Monitor
If you only want to monitor your network or internet speed without installing any third-party app, you can quickly view the network usage via the Task Manager Performance tab or the Resource Monitor in Windows 11. This method does not add any meter to the taskbar or on the desktop.
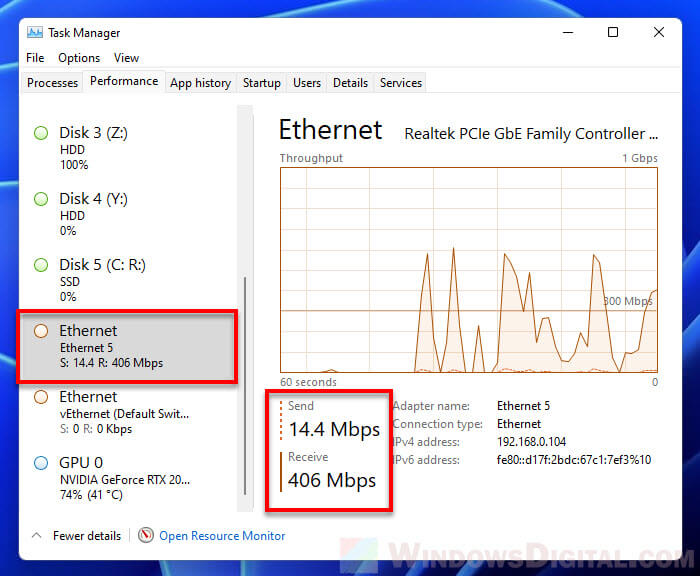
To check the internet speed via Task Manager, first press Ctrl + Shift + Esc to open Task Manager in Windows 11. If it isn’t already in full details mode, click “More details“.
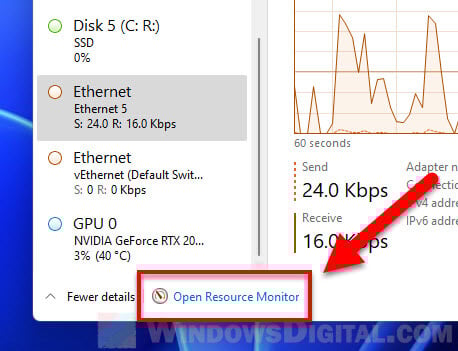
Next, click the “Performance” tab and select your Ethernet or WiFi adapter from the left pane. The network speed usage will shown on the right – the “Send” and “Receive” speed.
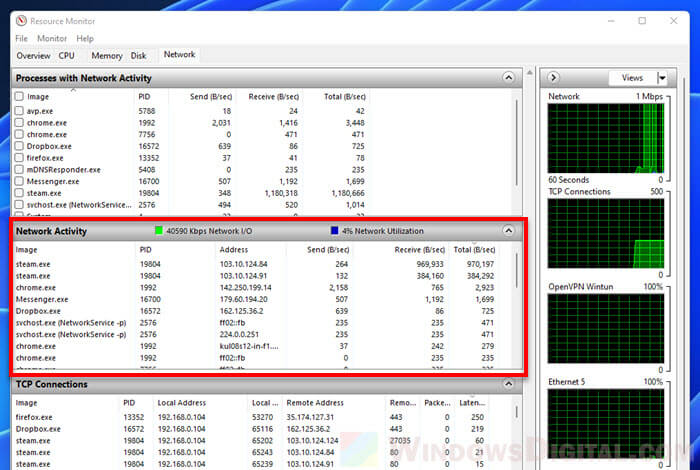
Alternatively, to view more details about which app or process is using the network bandwidth, you can use the Resource Monitor instead. To do so, click Open Resource Monitor at the bottom of the Task Manager window.
Then, select the Network tab and expand Network Activity. From there, you can view the network transfer speeds (Send, Receive and Total) of all running processes. You can sort the list by transfer speed by clicking the header of the relevant column you want to sort.
