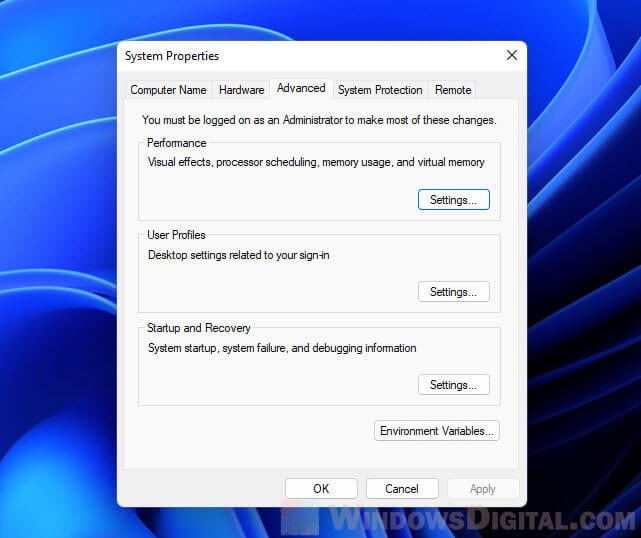
The System Properties window is the place we use to access Windows advanced system settings such as changing the computer or workgroup name, managing page file (virtual memory), enabling or disabling visual effects, configuring system startup and system failure settings, accessing system restore, and managing remote assistance.
As Windows 11 features a new design and some interface changes, especially in the Settings compared to Windows 10, the way to open the System Properties window in Windows 11 is a little different.
Also see: How to Open The Old Advanced Sound Settings in Windows 11
How to open System Properties in Windows 11
Page Contents
Advanced System Settings via Settings app
In Windows 11, the most common method to open System Properties is to select the “Advanced System Settings” option in the Settings app.
- Press Win + i keys to open Settings.
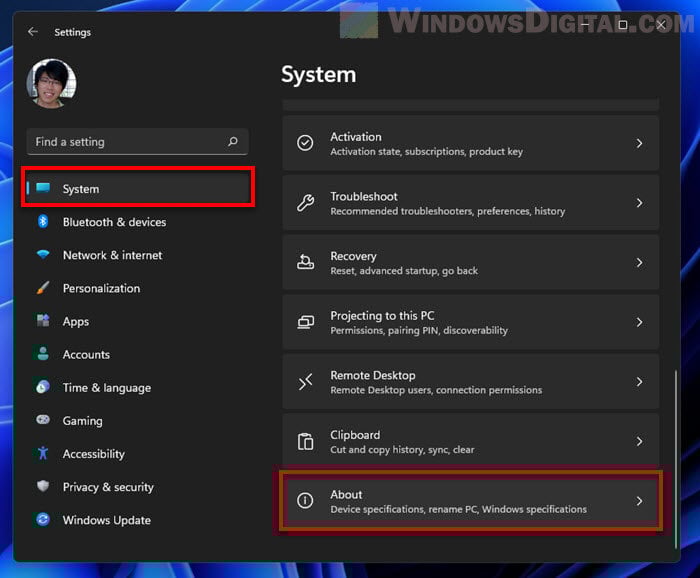
- On the left pane, select System.
- Then, on the right, select About.
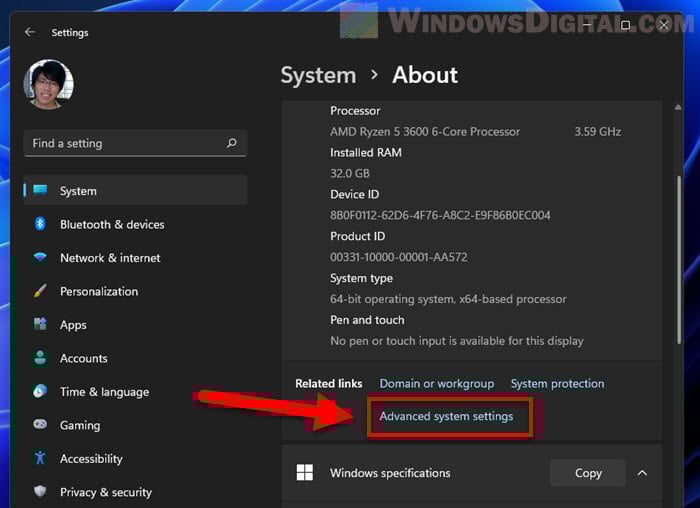
- In the About page, scroll down and click “Advanced system settings” in the Related links section.
- The System Properties window will be opened.
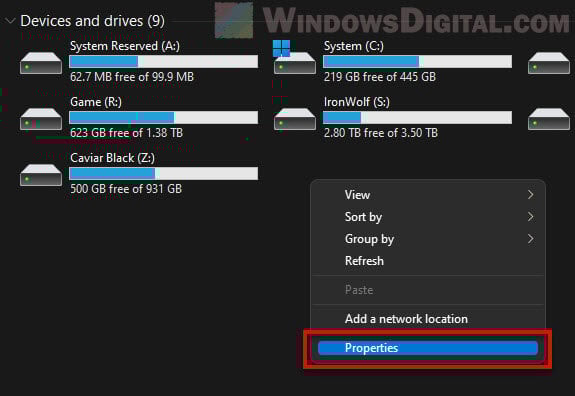
Alternatively, you can open the System’s About settings directly by right-clicking in the “This PC” directory in File Explorer window and select Properties.
Suggested Tip: How to Create “This PC” Shortcut on Desktop in Windows 11
Use Windows Search
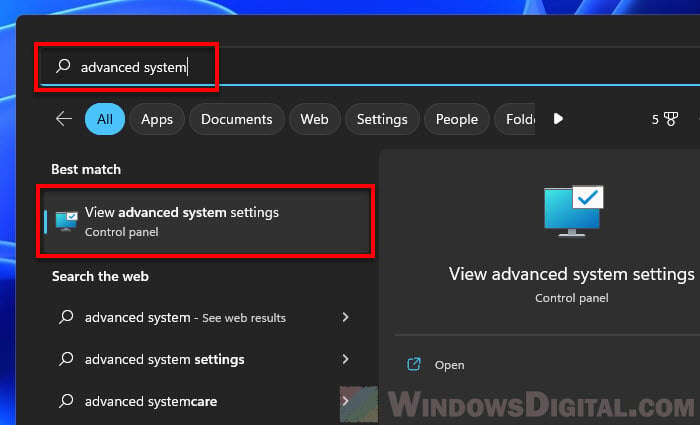
The easiest method would be to simply search for “advanced system settings” via the Start menu search in Windows 11.
Go to the Start menu and search using the keyword “advanced system settings”. Then, select View advanced system settings from the search result to open the System Properties window in Windows 11.
Related: How to Change Computer Name or Workgroup in Windows 11
Run Command
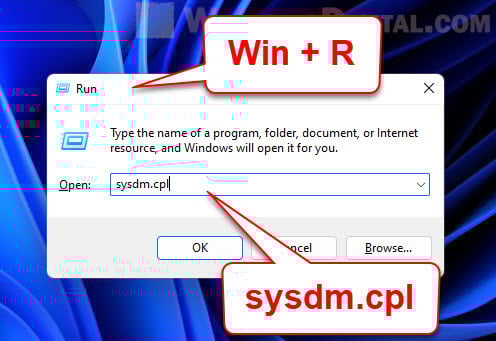
You can also use the Run dialog box to open the System Properties in Windows 11. To do so, first press Win + R keys to open the Run dialog box. Next, in the Open text field, type sysdm.cpl (System Device Manager Control Panel applet) and click OK to open the advanced system settings.
Open System Properties via CMD or PowerShell
In addition, you can also use the same command line “sysdm.cpl” in Command Prompt, PowerShell or Windows Terminal to open the advanced system settings in Windows 11.
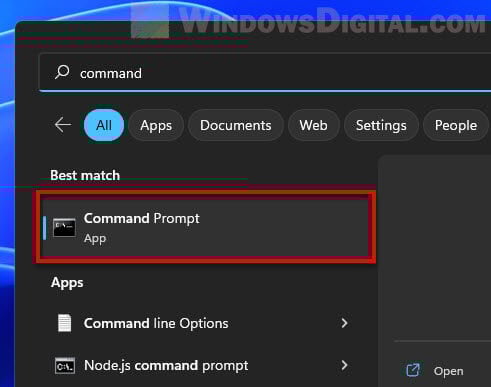
- Open Command Prompt, Windows PowerShell or Windows Terminal via Start.
- In the command prompt window, type
sysdm.cpland press Enter.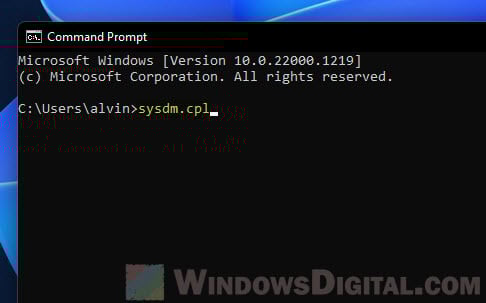
- This will directly open the System Properties window.
Create a shortcut to instantly open System Properties
If you often find yourself needing to go to the System Properties window, you can create a desktop shortcut to open it directly. You can even set up a keyboard shortcut to open the advanced system settings via the desktop shortcut, which we will show you later.
To create a shortcut to open System Properties in Windows 11, follow the steps below.
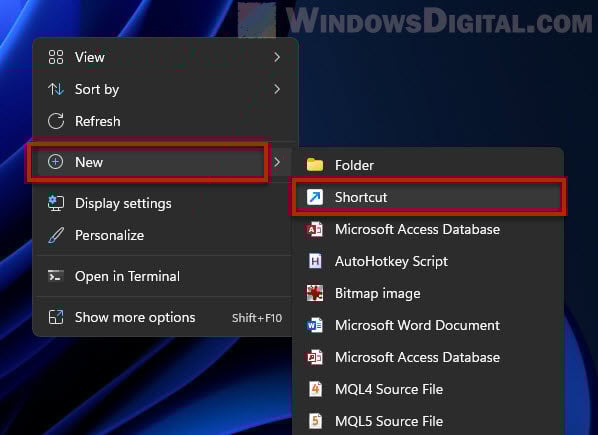
- Right-click any empty area on the desktop, and then select New > Shortcut.
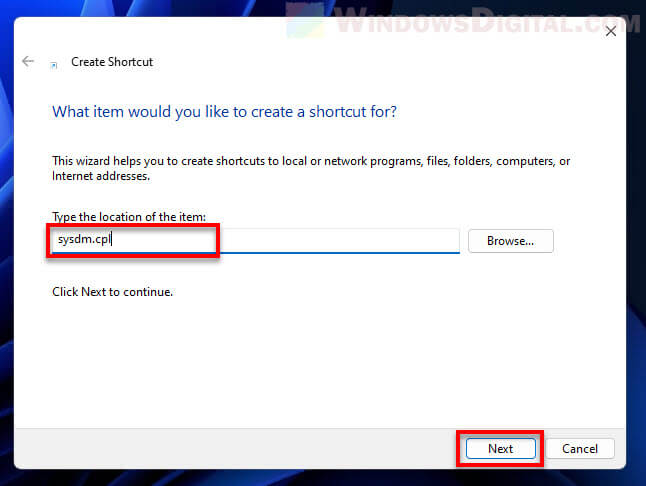
- In the Create Shortcut wizard, type sysdm.cpl in the “Type the location of the item” field. Click Next to continue.
- Next, type a name for the shortcut (any name you like).
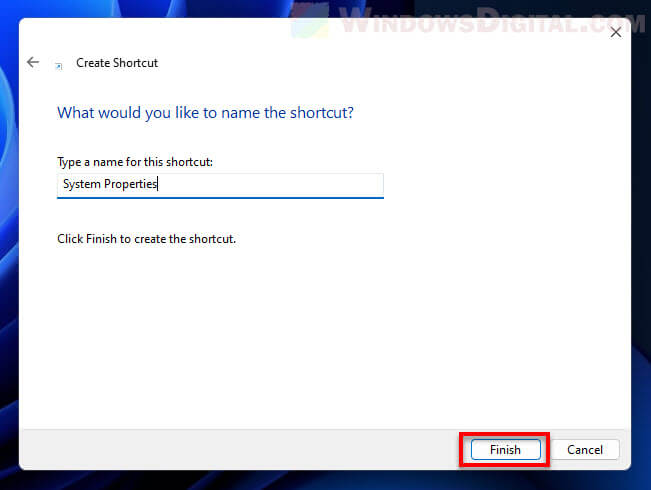
- Click Finish to create the shortcut.
- Now, whenever you want to open the System Properties window, simply double-click this desktop shortcut to open it.
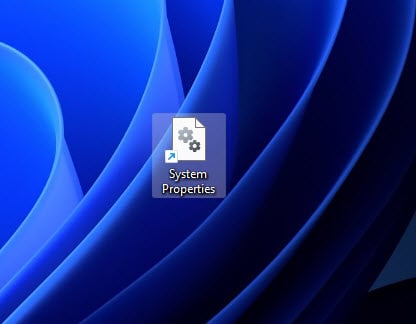
To set up a hotkey to open the System Properties, first follow the steps above to create the desktop shortcut, and then follow the steps below to set a shortcut key to open the shortcut.
- Right-click the desktop shortcut you’ve created and select Properties.
- In the Properties window, click in the text field next to “Shortcut key”.
- Then, press the shortcut keys you want to set to open the System Properties window, for example, Ctrl + Alt + S or any other shortcut key combination you prefer.
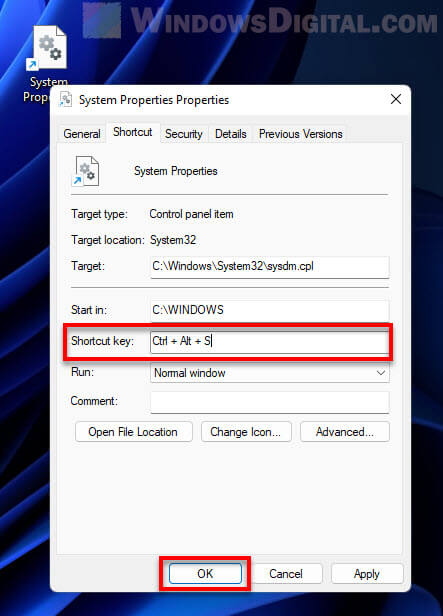
- Click OK to save the changes.
- Now, whenever you want to go to the Advanced System Settings, just press the shortcut key you have set earlier.

