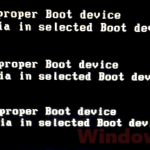
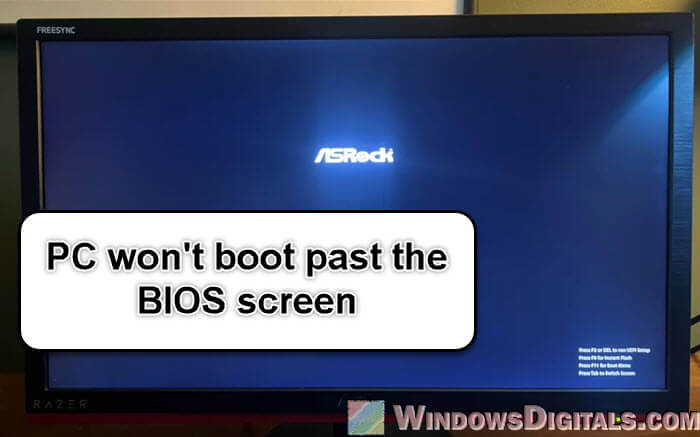
Actually, no matter what OS your computer runs, if it can’t even boot past the BIOS screen or if it doesn’t even show the BIOS logo (usually your motherboard logo), it usually points to a hardware problem. This can be worrying at first, but there are things you can try before you send it for repair or writing it off.
Also see: BIOS Keeps Resetting & Fans at Max Speed on Boot
Page Contents
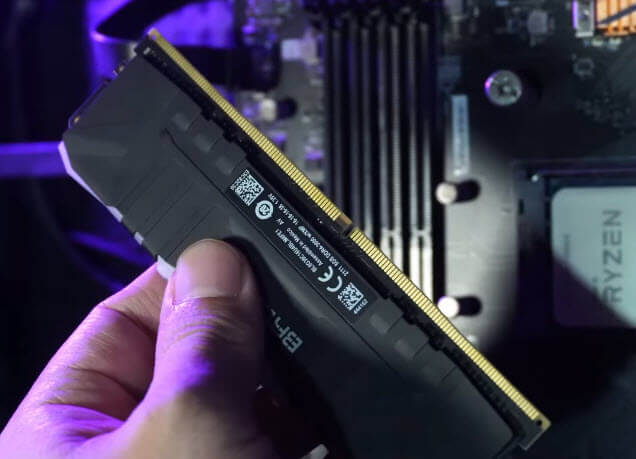
Reseat your RAM or try a spare one
If your PC can’t even boot past the BIOS screen, one simple yet very effective step to try is to just reseat your RAM. This means you take out the memory sticks and put them back in. Sometimes, the issue is as simple as the RAM not being properly seated in its slot. Over time, or maybe after moving the PC, RAM sticks can slightly come loose, and this minor displacement can prevent the PC from booting correctly.
- Turn off your computer and unplug it from the power source.
- Open your PC case. You might need a screwdriver for this, but some cases have hand screws.
- Locate your RAM modules. These are long, thin components usually situated near the CPU.
- Release the clips at the ends of the RAM slot and carefully remove the memory stick.
- Check for any dust or debris in the slot or on the RAM stick. Clean gently if needed.
- Reinsert the RAM stick firmly until the clips lock it into place.
- Close up your case, plug everything back in, and start your computer.
Suggested read: Does Faulty RAM Cause Freezes or Crashes on PC?
If reseating doesn’t help, and you have spare RAM, try replacing the existing RAM with the spare to see if that resolves the issue. This could tell you if your current RAM is the problem.
After reseating or replacing the RAM, plug everything back in and start your PC to see if it can boot past the BIOS screen now.
Check your RAM with Memtest86+
If reseating the RAM didn’t fix the problem, the next step is to run a thorough test for your RAM with a tool called Memtest86+. This program runs very detailed tests on your RAM to look for any problems. Bad RAM can cause a lot of issues, like stopping your PC from booting at all.
- First, you’ll need another working computer to prepare the bootable USB drive.
- Go to the official memtest86+ website (
memtest.org) and download the image file. - Use a program like Rufus to make a bootable USB drive with the memtest86+ image. Just pick the downloaded image and your USB drive in Rufus, then hit “Start”. You can refer to this guide, but instead of a Windows ISO, select the Memtest86+ ISO.
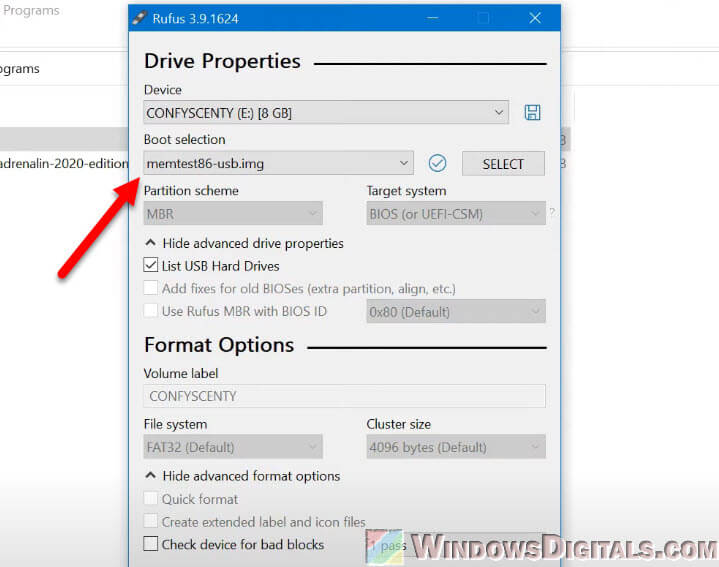
- When the USB drive is ready, plug it into the PC that won’t boot.
- Turn on the computer and go into the BIOS setup. You usually do this by pressing a key like F2, F12, DEL, or ESC right after you turn on.
- In the BIOS, find the boot order settings and set the USB drive as the first boot device.
- Save your changes and exit the BIOS. Your computer should now start from the USB drive and Memtest86+ will start automatically.
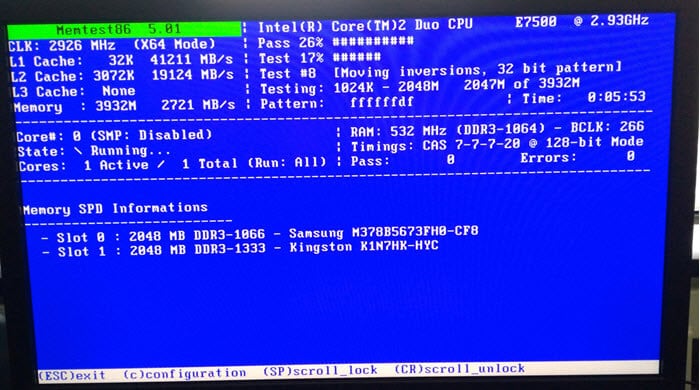
- Let Memtest86+ run all its tests. This might take a few hours depending on your RAM size. Watch for any errors that the software shows.
Watch the screen for any errors. If Memtest86+ finds any issues, it will show them. If your RAM passes all the tests without errors, your RAM is probably okay. But if the tests show errors, it might be time to replace the faulty RAM stick.
Related concern: Why is My Memory Usage So High When Nothing is Running?
The SSD or HDD that holds your Windows OS might be broken
Another common problem when your PC won’t start past the BIOS is that the drive with your operating system might be broken. This could be an SSD or an HDD. These drives can break from physical damage, prolonged use, or even power surges.
- Try connecting your SSD or HDD to a different computer. You might need something like an external HDD case or a SATA to USB adapter to do this conveniently.
- Once connected, check if the other computer recognizes the drive. You can find this in the “Disk Management” tool on Windows. Just type “Disk Management” in the search bar and open it.
- If the drive appears, check for any problems like unallocated space or errors.
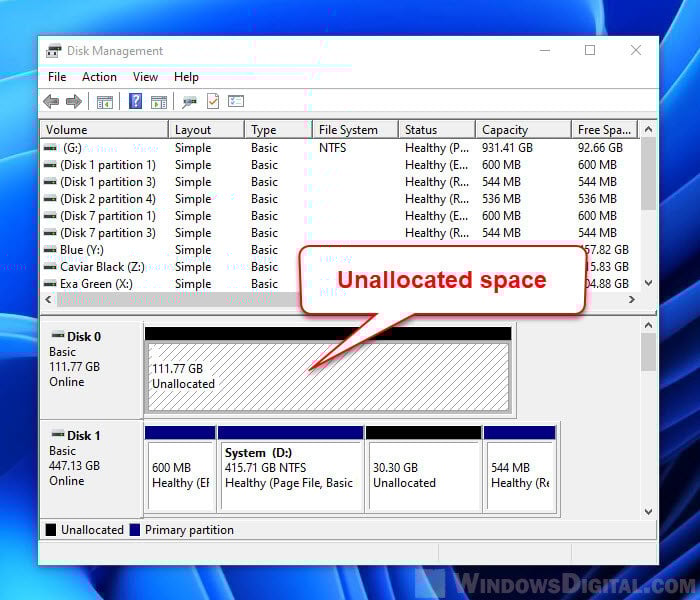
- If the drive doesn’t show up or you see errors or unallocated space unexpectedly, it might be failing.
If the drive is indeed failing, replacing it with a new one is likely the only option. But that also means you will need to reinstall Windows and possibly lose everything on the failed drive.
Linked issue: “A Disk Read Error Occurred” Windows 11/10 (SSD or HDD)
Boot into a Linux Live USB
Another thing you can try is to boot into a Linux Live USB and see if it works. This is to check if you can rule out other hardware problems.
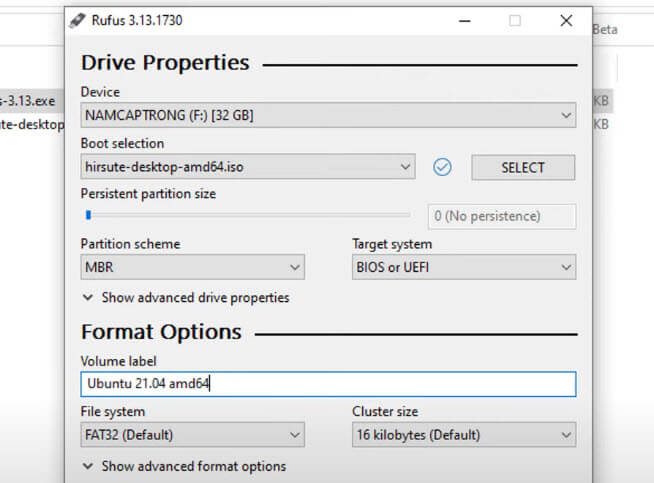
- On a working computer, download a Linux distribution ISO file, like Ubuntu (
ubuntu.com/download). - Use a software like Rufus or another USB tool to create a bootable USB. Insert an 8GB or larger USB flash drive into the working computer.
- Open Rufus, select your USB drive, choose the downloaded ISO file, and then start the creation process. This will format your USB drive and install the Linux files needed for booting.
- Once the bootable USB is ready, insert it into the problematic PC.
- Turn on the PC and enter the BIOS setup by pressing the usual key like F2 or DEL.
- Set the USB drive as the primary boot device in the BIOS settings.
- Save the BIOS settings and restart the PC. It should boot from the USB drive into Linux.
- Choose “Try Ubuntu” from the menu instead of installing it. This runs Ubuntu directly from the USB without installing anything on your hard drive.
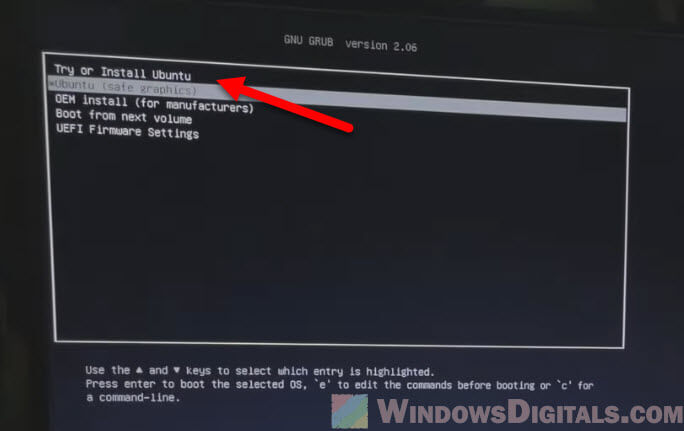
If your PC boots successfully into the Linux environment, it’s likely that your hardware is mostly fine, but there might be an issue with your Windows installation or the drive it’s installed on. You can use this Linux session to further investigate hardware issues or to backup data from your drives.
Immediate overheating when booting
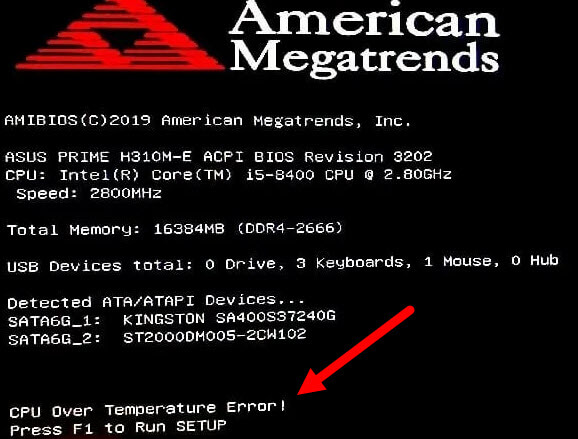
Another possible reason for a computer to crash immediately during or shortly after the BIOS screen is that a part might be overheating as soon as the computer starts, to the point that your motherboard decides to shut it down immediately to prevent further damage, thus causing a crash or restart before you even get to the Windows logo.
Checking if this is the case can be a bit tricky, though. Usually, when something on your board is overvolting, your BIOS will notify you and stop you at the boot screen.
If nothing is shown in the BIOS and you want to test if any of your parts are overheating, the only way is to unplug the parts and try them on another computer, one by one.
If none of the above helps with your issue and you’re still not booting past the BIOS screen, it might be time to send it for a full inspection or warranty.