Windows 11 dump file is a file that stores a copy of your computer’s memory at the time of a system crash or a BSoD (Blue Screen of Death). It accumulates all the memory information during the crash into a file. These dump files are crucial to help diagnose and debug the problem that caused the crash.
If you are looking for the memory dump file location for diagnosing purposes or if you simply want to clear the dump files, this guide will show you where you can find the dump files in Windows 11, as well as how to clear the dump files or change the dump file location.
Also see: How to Startup Repair Windows 10/11 using Command Prompt
Page Contents
Where is the memory dump file in Windows 11
Dump File Location in Windows 11
The memory dump file in Windows 11 is a single file called MEMORY.DMP which can be found in the system root folder – “C:\Windows”.
The full path to the memory dump file would be “C:\Windows\memory.dmp“, whereas “C:” is the drive of your Windows installation. Replace “C:” if your Windows was installed on a different drive.
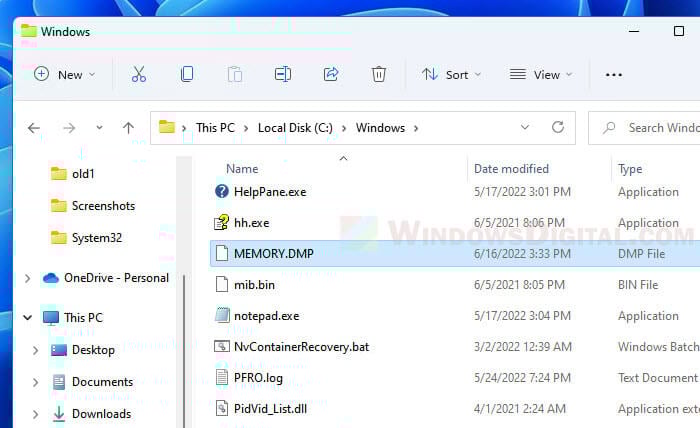
Alternatively, you can access the folder by first pressing Win + R keys to open the Run dialog box. Then, enter %SystemRoot% to the Open field and click OK to open the system root folder. From there, look for a file called “MEMORY.DMP” and that will be the dump file you are looking for. To open the dump file directly, enter %SystemRoot%\memory.dmp instead.
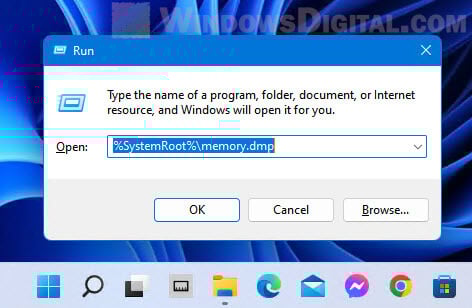
If you can’t find the memory.dmp dump file in the system root, it just means that there was no crash recorded, or you have recently cleared the dump file through disk cleanup recently after the system crash.
Related: How to Fix Blue Screen With Sad Face on Windows 11/10
Minidump files location
In Windows 11, dump files can also be stored as smaller memory dump files called Minidump. You can find these minidump.dmp dump files in C:\Windows\Minidump.dmp. Some minidump files will have their own names, usually numbers such as the date and time of the crash incident.
These are the default path to the memory dump files in Windows 11. To learn how to change the default dump file location in Windows 11, see the next section of this guide.
How to clear dump files in Windows 11
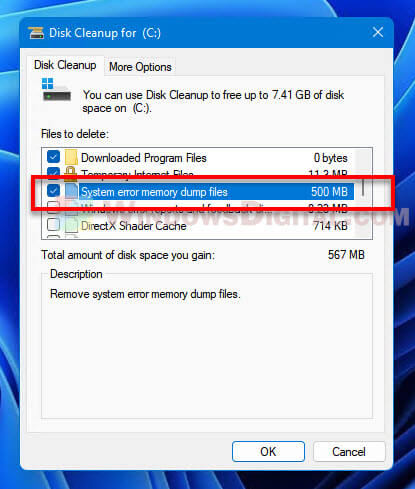
To clear the dump files in Windows 11, the better way to do it other than deleting the MEMORY.DMP in the system root folder is to clear it via the Disk Cleanup tool. To learn how to do so, follow the steps below.
Suggested Guide: How to Clean C: Drive in Windows 11
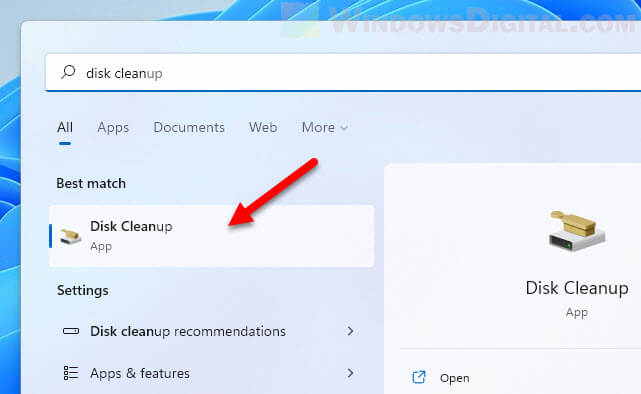
- In Windows 11, search for and open “Disk Cleanup” via Start.
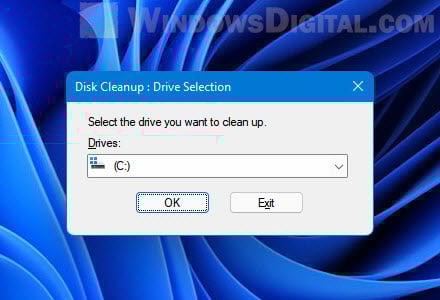
- When prompted to select drive, choose the system drive where your Windows installation is located, usually the C: drive.
- After the initial load, in the Disk Cleanup window, click “Clean up system files” under Description.
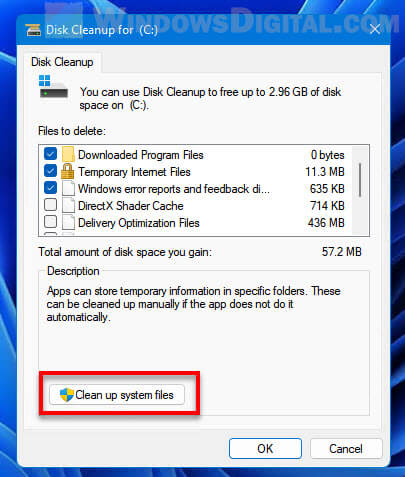
- Disk cleanup will then calculate what system files can be cleared and how much space you will be able to free on the drive. This may take a while to complete.
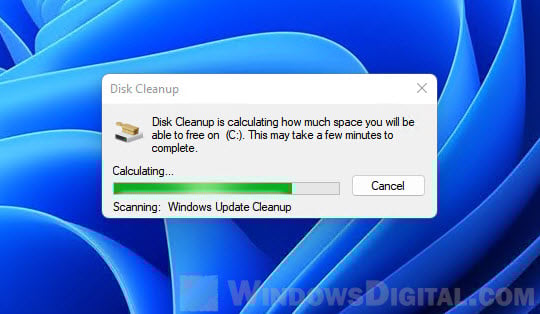
- On the next window, select “System error memory dump files” along with any other files you want to clear, and then click OK to begin clearing the unwanted files.
How to change default dump file location in Windows 11
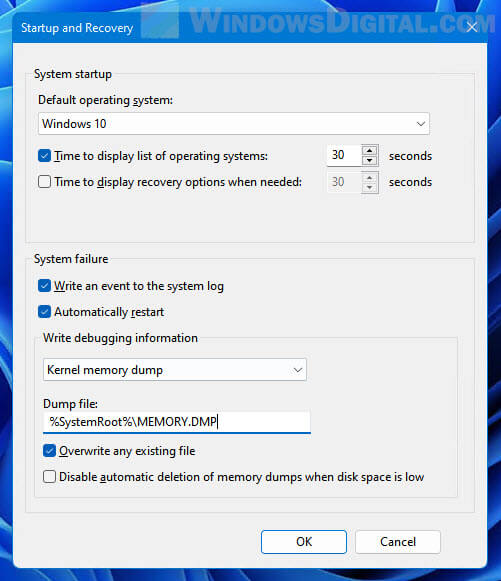
The dump file location is defaulted to the system root folder – “C:\Windows”. You can change where Windows should save the dump file to a different location instead of the system root folder.
The most common reason users would want to change the default dump file location is when the dump file is taking up too much disk space on the system drive. This is especially the case when they choose the “Complete memory dump” option (a type of dump file) which will require significantly larger disk space as it writes the complete memory equals to the amount of RAM.
To change the default dump file location in Windows 11, follow the steps below.
- Search for and open “View advanced system settings” via Start.
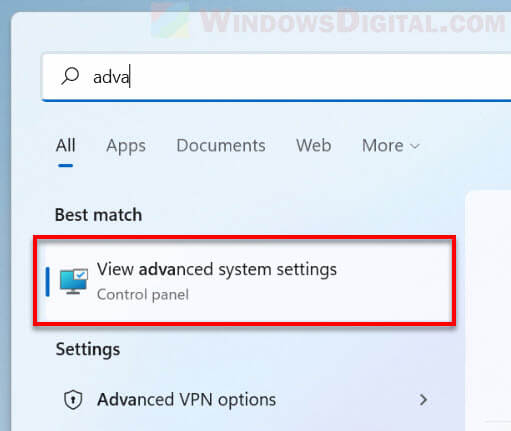
- In the System Properties window, select Advanced tab, and then click the Settings button under “Startup and Recovery“.
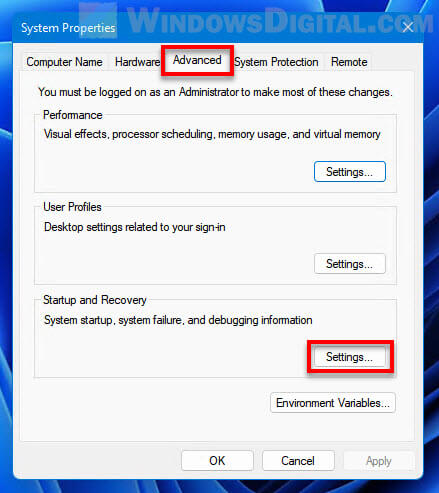
- In the “Dump file” text field, enter the new location you would like Windows to save the dump file to.
How to change the type of memory dump file
Windows can generate different types of memory dump file. The debugging information and details are written in different format in each type of memory dump file. The size of the dump file also depends on the type of the dump file. Some types of dump file will store more information, while some store lesser.
You can change the type of memory dump file in Windows 11 by first follow the exact same steps in the instructions above to open the “Startup and Recover” window. In the window, click the drop-down menu under “Write debugging information”, and then select the type of memory dump file you want Windows to generate in the event of system crash.
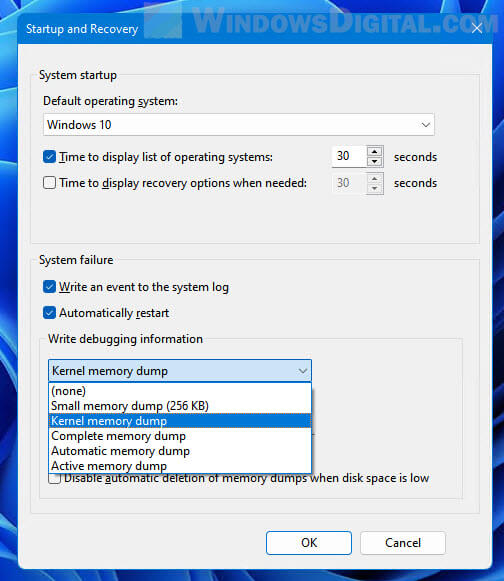
If you choose (none), Windows 11 will not generate any memory dump file in any system crash or blue screen event.
How to read dump file in Windows 11
Dump files are not designed to be understandable by the average users. Memory dump files are designed for technicians and developers who can make use of the data to fix the issues and improve the system so that these crashes don’t happen again.
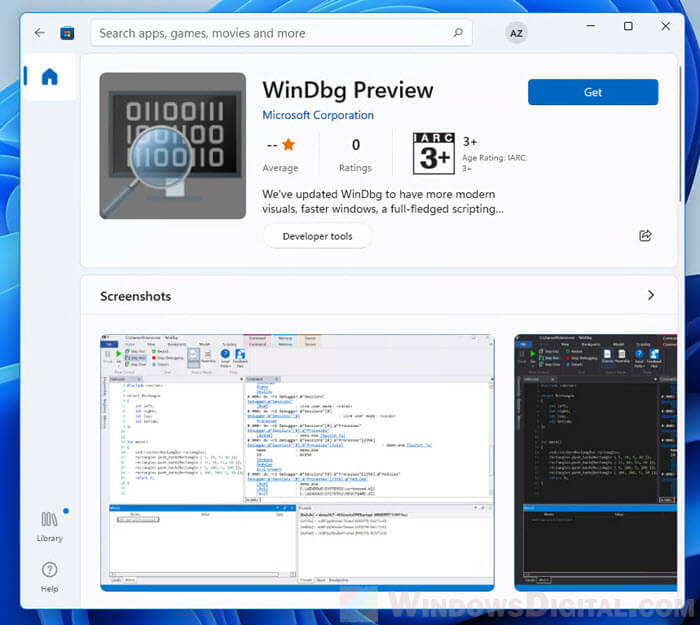
If you want to read the dump file in Windows 11, you will need a debugging tool specializes in reading dump files. You can use an app called WinDbg Preview by Microsoft which can be installed via Microsoft Store.
