In Windows 11, there are several ways to check who is currently logged into the Windows or who you are logged in as locally. If you are on a shared network and want to check who is logged in to another Windows 11 computer remotely, there are several command lines you can use to query who is currently logged into that particular computer.
The remote method is especially useful when there are several people who often remotely login to a shared computer. If you try to login to a shared computer while someone else is already logged on, you will be given the option to continue or force the other user to logout or disconnect. Thus, it would be nice to remotely check who is currently logged into the shared computer first, before trying to login.
Also see: How to Restrict User Access to a Folder or Drive in Windows 11
Page Contents
Check who is logged in on Windows 11 using Command Prompt
Locally
- Search for Command Prompt via Start and open it.
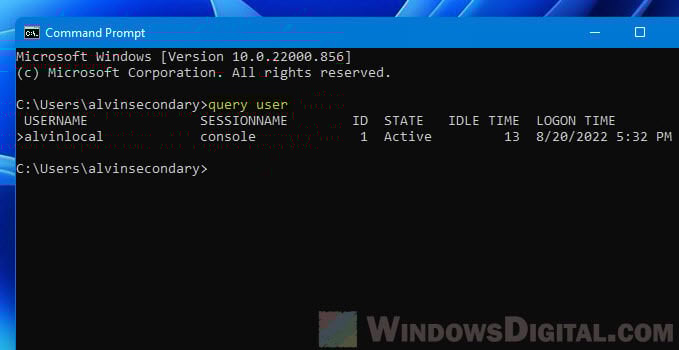
- In the Command Prompt window, enter the following command to query who is currently logged in.
query user
- The user who is logged in will be shown under USERNAME along with other information such as logon time.
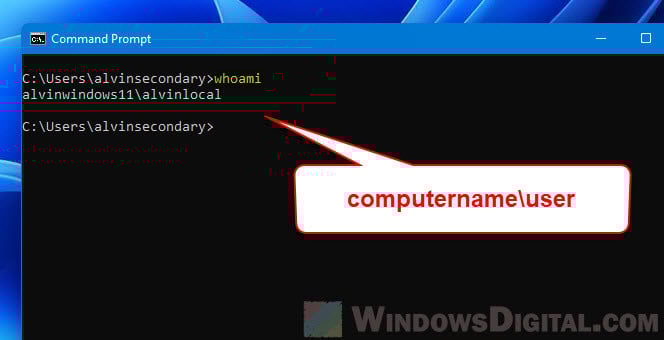
Alternatively, you can use the “whoami” command instead to check who you are logged in as in Windows 11. In Command Prompt, enter the following command to check “who am I logged in as” in the local computer (or the computer you remotely logged on to).
whoami
Remotely
- Search for and open Command Prompt via Start menu.
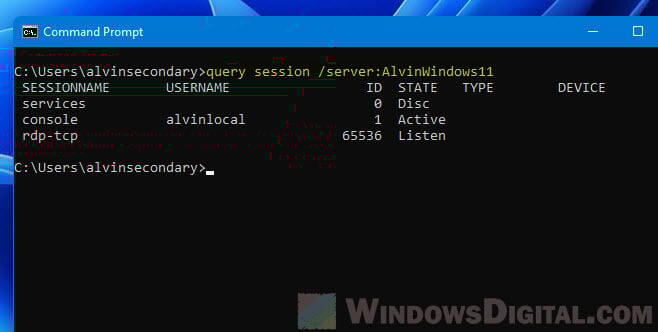
- In Command Prompt, enter the following command to query who is logged in on a Windows 11 remote computer. Replace the ComputerName with the actual computer name of the PC you want to check.
query session /server:ComputerName
You can also use query user instead of query session.
query user /server:ComputerName
- Command prompt will then shows details about the user who is currently logged into the remote computer.
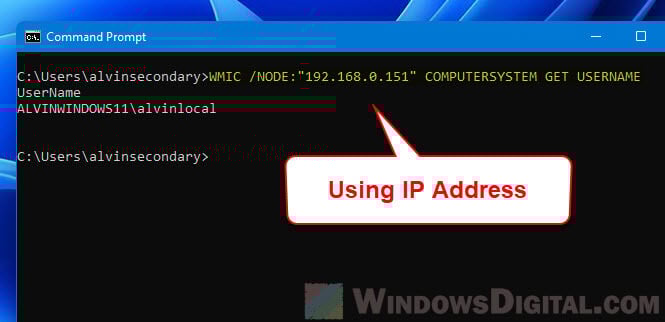
In addition, you can also use the WMIC command line to check who is logged in on Windows 11 remotely. In the command prompt window, enter the following command. Replace the ComputerName with the actual computer name of the remote computer you are querying.
WMIC /NODE:"ComputerName" COMPUTERSYSTEM GET USERNAME
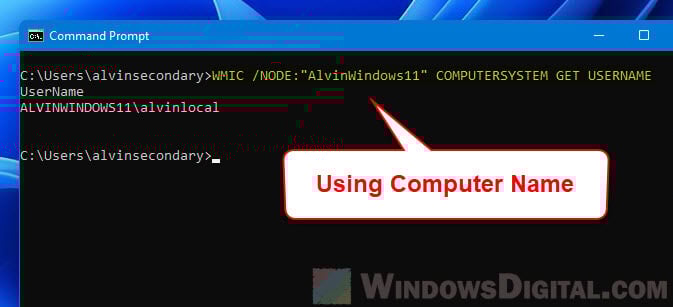
Alternatively, you can use the IP address of the remote computer instead of the computer name for this command to query who is logged in.
WMIC /NODE:"IPaddress" COMPUTERSYSTEM GET USERNAME
What to do if you encounter RPC or other error
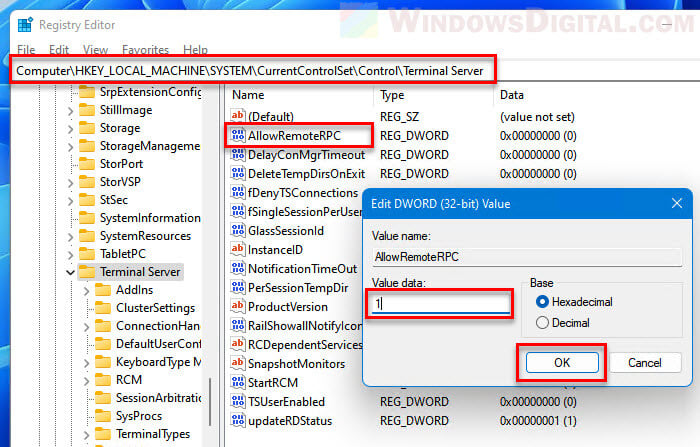
If you encounter RPC error such as “The RPC service is unavailable” error while querying who is logged in on Windows 11, try to set the following registry value on the remote computer.
- Search for Registry Editor via Start and open it.
- Navigate to the following registry key.
HKEY_LOCAL_MACHINE\SYSTEM\CurrentControlSet\Control\Terminal Server
- Next, double-click AllowRemoteRPC.
- In the Value data field, enter “1” and then click OK to save the changes.
- Close Registry Editor and restart the remote computer for the changes to take effect.
Check who am I logged in as via Task Manager or Start menu
If you only want to find out who you are logged in as on a Windows 11 local computer or a computer you remotely logged in to, you can quickly do so via the Task Manager or the Start menu.
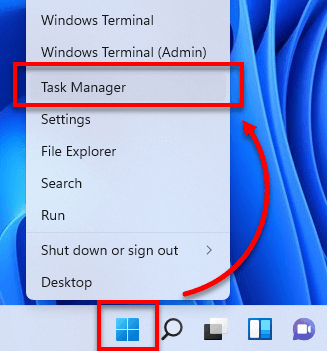
To open Task Manager in Windows 11, right-click the Start icon on the taskbar and then select Task Manager. Alternatively, you can press Ctrl + Alt + Del to open the lock screen and then select Task Manager to open it.
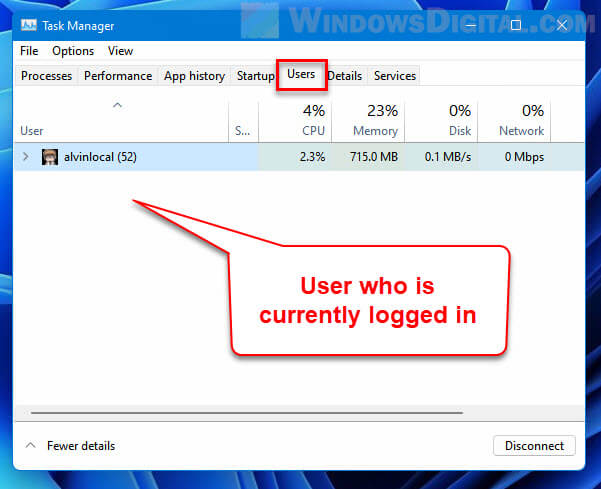
Next, in the Task Manager window, select the Users tab. From there, you can see which user is currently logged into the Windows 11 computer.
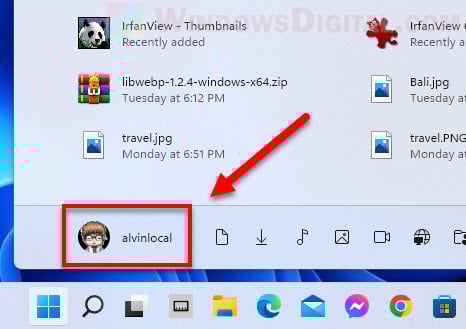
Another method to find out who is logged into Windows 11 is by simply opening the Start menu. Click the Start icon to open the Start menu. The currently logged in user will be shown at the bottom left corner of the Start menu.
