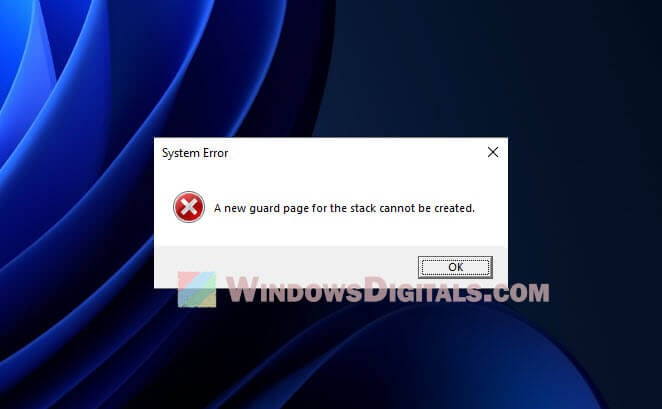
There is a quite common error that you might encounter when you try to run a program – “A new guard page for the stack cannot be created.” This specific error will appear when the program uses more memory than it is supposed to and causes a “stack overflow”. As a result, the program will likely crash, become unresponsive, or show unexpected behaviors.
In this guide, we’ll look into why you are seeing this error and what you can do to fix it.
Page Contents
Understanding the error
This error is about something called stack overflow. That’s when a program tries to use more memory than it has available. The stack is part of the memory where the program keeps temporary data like variables and info about the function calls it makes. If the stack runs out of space, the program will likely crash or act up.
In Windows 11, the system will try to set aside a special area in memory called a guard page that helps prevent stack overflow. This guard page sits between the stack and other memory areas. If a program tries to go past the stack limit, it hits this guard page and stops, which helps avoid bigger problems.
Also see: How to Clear RAM Cache in Windows 11
Sometimes Windows can’t set up this guard page, and that’s when you see the error message. This could happen for a few reasons, like not having enough system resources (in this case, RAM), bugs in software, or conflicts with other programs.
If you’re a developer and run into this issue with your app, you might need to give your program more stack space. You can usually do this through your compiler settings or by choosing to store some data on a different part of memory called the heap.
If you’ve tried these things and still see the error, it can be a more complicated issue like broken stack or a messy bug in your software.
Similar issue: Why is My Memory Usage So High When Nothing is Running?
How to fix “A new guard page for the stack cannot be created” error
Restart your computer
A quick restart might solve the problem. Restarting can help free up resources, get rid of temporary data, and refresh the system that could be causing the issue.
- Save any open files and close all programs.
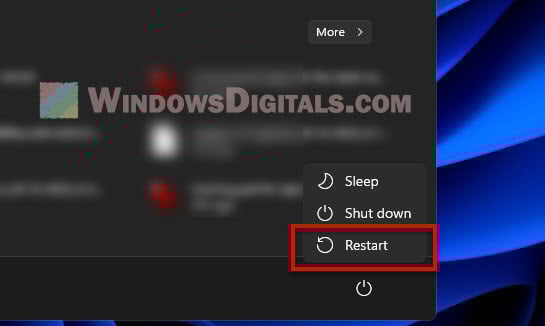
- Click the Start button and select the power icon.
- Choose Restart from the menu.
- After your computer restarts, see if the error comes back.
Reinstall the problematic application
If restarting didn’t fix the problem, you might need to remove and reinstall the app that’s causing trouble.
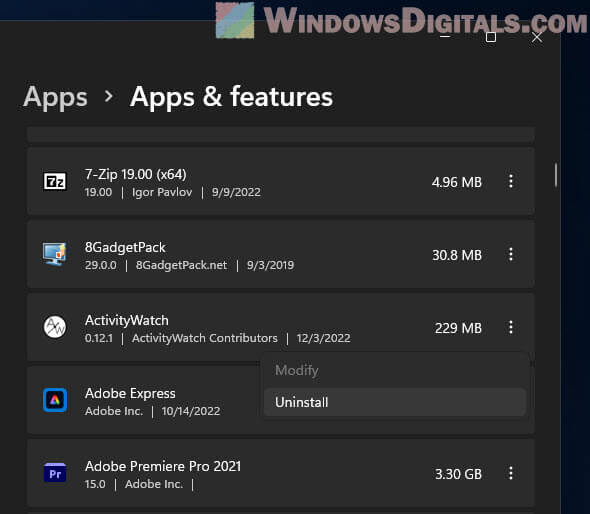
- Press Win + X and pick “Apps and Features”.
- Find the app in the list, click it, and select “Uninstall”.
- Follow the instructions to remove the app.
- Restart your computer.
- Go to the official website or Microsoft Store to download and install the latest version of the app.
How to do a clean boot
Doing a clean boot can help figure out what’s causing computer problems by turning off startup services and startup programs. Here’s what to do:
- Press Win + R, type
msconfig, and hit Enter.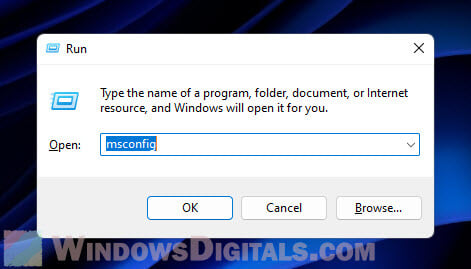
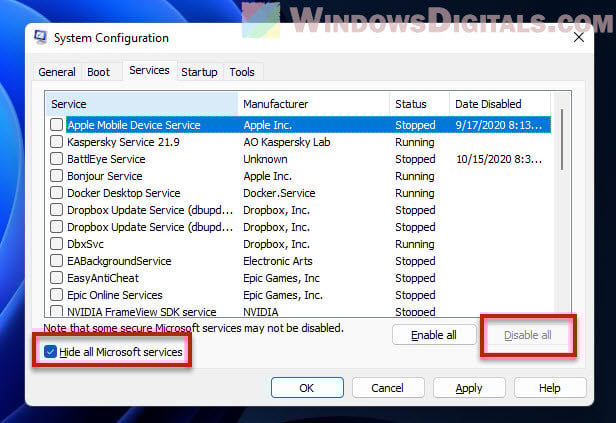
- In the System Configuration window, switch to the Services tab and tick the “Hide all Microsoft services” box.
- Hit Disable all.
- Move to the Startup tab and click Open Task Manager.
- In Task Manager, turn off all startup items.
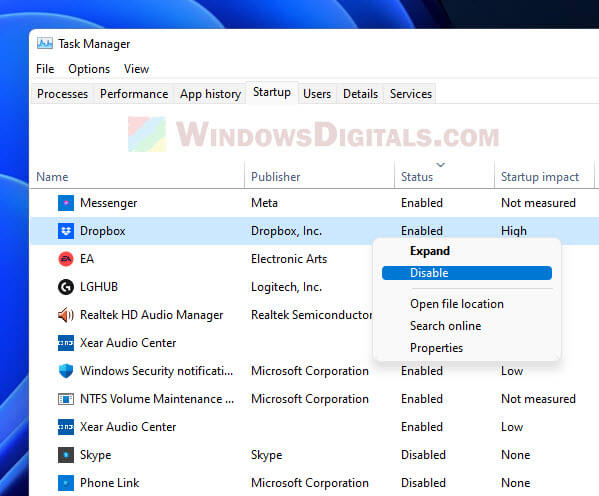
- Close Task Manager and click OK in the System Configuration window.
- Restart your computer to see if the issue is gone.
If the error goes away, turn on services and startup items one at a time to find the problem. Once you find the issue, either uninstall or disable it to stop the error from coming back.
Useful tip: 30+ Windows 11 Services to Disable for Gaming Performance
Check for processes or programs using too much memory
To find and fix programs that use too much memory:
- Press Ctrl + Shift + Esc to open Task Manager.
- Click on the Processes tab.
- Sort processes by memory usage by clicking on the Memory column header.
- Look at the top processes using the most memory.
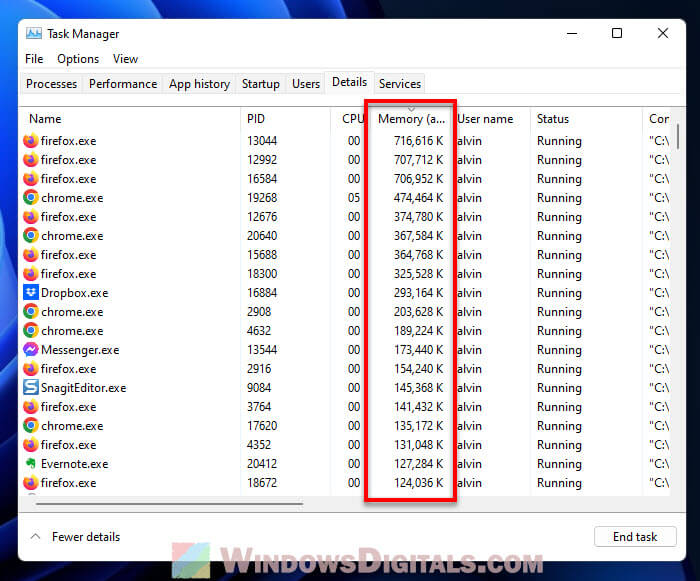
If you see a process or program eating up a lot of memory, here’s what you can do:
- End the task of any unresponsive process by right-clicking and choosing End task. This might cause you to lose unsaved data.
- If the process belongs to a specific app, close and reopen it to see if the memory use goes back to normal.
- Look for updates or patches for the app, as the problem might be fixed already by the app makers.
- If the high memory use doesn’t stop, think about uninstalling the app and finding a less demanding replacement.
Recommended resource: How to Reduce Hardware Reserved Memory in Windows 11/10
Check and fix corrupted system files
To find and fix any corrupted system files, here’s how you use the System File Checker (SFC) tool:
- Press Win + X and choose Windows Terminal (Admin).
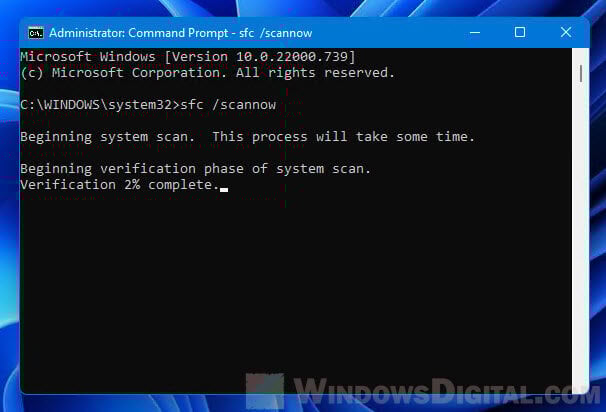
- Type
sfc /scannowand press Enter. - Wait for the scan to finish and then restart your computer.
Update your system and drivers
Old system files or drivers can cause problems. Here’s how to update your system and drivers:
- Press Win + i to open Settings.
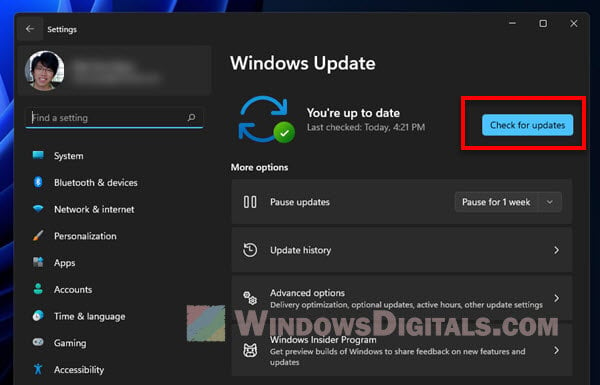
- Go to Windows Update on the left and then click on Check for updates. Install any updates and restart your computer if needed.
- Press Win + X and choose Device Manager.
- Find the device you want to update, right-click, and choose Update driver.
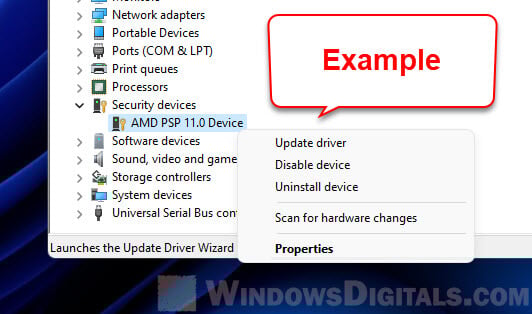
- Pick “Search automatically for updated driver software” and follow the steps.
Try adjusting the virtual memory settings
If your system is low on physical memory, increasing the virtual memory can sometimes help. Virtual memory extends your RAM by using part of your hard drive (or SSD) as temporary memory. To change it, go to “System Properties“, click on “Advanced system settings”, and under “Performance”, click “Settings”. Then, choose the “Advanced” tab and change the virtual memory settings.
Check the Windows Event Viewer
Windows Event Viewer is a tool that logs what happens on your computer. It can sometimes be helpful when troubleshooting errors like this. To use it, press Win + R, type eventvwr.msc, and press Enter. Check the logs for any error messages that occurred around the time you received the stack error to get more clues on what might be causing it.


