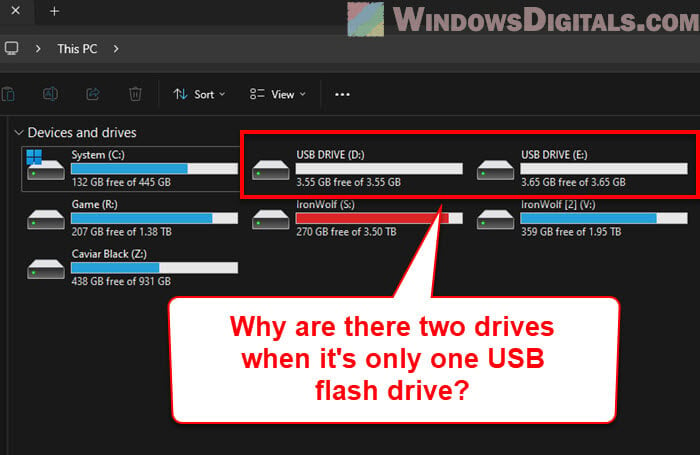
If you plug in an existing or a new USB drive and see that it shows up as two drives instead of just one in the This PC (File Explorer) window, it just means that you have two partitions on the USB flash drive. This guide will explain why that happens and how you can partition the drives the way you want.
Also see: How to Merge Two Drives in Windows 11
Page Contents
USB drive showing up as two drives in Windows
The reason that you see two drives, for example, D: and E: drives, when you plug in only one USB thumb drive to your PC is that the thumb drive actually has two partitions. It may have originally come like that (if it’s new, but uncommon), or someone might have previously created two partitions on it.
If the drives you see do not show any volume (blank), meaning you don’t see the storage space displayed under the drives in File Explorer, it usually means that the partitions are still unallocated or not formatted. In that case, you will need to format it first, or create a simple volume on these partitions in order to start using them (which we will talk about later in this guide).
Linked issue: File Too Large for USB Drive But Plenty of Space (Windows 11)
Is this behavior malicious?
If you’re worried that seeing two USB drives instead of one might mean that your drive has been infected by some kind of virus or malware, know that whether or not your drive is infected is irrelevant to how many partitions it has.
Your drive can still be infected regardless of how many partitions it has. Having two partitions on a USB drive is common and doesn’t indicate that the drive has a virus.
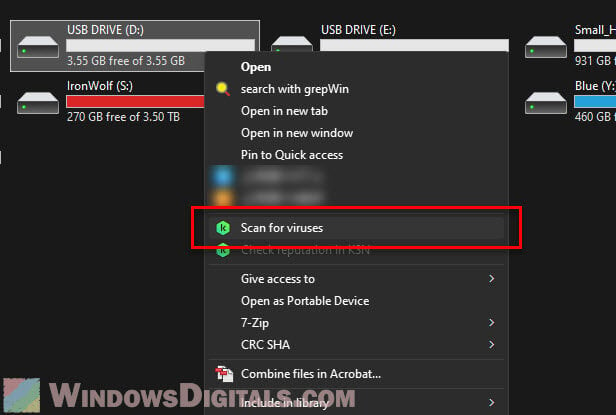
If you’re worried, just scan it with your antivirus program (right-click and select “Scan with <your antivirus software>“), which should be a common practice whenever you plug in a USB flash drive that you’re not familiar with.
Might be useful: How to Delete Protected EFI System Partition in Windows 11
How to partition your USB drive
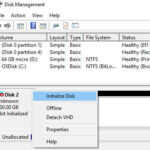
If any of your USB drives are showing no volume and cannot be accessed, you need to partition it first before you can use it. You can do that using a built-in tool called Disk Management in Windows 11 or Windows 10. Here’s how to do it:
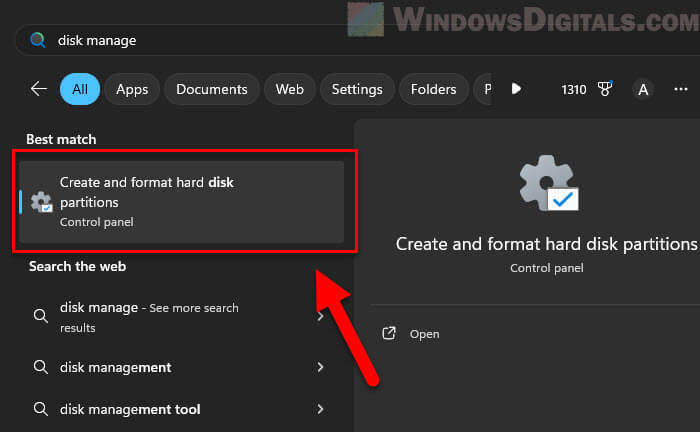
- Search for Disk Management via the Start menu and open it.
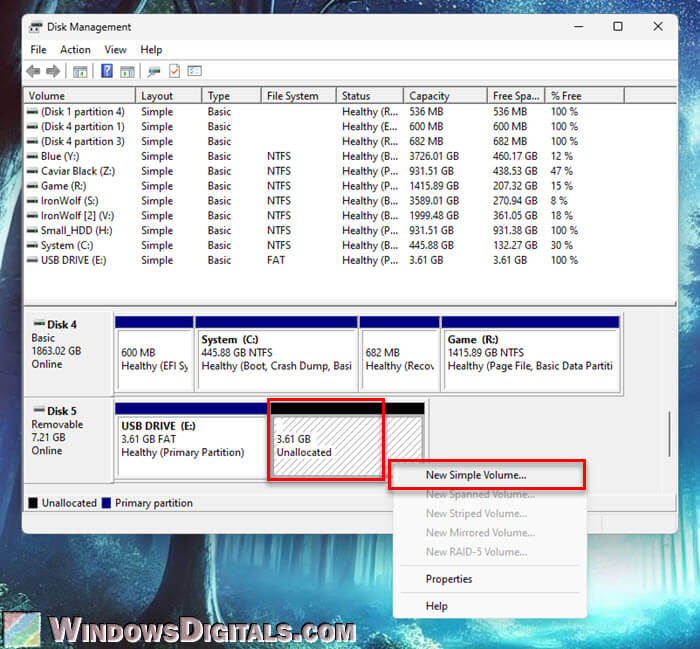
- Select your USB drive from the top section. It will then highlight the disk number at the bottom part of the window. Note: Please ensure that you’re looking at the correct disk (the space should also give you a hint of which disk it is) to avoid accidentally deleting any volume on other disks.
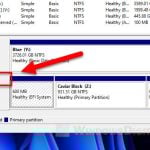
- Right-click on the “Unallocated” space, and select “New Simple Volume“.
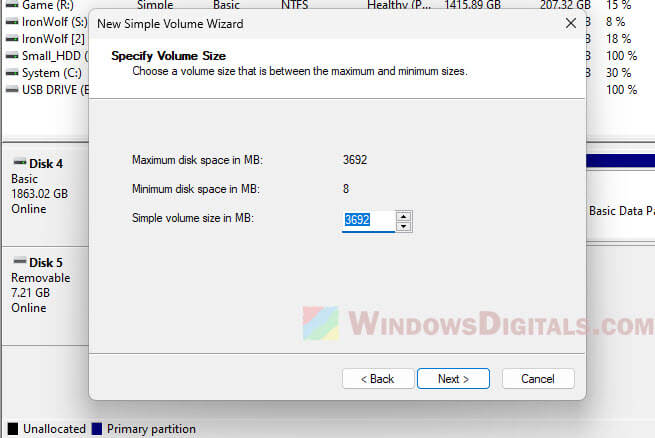
- Follow the on-screen instructions and select the volume size you want for this partition.
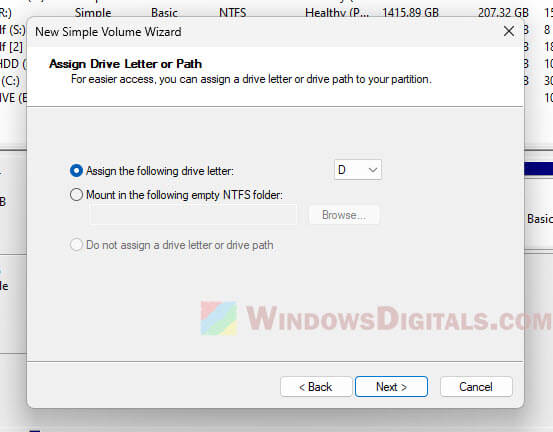
- Assign a drive letter for it, for example, the “D:” drive.
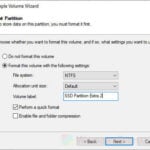
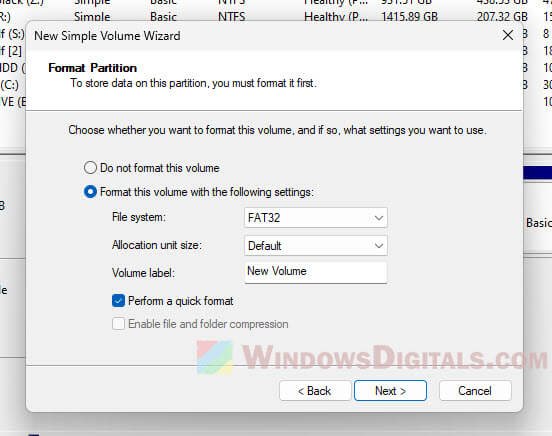
- You’ll also need to select a file system for the drive. Use FAT for small USB drives (those under 2GB) and for compatibility with very old Windows or other operating systems, FAT32 for drives up to 32 GB (but it has a file size limit of 4 GB), and NTFS for larger drives or individual files larger than 4 GB (although it may lack compatibility with older systems).
- After confirming the volume creation, you will have a new drive that you can access via the “This PC” section.
If you don’t see any “unallocated space” on your USB drive in Disk Management and are still unable to access or use your USB drive, it might mean that it’s not formatted yet and you’ll need to format it first. However, this will mean wiping all data on the drive.
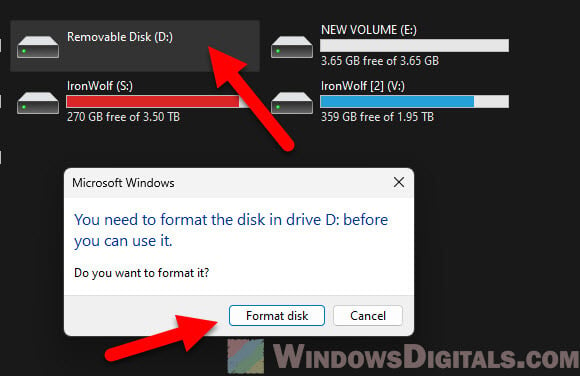
If you’re still having issues with your USB drive, and if you don’t mind erasing all the data on it, you can delete the volumes on the USB drive and re-create new partitions on it (refer to the instructions in the next section).
Pro tip: How to Split Drive in Windows 11 or 10 Without Formatting
How to merge the two partitions of a single USB drive
If you don’t like your USB drive having two partitions, you can merge them into just one. However, to merge them, you will need to delete all the volumes on the USB drive and create a brand new partition on it. Warning: Deleting a volume means completely wiping the volume. All data on the volume will be permanently deleted.
If you are okay with deleting the volume (and wiping the data), follow the steps below to merge the partitions.
- Open the Disk Management tool.
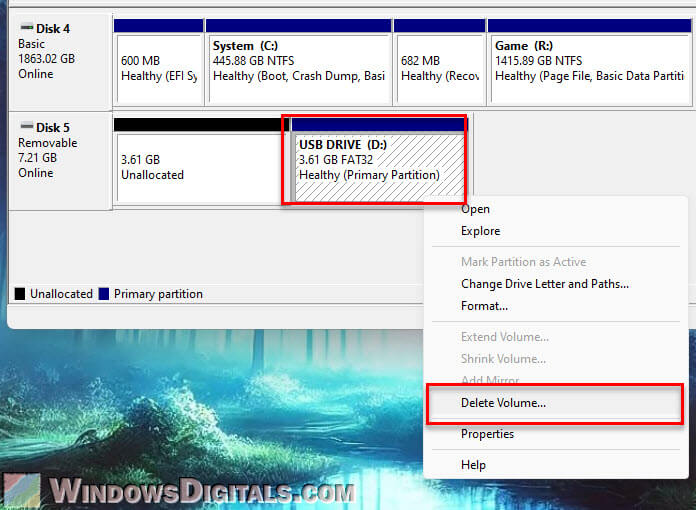
- Right-click on the first USB drive’s partition and select “Delete Volume.” Warning: The screen here includes all your other hard drives. Make sure you’re looking at the correct disk to avoid accidentally deleting the volume of the wrong drive.
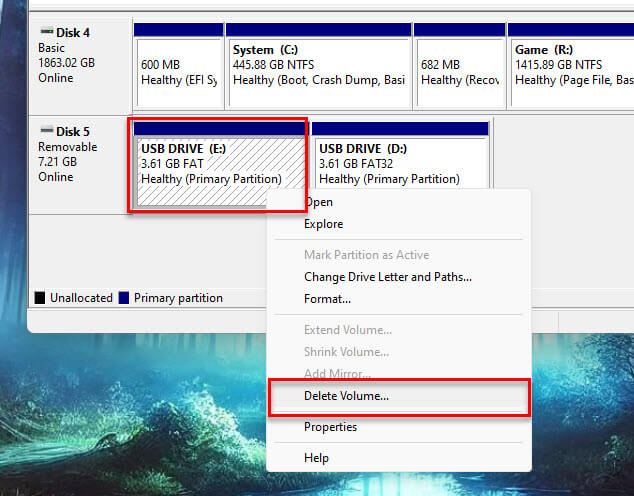
- Next, delete the volume for the second partition.
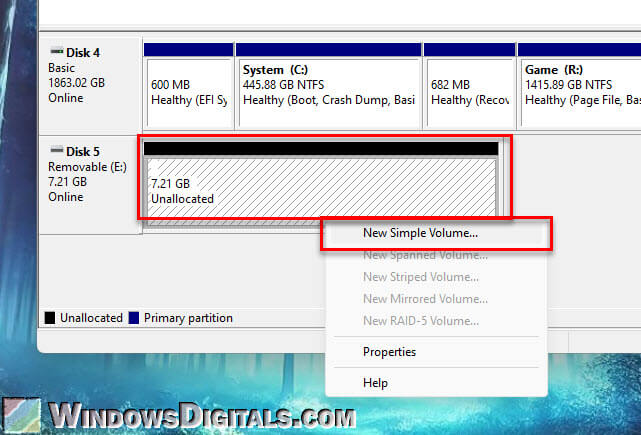
- Now, you should see the entire disk listed as “Unallocated”. Right-click on the “Unallocated” space, and select “New Simple Volume“.
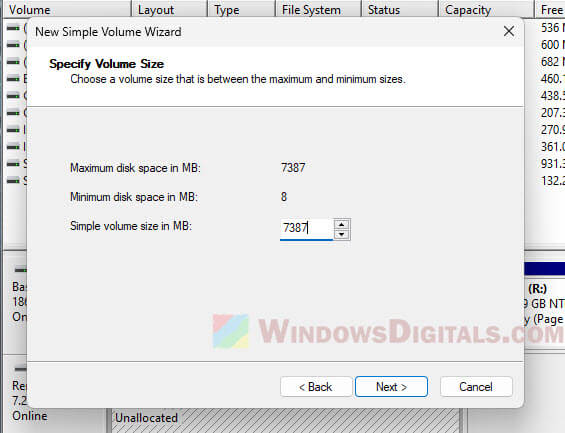
- Click Next, and when prompted to specify the volume size, enter the size displayed in the “Maximum disk space” to make full use of all the available unallocated space on this new partition.
- Follow the rest of the on-screen instructions to complete the volume creation (you can refer to the earlier steps for guidance on which file system to use).
When the volume is created and formatted, you should now see only one single USB drive in the “This PC” section.
