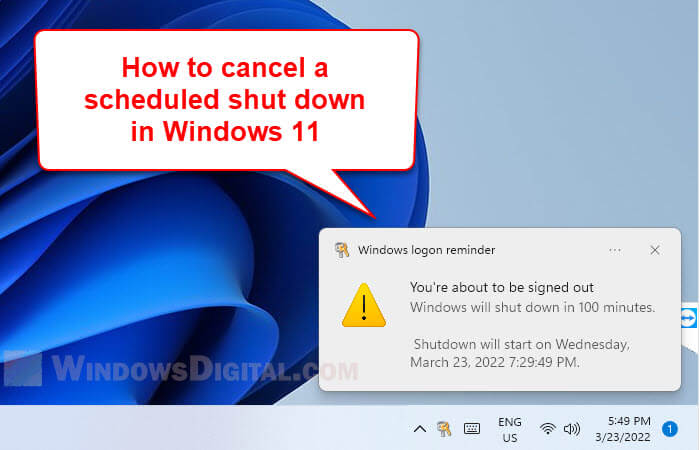
If you have accidentally activated a scheduled shutdown in Windows 11 or if you see an automatic shutdown notification – “You are about to be signed out. Windows will shut down in x minutes” triggered by other app or an update, this guide will show you 3 methods on how to turn off a scheduled auto shutdown in Windows 11.
Scheduled automatic shutdown is often triggered after an installation of a new app or an update of an existing app is done recently. That includes installations or updates by any app that requires a reboot, such as Antivirus software, etc. If you wish to shut down at a later time because you still have unfinished work you wish to save or finish, you can manually cancel the auto shutdown to prevent losing your unsaved work.
How to cancel auto shutdown in Windows 11
Method 1: Turn off auto shutdown via Run
The easiest method to quickly disable a scheduled auto shut down in Windows 11 is by running a command in the Run window. To immediately cancel auto shutdown in Windows 11 using Run command, follow the steps below.
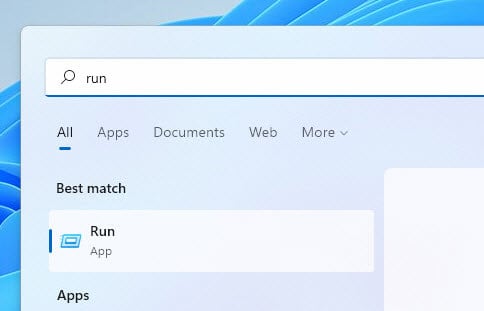
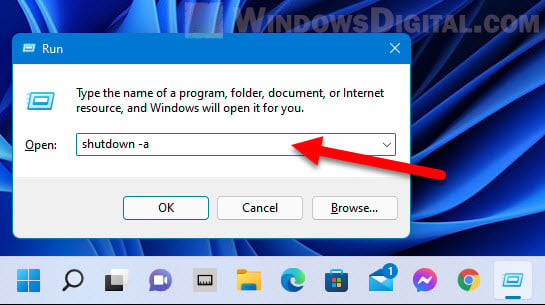
1. Press Win + R keys to open Run dialog box. Alternatively, you can type Run in the Start menu search bar and press Enter to open Run dialog box.
2. In the Run window, type “shutdown -a” in the Open field, then click OK to run the command.
shutdown -a
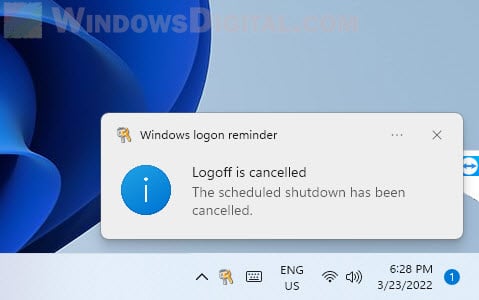
3. If you see the following message: “Logoff is cancelled. The scheduled shutdown has been cancelled” after running the command, it means you have successfully turned off the auto shutdown in Windows 11.
Method 2: Execute cancel shutdown command in Command Prompt
Another different way to turn off a scheduled shutdown in Windows 11 is by executing a command line in the Command Prompt (CMD).
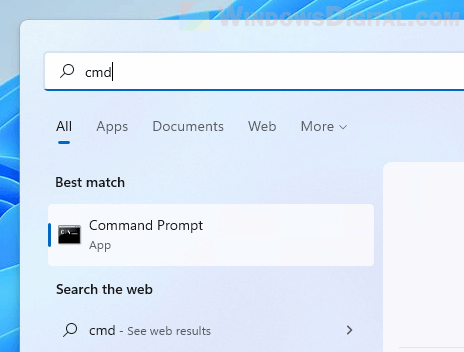
1. First, search for “CMD” or “Command Prompt” via Start and open it. “Run as administrator” is not required. However, if you run into error when you execute the following command, you may want to try to run Command Prompt as administrator first.
2. Enter the following command line and press Enter to execute it.
shutdown -a
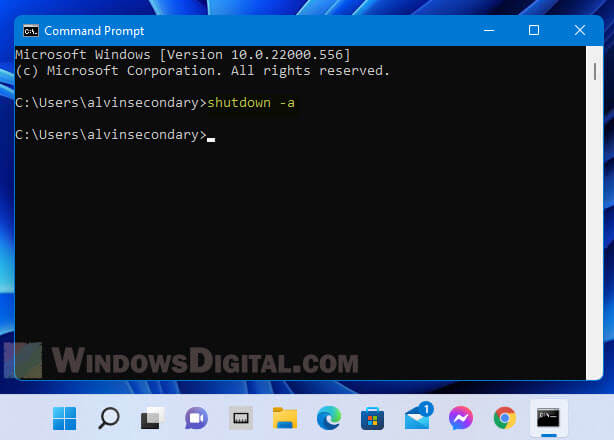
If the command line is executed successfully, you should see the following notification message, indicating that the auto shutdown has been cancelled in Windows 11.

Method 3: Create a cancel auto shutdown desktop shortcut
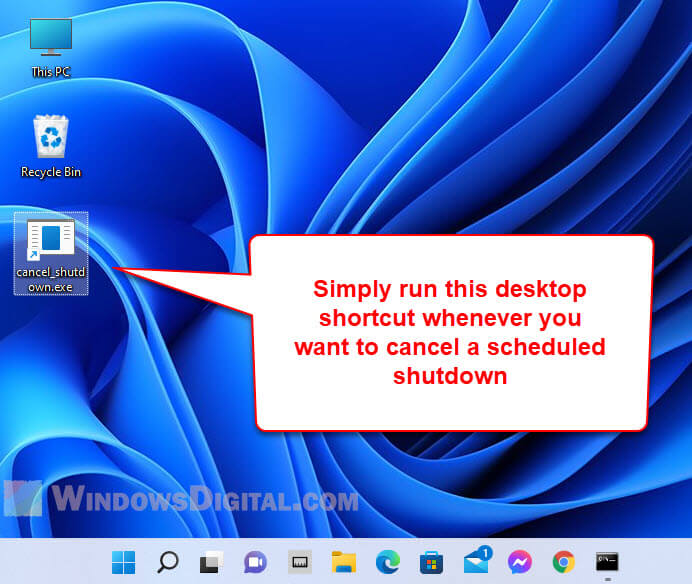
If automatic shutdown is being scheduled so frequently that you will need to cancel it from time to time, you can create a desktop shortcut to cancel the auto shutdown upon running. Here’s how to do it.
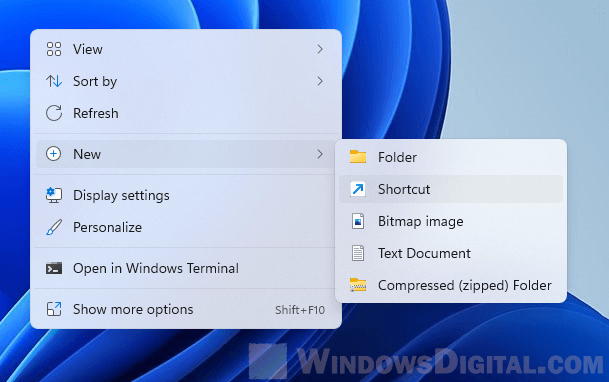
1. Right-click anywhere on the desktop, then select New > Shortcut.
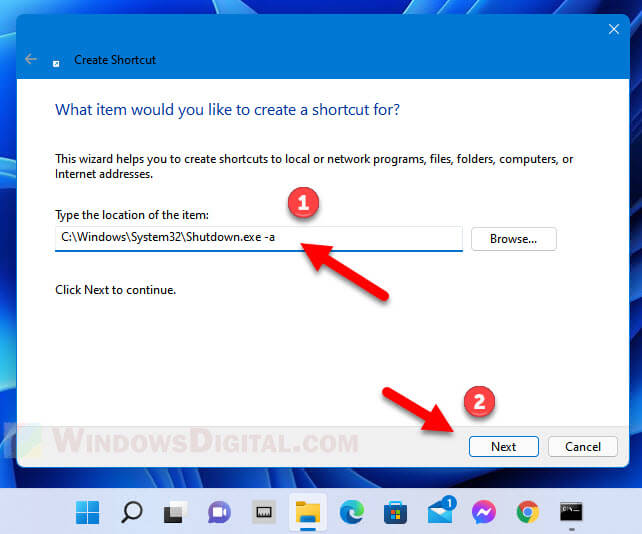
2. In the Create Shortcut wizard, type the following to the “Type the location of the item” text area. Then, click Next to continue.
C:\Windows\System32\Shutdown.exe -a
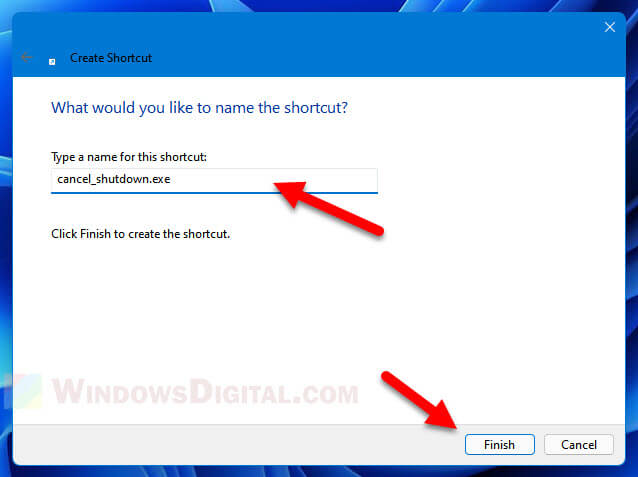
3. Give the shortcut any name you want. I like to name it cancel_shutdown.exe. Click Finish to complete the wizard.
4. Once the shortcut is created, you can run it to immediately turn off any scheduled shutdown in Windows 11. Whenever you open the desktop shortcut, you may see a window appear for a split second and then disappear. It indicates that the shortcut is being executed successfully and any scheduled shutdown would have been cancelled.
