When it comes to transferring files and videos, iOS is different from most other operating systems. Generally, to transfer videos or files from another device to an iPhone or iPad, you need to sync them with iTunes. You cannot just copy and paste to send them over to your iOS device, which many people find cumbersome and inconvenient.
While there are many apps that offer simple solutions to transfer files from another device to your iOS device without using iTunes, if you want to quickly transfer only video files from Windows 11 or Windows 10 PC to iPhone or iPad, you can use a video player app called VLC Media Player.
Also see: Share Files From Android to PC Wirelessly
Why use VLC to transfer videos?
VLC (VideoLAN Client) is one of the most popular video players in the world, mainly for PC users. It also supports most other platforms such as Mac, iOS and Android. It is known for its ability to play any video file format you throw at it and for its many useful features. Most importantly, it is free to use and open source.
One of the most compelling features of the VLC app for iOS is the “Sharing via Wi-Fi” feature. It allows you to set up a sharing gateway via Wi-Fi. Any device connected to the same Wi-Fi network will be able to send or receive videos to or from the iPhone over Wi-Fi.
If you want to quickly share a couple of videos from your Windows 11/10 PC to your iPhone or iPad, you can use this feature to send the videos easily over WiFi.
Suggested read: How to Picture in Picture with VLC (Windows, iOS or Android)
How to use VLC to transfer videos from Windows PC to iPhone or iPad
First, install the VLC media player app from the AppStore on your iOS device. It’s free and very lightweight. It shouldn’t take long to install.
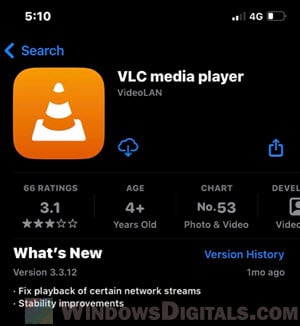
Once installed, launch the app. The first time you launch the app, there usually will not be any video listed in the “Video” section. You will need to manually import videos you want to watch through one of the provided methods in the app. One of the available methods to import videos in VLC for iOS is the “Sharing over Wi-Fi” option.
To transfer videos from Windows to iPhone or iPad using VLC, follow the steps below.
- First, make sure that both your Windows PC and your iOS device are connected to the same Wi-Fi network.
- Launch VLC media player on your iPhone or iPad.
- Next, tap “Network” at the bottom of the screen.
- From there, you will see several methods you can use to import videos to VLC. Turn on the “Sharing via Wi-Fi” option and make a note of the IP or web address displayed.
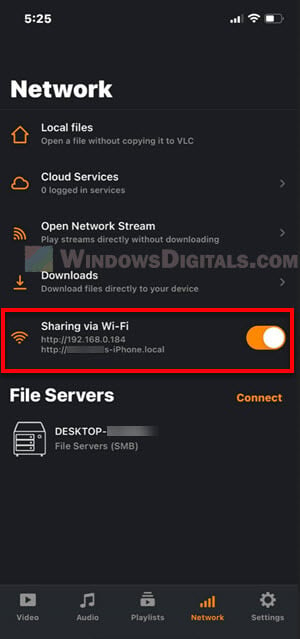
- On your Windows PC, open a web browser and enter the address you wrote down. In my case, it is http://192.168.0.184 which is the local IP address to my iPhone.
- Once entered, you will see a web page titled “Sharing via Wi-Fi”. To send a video file to your iPhone, drag and drop the video file to where it says “Drop Files“.
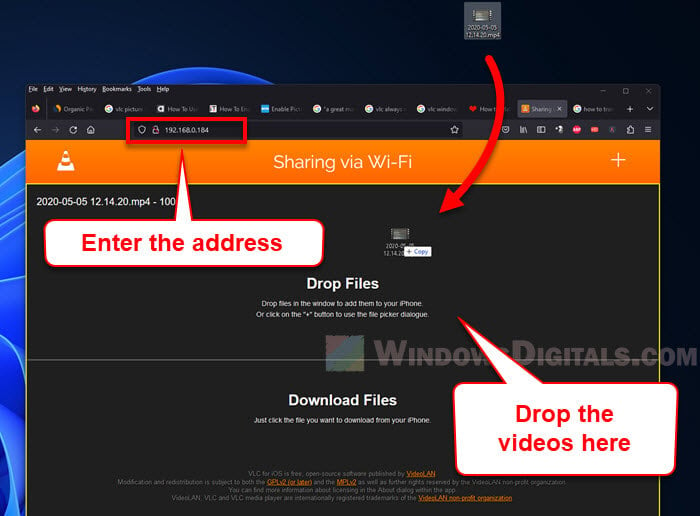
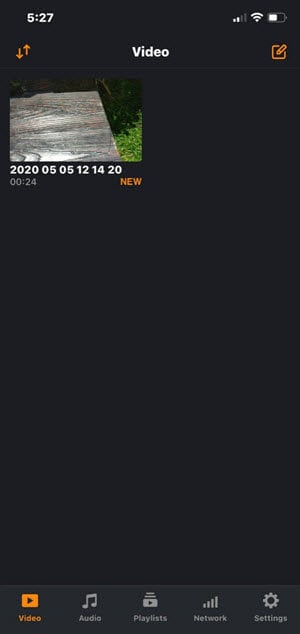
- The upload process will begin immediately as you drop the file. Once the upload is complete, you can find the video file in the “Video” section in VLC on your iPhone.
Related read: How to Download Subtitles in VLC on Windows 11
Transfer videos from iPhone to Windows
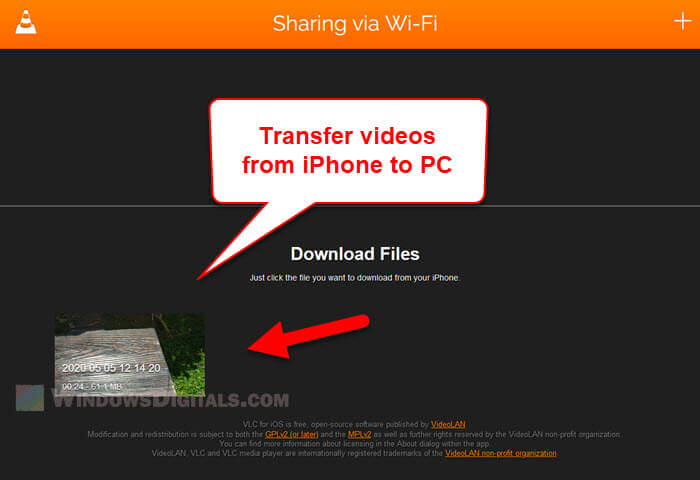
If there is any video already imported and listed in the “Video” section in the VLC app on your iPhone, you can transfer those video files from your iPhone to your Windows PC by repeating the same steps.
- Turn on the “Sharing via Wi-Fi” option in VLC app on your iPhone.
- Next, access your iPhone’s local IP address in a browser on your Windows PC.
- Then, click the file you want to download from your iPhone via the “Sharing via Wi-Fi” webpage.
