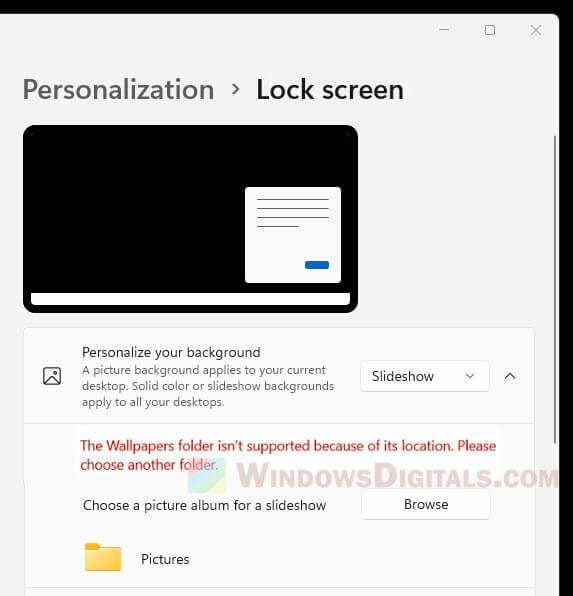
If you’re using Windows 11 and you’ve tried to set up a slideshow for your lock screen by hitting the “Browse” button next to “Add an album for your slideshow” in the “Personalization > Lock screen” settings, and picked a folder like Pictures, you might have seen this annoying message: “The Pictures folder isn’t supported because of its location. Please choose another folder“. It’s pretty annoying, especially if you just want to spice up your lock screen with some cool photos or images.
Page Contents
Understanding the lock screen folder location error on Windows 11
So, you’re trying to add a folder for your lock screen slideshow and bam, you get the “The [folder name] folder isn’t supported because of its location” error. This usually happens when you pick a special folder or its subfolders, or when you manually type in the full path in the browse box.
The issue is, Windows doesn’t think the folder or subfolder you picked can be used for the lock screen slideshow because of where it’s located or what type of folder it is. For instance, some system folders or special folders from Quick access like Documents, Downloads, Music, and Videos might not be cool to use for your lock screen slideshow.
Also see: Windows 10 lock screen images location (Folder)
Workarounds for the “The folder isn’t supported because of its location” error
But hey, don’t give up yet! There are a few tricks you can try to get your chosen folder to work for the lock screen slideshow, even if you’re hitting that annoying error. Check these out:
Solution 1: Browse to the folder path manually from This PC
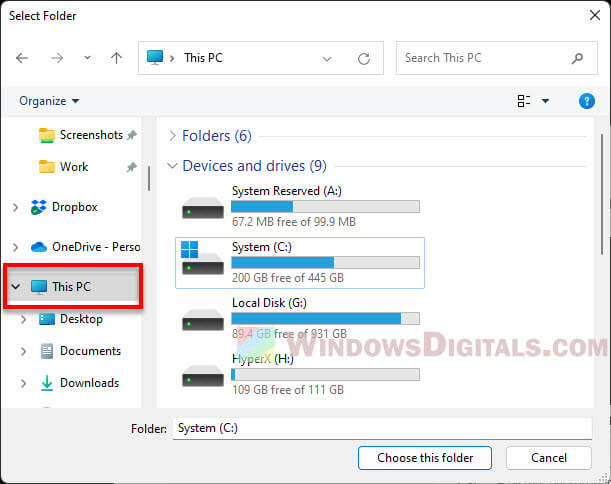
An easy fix for the lock screen “The folder isn’t supported because of its location” error is to just manually go to the folder from “This PC” or the drive’s root directory (like the C: drive) and pick your folder from there, instead of picking it from Quick Access or somewhere else.
Related issue: “This folder is empty” in Windows 11 (Fix)
For instance, if you’re trying to pick the Pictures folder from the Users folder for your lock screen slideshow, here’s what you do:
- Hit the Browse button in the Lock Screen settings.
- In the file picker dialog, click “This PC” from the left pane.
- Go into the C: drive.
- Open the “Users” folder.
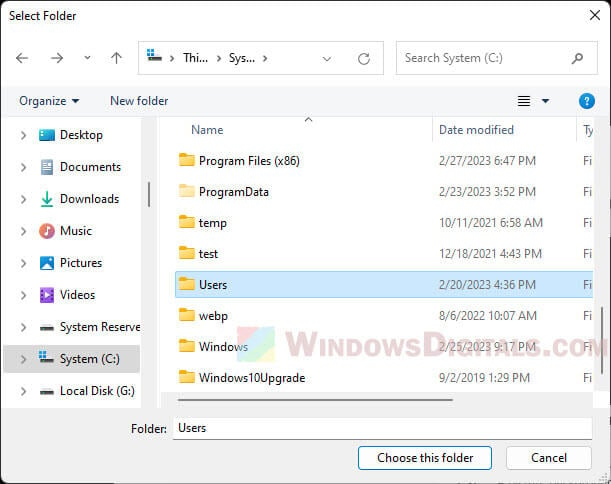
- Get into your user profile folder.
- Pick the “Pictures” folder but don’t actually open it.
- Then hit “Choose this folder“.
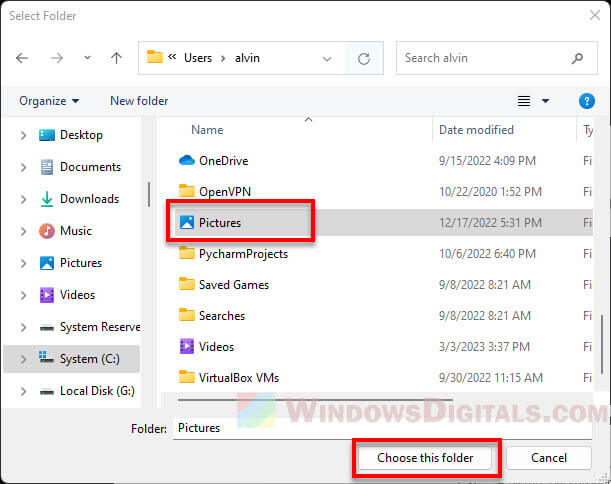
Do this for any folder or album you want to add to the lock screen slideshow.
Solution 2: Select but do not open the folder containing your images
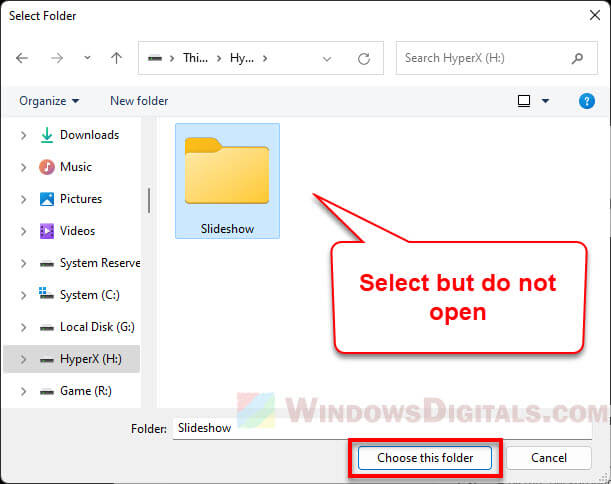
Another way to get around the “The folder isn’t supported because of its location” error when setting up your Windows 11 lock screen is to just select the folder with your images without opening it. This method has worked for lots of people. Here’s how:
- Hit the Browse button in the Lock Screen settings.
- Manually go through the folder path from any drive root, like C: or D:.
- Just select the folder with your images, but don’t open it.
- Then click “Choose this folder“.
Solution 3: Access Personalization settings via CMD
If the other solutions aren’t doing the trick, try opening the Personalization’s wallpaper settings with this command in Command Prompt:
control /name Microsoft.Personalization /page pageWallpaper
This should open the wallpaper settings page, letting you browse and pick the folder for your lock screen wallpaper or slideshow.
One last thing
Well, in most cases, the “The folder isn’t supported because of its location” error message pops up because of system restrictions on certain folders or subfolders, which aren’t suitable for use as a source for the lock screen slideshow. If you’re still seeing the error even after manually browsing to the folder from “This PC” or the drive’s root directory while selecting the folder for the lock screen slideshow, it probably just means that the folder is actually not allowed and restricted by Windows or your admin.
