Making sure the clock on your computer is correct might sound like a minor thing, but it’s actually very important for keeping your computer running well. This is also extremely important for businesses that need the right time stamps for log files, syncing data, and keeping things secure. In this guide, I’ll show you how to sync your Windows 11 clock with an internet time server, change your Network Time Protocol (NTP) server, and update your NTP time using the command prompt (CMD).
Also see: How to Change Date and Time Format in Windows 11
Page Contents
Why keeping time right on your PC is important
Having your computer’s clock synced isn’t just about the right time showing on your taskbar. It’s also very important for a bunch of other computer tasks like managing files, scheduling stuff, network authentication, and logging what’s happening. It makes sure everything works together correctly and in order, which is a big deal when your computer’s part of a network.
Windows 11, just like the ones before it, uses the Network Time Protocol (NTP) to keep its clock in line with external time servers. By default, it syncs with time.windows.com, but there are loads of other public NTP servers out there you can use instead of the default one.
Linked issue: Date and Time is Always Wrong in Windows
How to sync your Windows 11 time with the internet using CMD
If you want to make sure your system’s time is correct, Windows 11 lets you sync it up with an internet time server. The following steps will show you how to do that using CMD:
- Start by opening the Command Prompt as an admin. Just search for “cmd” or “command prompt” in the Start menu, right-click on “Command Prompt” in the search results, and pick “Run as administrator” from the menu that pops up.
- With the Command Prompt window open, enter the following command:
w32tm /resync
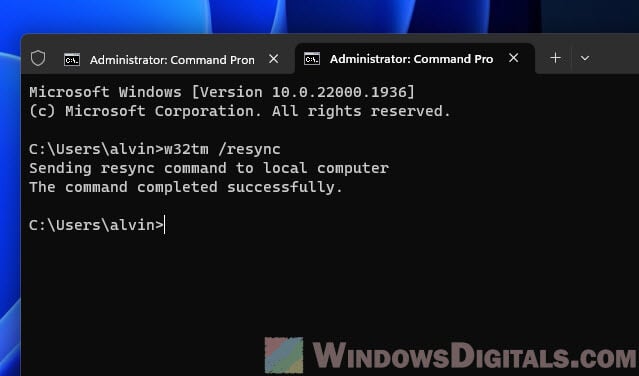
- Hit the Enter key after you type in the command. If all goes well, you’ll see a message saying the command worked. This step gets your system’s clock in sync with the default internet time server.
This feature can also help sort out issues if your computer’s clock is running slow or fast, making sure your computer’s time is as accurate as possible.
Related resource: How to Change Date and Time Format in Windows 11
How to switch your NTP time server in Windows 11
Normally, your Windows system will keep its clock synced with Microsoft’s time server (usually time.windows.com). But sometimes, you might need to sync with a different NTP server, such as when the default one isn’t reachable at the moment or you prefer using a local time server in your country. Follow the steps below to switch to your preferred NTP time server in Windows 11 using CMD:
- Start Command Prompt as admin, just like before.
- In the Command Prompt window, type in the following command to change the NTP server. Swap “time.nist.gov” with your chosen NTP server’s address:
w32tm /config /syncfromflags:manual /manualpeerlist:time.nist.gov
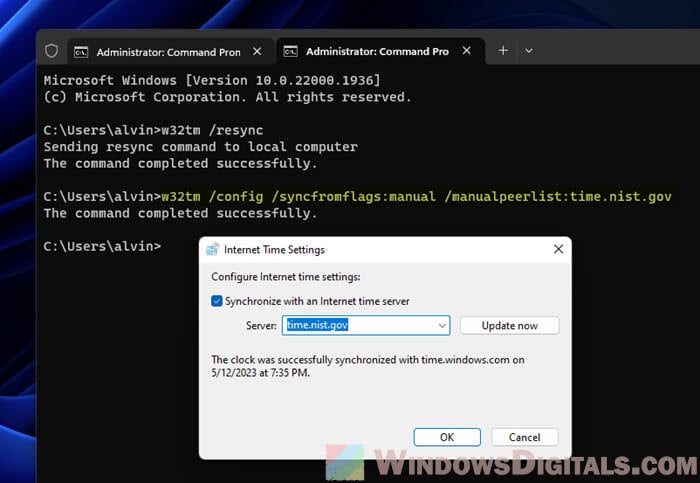
- Hit the Enter key after you enter the command. This changes your NTP server to the one you prefer.
- To make sure the changes take effect, type this command and press Enter:
w32tm /config /update
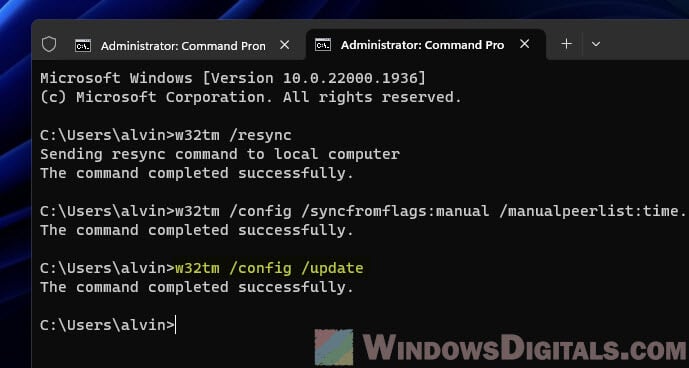
- Then, get your system’s clock synced up with the new NTP server by using the w32tm /resync command.
How to refresh your NTP time
Refreshing your NTP time in Windows is just a matter of making it resync. Just follow the steps in “How to sync your Windows 11 Clock using CMD” and run the “w32tm /resync” command to get your system clock updated or fixed whenever you need.
What to do if you run into time sync issues
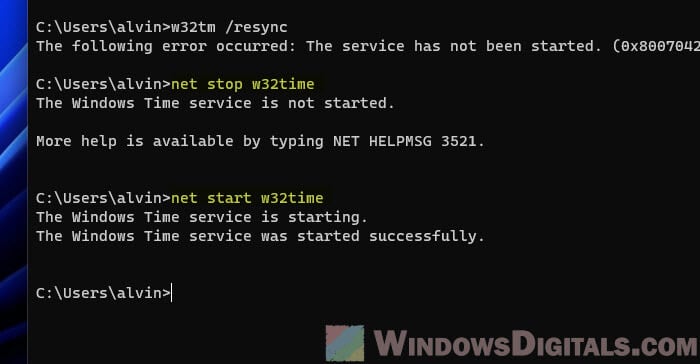
Even if you follow the steps exactly, you might run into problems with the time sync process. Like, you might see an error when trying to use the w32tm /resync command. Common errors include messages like “The service has not been started (0x80070426)” or “The computer did not resync because the time service was shutting down.”
If that happens, try this command to restart the w32time service, which can often kick any time syncing issues to the curb in Windows 11 or 10:
net stop w32time
net start w32time
After the service is back up and running, give the time sync another go with the w32tm /resync command.
If restarting doesn’t smooth things over, consider unregistering and then re-registering the time service in Windows with these steps:
- First, start by unregistering the Windows Time Service with this command:
w32tm /unregister. - Then, stop the Windows Time Service using this command:
net stop w32time. - Next up, re-register the Windows Time Service with this command:
w32tm /register. - Finally, get the Windows Time Service going again with:
net start w32time.
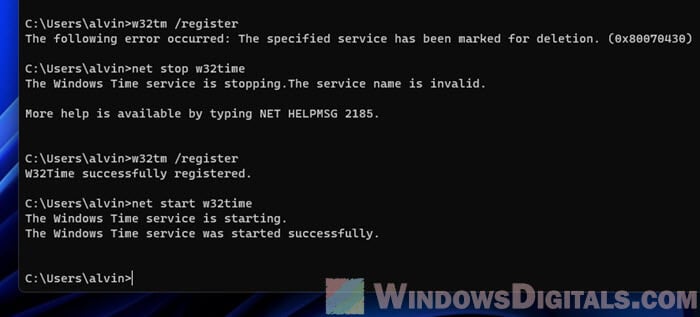
Running through the above steps will unregister, stop, re-register, and then restart the Windows Time Service. It should be able to fix any related issues in the process.
So, what have we learned?
Using the command line lets you set up automatic tasks, which is very helpful if you’re managing several computers—think network administrators, for example. You can write scripts that run these commands automatically at set times. Besides, since you can run CMD commands remotely, it’s also a handy option for network environments.
