When Windows 11 was released, there was a registry hack you can apply to bring back the Windows 10 classic start menu in Windows 11. This registry tweak requires you to add a registry value called Start_ShowClassicMode and set the data value to 1 via Registry Editor in Windows 11.
However, after a recent update in Windows 11, the Start_ShowClassicMode registry hack doesn’t work anymore. Microsoft has officially blocked the registry change with that update. Since the Start Show Classic Mode no longer works, if you have previously applied the registry tweak, after installing the update through Windows Update, your Start menu and taskbar will automatically be reverted back to the default appearance in Windows 11.
Speaking of customizing Windows 11, there is always a way. As there is no longer any built-in method to force change Windows 11 elements such as the Start menu and taskbar to classic mode, we have to rely on third party tools.
There is an excellent tool called ExplorerPatcher that can do exactly what we want in this case. In this guide, we will show you how to use the ExplorerPatcher tool to force change Windows 11 elements such as Start menu and Taskbar to their Windows 10 classic versions.
Also see: How to Ungroup Taskbar Items in Windows 11
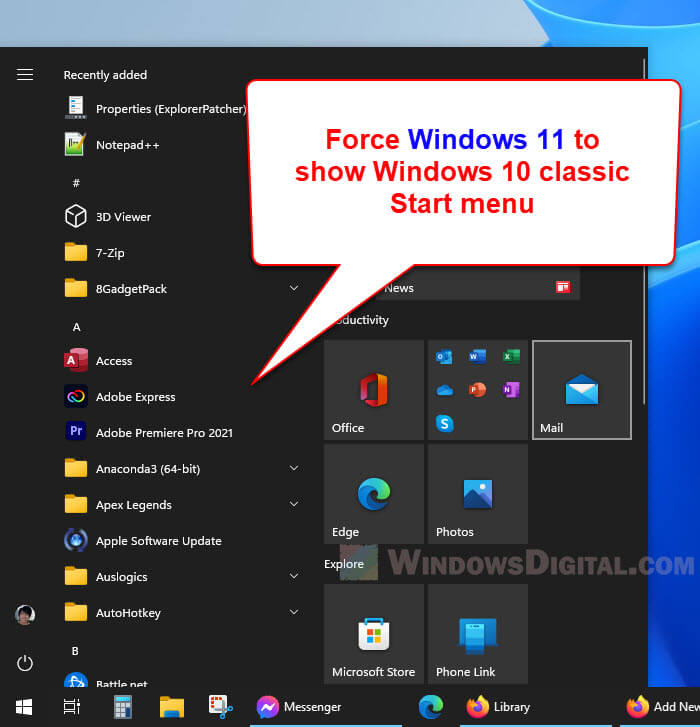
Start_ShowClassicMode not working, any alternative?
Since Start_ShowClassicMode doesn’t work anymore, you can use a third party program called ExplorerPatcher to force change some of the Windows 11 elements such as the Start menu, Taskbar, System tray, File Explorer, etc. to the Windows 10 classic styles. With ExplorerPatcher, you can make Windows 11 look and feel like Windows 10.
Suggested Read: How to Change Windows 11 Start Menu Default Search to Google
You can download ExplorerPatcher from https://github.com/valinet/ExplorerPatcher/releases. On the Releases page, Expand the “Assets” section for the latest release and select the setup executable file to download it.
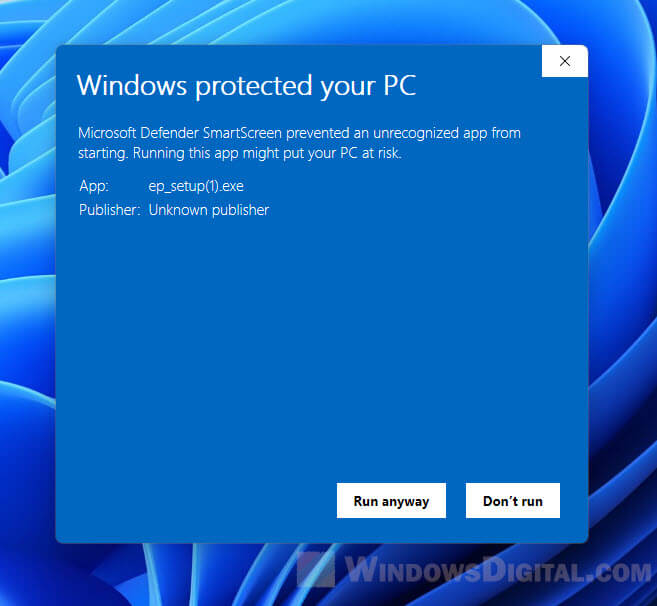
Run the setup to install the tool. As this tool is a community made tool, when you run the installer, you may be prompted a warning that tells you this installer is from an unknown publisher. When prompted, click “More info” and select “Run anyway” to proceed with the installation.
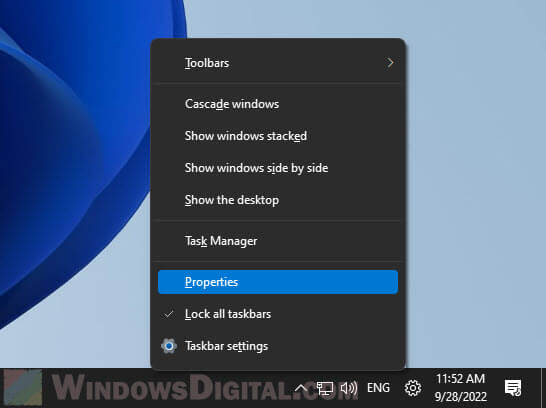
Once installed, right-click anywhere on the taskbar and select Properties. This will open the ExplorerPatcher settings window.
In the Properties window, to change the Windows 11 Start menu style to Windows 10 classic mode, select Start menu from the left pane. Next, click the “Start menu style” option and select “Windows 10” instead of “Windows 11 (default)”.
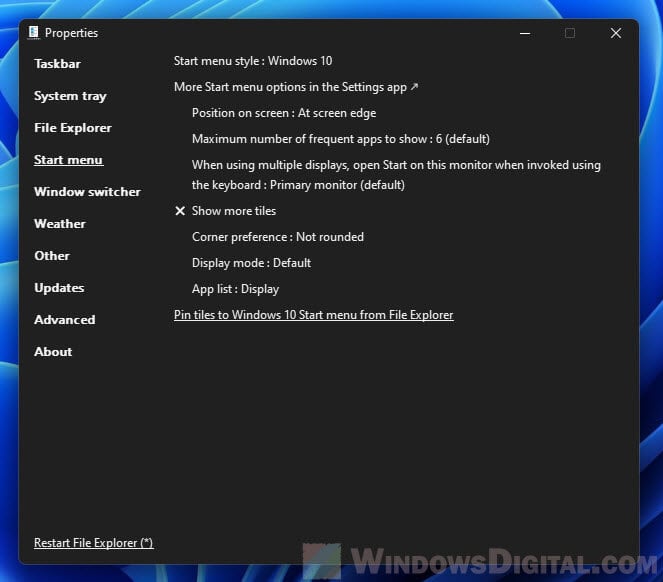
For the changes to take effect, click the Restart File Explorer button at the bottom of the Properties window. This will force close and restart the explorer.exe process automatically so that changes you made can take effect immediately. Alternatively, you can just restart your computer for any changes to take effect.
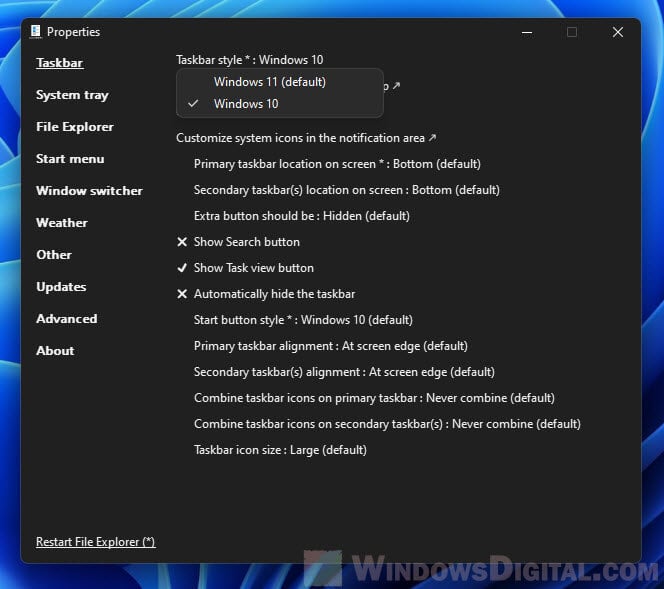
You can also change other elements such as the Taskbar to make it look the Windows 10 classic taskbar. To do so, select “Taskbar” on the left pane. Then, click the “Taskbar style” drop-down menu and select “Windows 10” instead of “Windows 11 (default)”.
Read: How to Remove Alt+Tab Blur Background in Windows 11
Revert the classic mode back to Windows 11 default
If you change your mind and want to revert the Windows 10 classic styles back to that of Windows 11, you can either follow the same steps above to revert the style for different elements back to Windows 11 via the ExplorerPatcher Properties window, or just uninstall the tool.
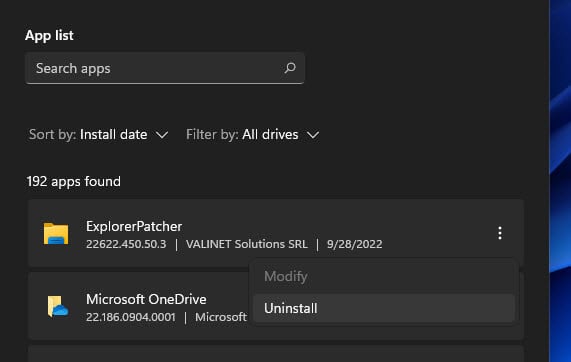
To uninstall ExplorerPatcher, go to Settings > Apps > Apps & features. Search for the app using the App list search bar, click the triple dotted menu icon next to the app and select Uninstall. Once uninstalled, restart your PC for changes to take effect.
