You can now actually record a video of your screen using just the Snipping Tool. It’s an amazing feature that has been brought into this tool that was originally a screenshot tool. However, like many other Windows tools, there are some problems you might encounter that make the video recording not work:
- You can’t get the video to record properly.
- The recorded video doesn’t save.
- There is no sound when recording.
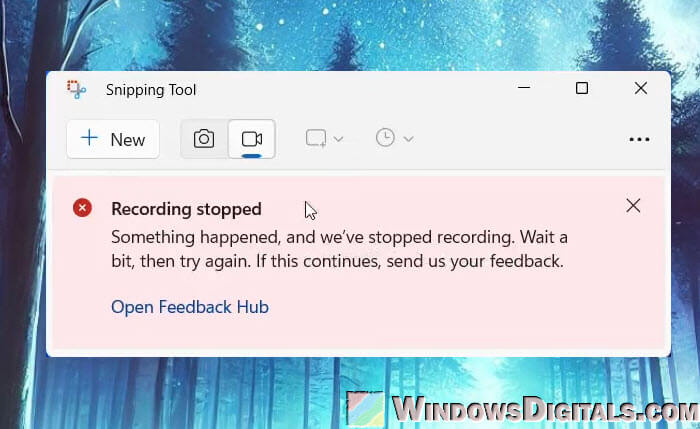
- You get an error that says, “Something happened, and we’ve stopped recording“.
This guide will show you a few effective workarounds that might be able to help fix the problem you have with Snipping Tool, particularly on Windows 11.
Page Contents
Change the graphics preference for Snipping Tool
If the Snipping Tool is causing problems when you try to record video, it could be because your computer is using the wrong graphics preference for the app. This usually happens if you have two graphics cards, such as an Intel HD Graphics integrated into your processor and a separate NVIDIA or AMD card. Try to set Snipping Tool to use the more powerful dedicated graphics card.
- Go to the Start menu, type “Graphics Settings” into the search bar, and open it.
- Select “Microsoft Store app” under “Custom option for apps” and then click “Browse“.
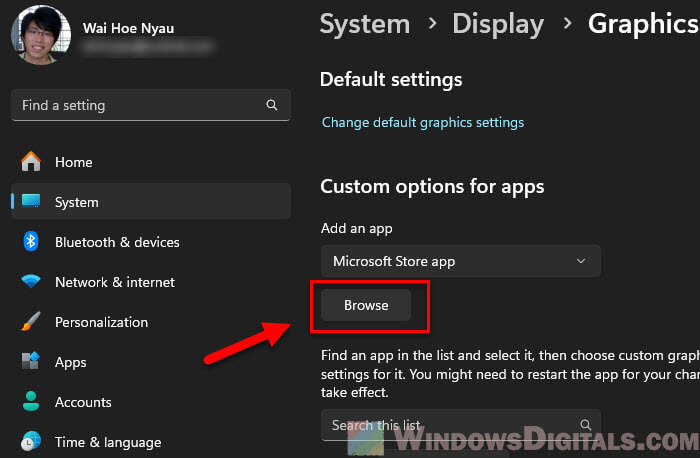
- Keep scrolling until you see the Snipping Tool, click on it to add it to the list.
- Select “Snipping Tool” from the list, then choose “Options“.
- Now, select “High performance” and then click “Save“.
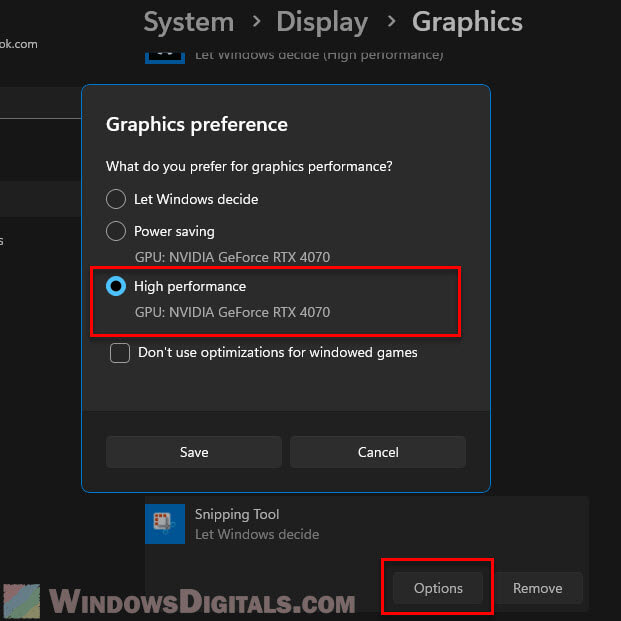
Snipping Tool will now be using your dedicated video card. Try this out and see if it makes a difference.
Related problem: Snipping Tool No Video Recording Option, Why?
Disable display projection
Having multiple displays or projecting your screen can sometimes mess with the Snipping Tool’s ability to record video. If you’re using different monitor setups, this could be causing the problem. Try the following steps and see if it helps.
- Press Win + P on your keyboard to bring up the “Project” menu on the right side of your screen.
- Here, you’ll see options like “PC screen only“, “Duplicate“, “Extend“, and “Second screen only“. Go for “PC screen only” to make sure your computer only uses your main monitor.
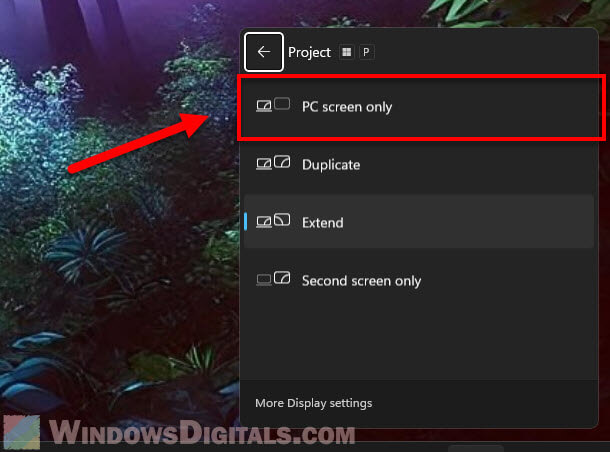
- After choosing this, try the video snip option using Snipping Tool and see if it can record without any problems.
This stops your PC from sending video to any other screens, which might be the reason the Snipping Tool stops recording.
Pro tip: How to Record a Video of Your Screen with Sound in Windows 11 or 10
Position the app window correctly
If you’re trying to record something on your screen with the Snipping Tool and it’s not capturing the selected area correctly, the position of the window could be the issue.
- Check that the app or window you want to record is fully on your main screen. If it’s partly off-screen or on another monitor, move it to the main display.
- Make sure the app window isn’t covered by other open apps or browser windows. It should be on a clear part of your desktop.
- Once you’ve got the window positioned right, try selecting the area again with the Snipping Tool for recording.
Might be useful: How to Change Monitor Position in Windows 11
Repair and reset Snipping Tool
If you’ve tried the other fixes and the Snipping Tool is still not working as it’s supposed to, you can try to repair or reset the app. This can sort out any hidden problems by putting the tool back to its original settings.
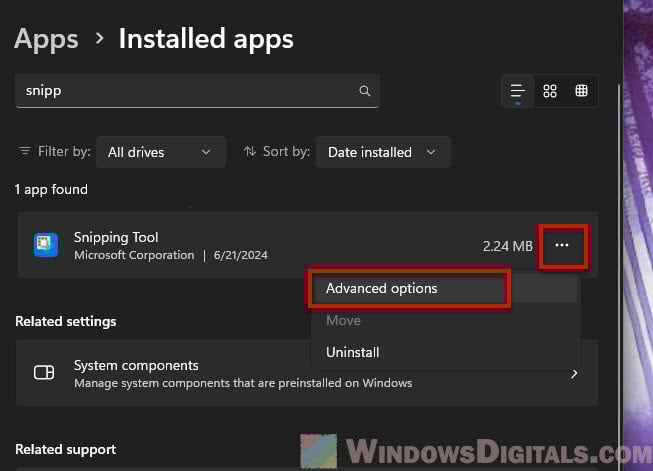
- Open the Start menu and go to Settings.
- Click on Apps, then go to Installed apps.
- Look for the Snipping Tool in the list, click on the three dots (…) next to it, and pick Advanced Options.
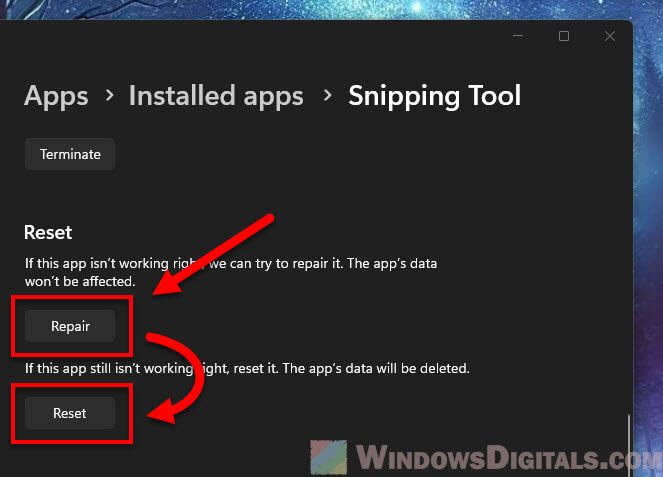
- You’ll see options to Repair and Reset. Start with Repair, which fixes the app without messing with your data.
- If you still have issues, go back and choose Reset. This takes the app back to its default settings and might fix more stubborn problems.
This is a good way to deal with any problems that might have popped up from system updates or other apps messing with it.
Try running SFC and DISM
If the Snipping Tool still isn’t working right, there might be deeper problems with the system files. Running the System File Checker (SFC) and Deployment Image Servicing and Management (DISM) tools might be able to fix these problems.
- Right-click the Start button and choose Terminal (Admin) to open it with admin rights, or just run CMD as administrator.
- In the Terminal or CMD window, type
sfc /scannowand press Enter. This scans your system for broken files and tries to fix them.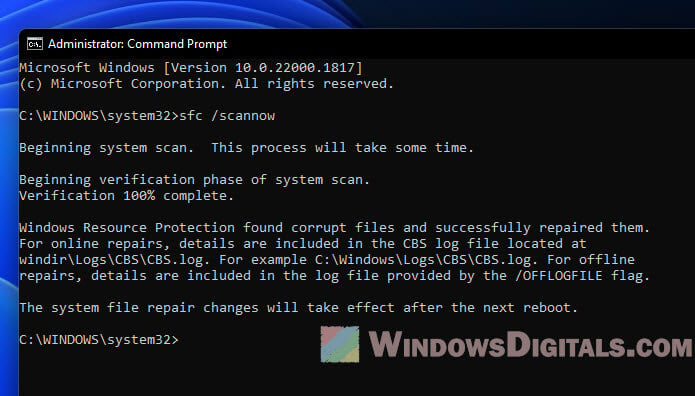
- After the SFC scan finishes, it’s time for DISM. Type
Dism /Online /Cleanup-Image /ScanHealthand press Enter to check for problems. - If DISM finds issues, type
Dism /Online /Cleanup-Image /RestoreHealthand press Enter. This fixes the system image.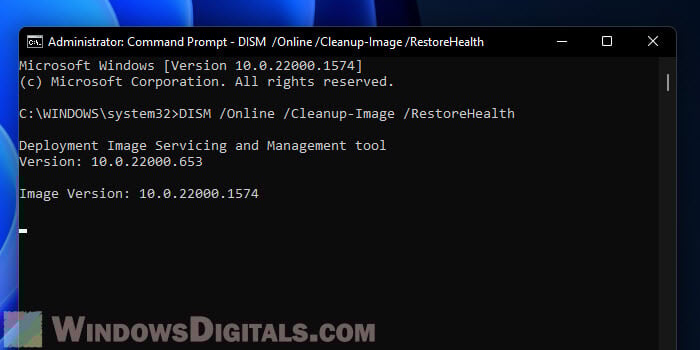
Let each tool finish its job before you close Terminal. It might take a while depending on what’s needed to be fixed.
Re-register the built-in Windows apps
Sometimes, problems with apps like the Snipping Tool come from unknown and complicated issues with the Windows apps themselves. Re-registering all the built-in apps can refresh their installation and might fix any glitches.
- Open Windows PowerShell as an administrator, just like you did before.
- Type this command and press Enter:
Get-AppXPackage -allusers | Foreach {Add-AppxPackage -DisableDevelopmentMode -Register "$($_.InstallLocation)\AppXManifest.xml"}
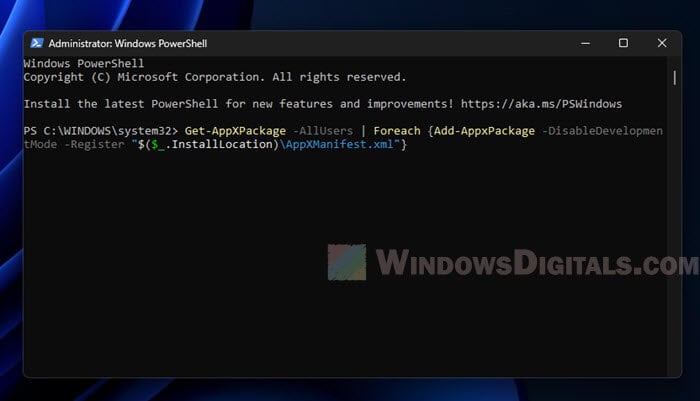
This might take a few minutes, depending on how fast your computer is and how many apps there are. Once it’s done, try the Snipping Tool video option again to see if that fixed the issue.
Just use a different screen recording app
If you’re tired of fixing whatever problem you have with Snipping Tool’s video recording feature, you might want to just try another app for screen recording.
For quick and simple screen recording, you can use the NVIDIA Share feature if you’re using an NVIDIA graphics card and have its driver installed. Alternatively, if you’re looking for more advanced screen recording options, you can try OBS Studio, which is free and one of the most popular tools for video recording and streaming.