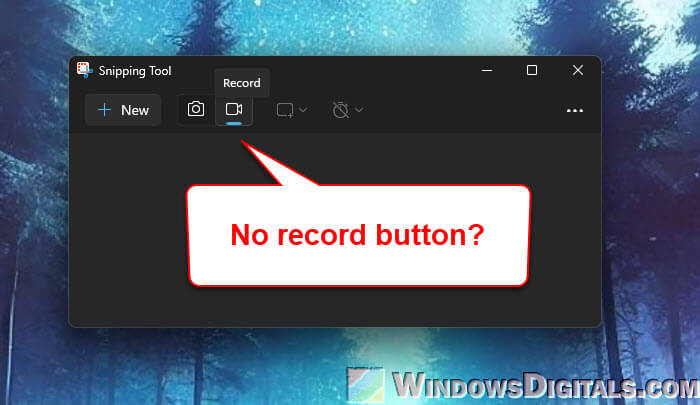
If you have heard about the exciting update that brought a new video recording feature to one of the most used built-in tools in Windows – Snipping Tool, only to find that you see no video option available when you open it, this guide will explain why that happens and what you should do to enable the video recording feature in Snipping Tool.
Also see: How to Record a Video of Your Screen with Sound in Windows 11 or 10
Page Contents
Check your Windows and Snipping Tool versions
First, make sure you have the latest version of Windows, particularly Windows 11 (because the feature is only available for the latest Windows 11 version).
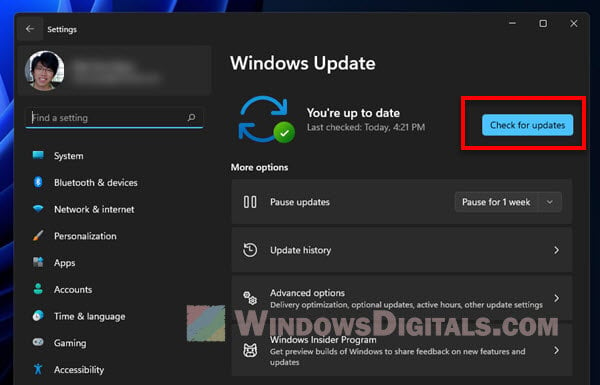
- Press Win + i to open Settings.
- Click on Update & Security then Windows Update.
- Click on Check for updates. If updates are available, install them.
After updating Windows, make sure the Snipping Tool is also up-to-date. Even though it usually updates with Windows, you should still check the Microsoft Store to see if there is an update that you need to install.
- Open the Microsoft Store from your Start menu.
- Click on the three dots at the top right and choose Downloads and updates.
- Look for the Snipping Tool in the list (or search for it using the search bar) and if you see an update button, click it to update.
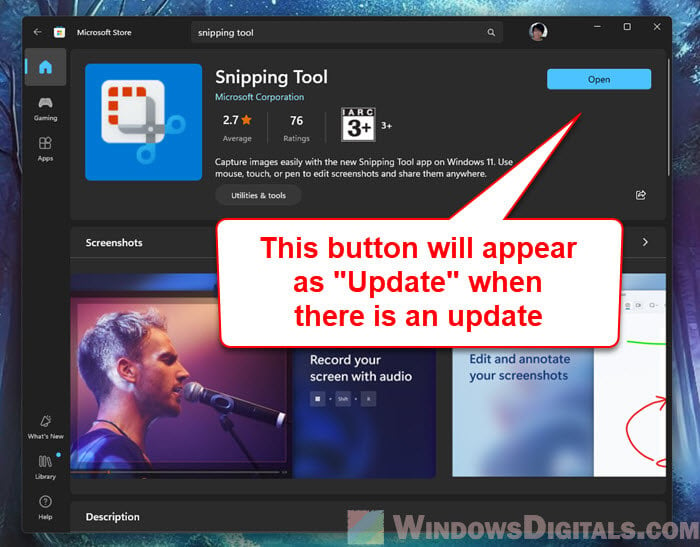
The key is to make sure both the OS and the Snipping Tool app are updated to the latest version that actually has the video recording feature. If the Snipping Tool is of the latest version on Windows 11, you should see the video recording option.
Might be useful: How to Record Screen on Windows 11 or 10 With NVIDIA Share
Reset the Snipping Tool app
If updating didn’t help, try resetting the Snipping Tool. This can fix glitches or settings problems that might be hiding the feature.
- Press the Win + i keys to go back to Settings.
- Go to Apps then Installed apps.
- Find the Snipping Tool in the list.
- Click the three-dot menu next to it and select Advanced options.
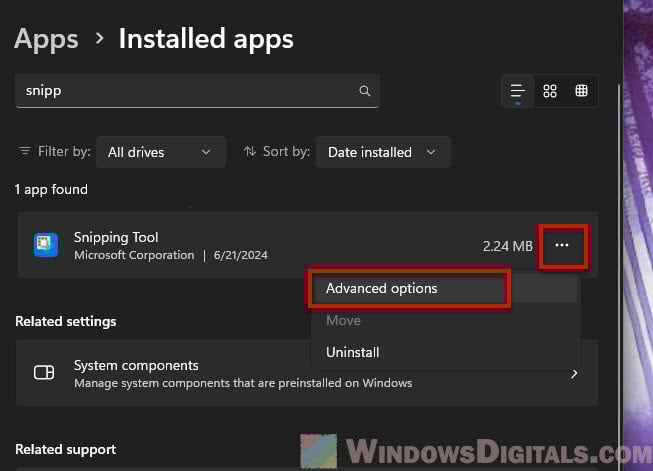
- Scroll down and click on Reset. Confirm by clicking Reset again when prompted.
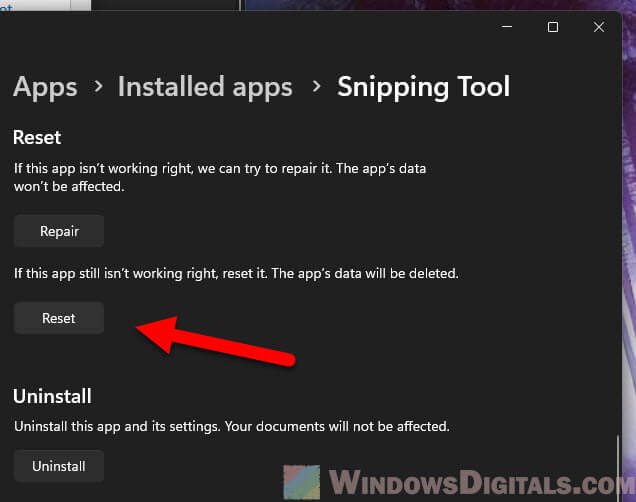
Resetting the app deletes its data, which might fix issues if the app’s setup was wrong. After resetting, see if the video recording option shows up in the Snipping Tool.
Pro tip: Install or Uninstall Windows 11 Snipping Tool via PowerShell
Verify the correct version for video snipping
You can check your Snipping Tool version to see if it’s the latest one which introduces the video recording option.
- Open the Snipping Tool on your computer.
- Inside the Snipping Tool, click the three-dots “See more” menu button and select Settings (sometimes this is a gear icon).
- Scroll down, Look for “About this app” section.
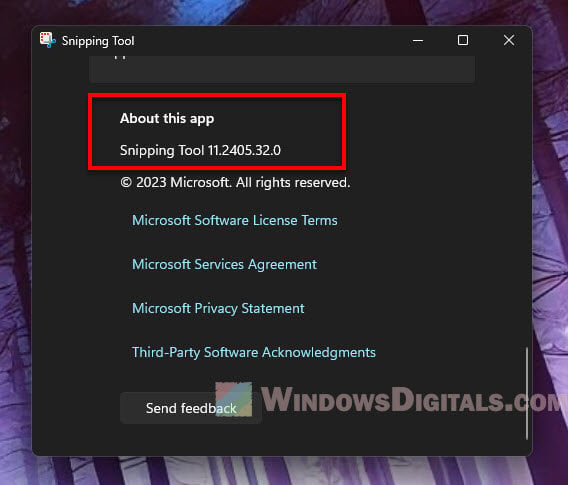
The version that supports video recording should be pretty new. For instance, if you have Windows 11, you might need version 11.2405.32.0 or newer. Compare your version to see if it’s up-to-date.
If your version is still old after updating through the Microsoft Store, you might have an issue with how Windows Update is bringing the latest features to your apps. In this case, go to the Windows Update settings, choose Advanced options, and make sure the option to get updates as soon as they’re available is turned on.
Related guide: How to Find Snipping Tool History in Windows 11 or 10
One last thing
If you’ve updated your Windows 11, checked the Microsoft Store for updates, reset the app, and made sure you have the right version, but still don’t see the option, it might be a bigger system problem. Try to run System File Check to see if it can fix it. If it doesn’t, you might need to find a pro to help you out if you really need the video recording feature in the Snipping Tool.


