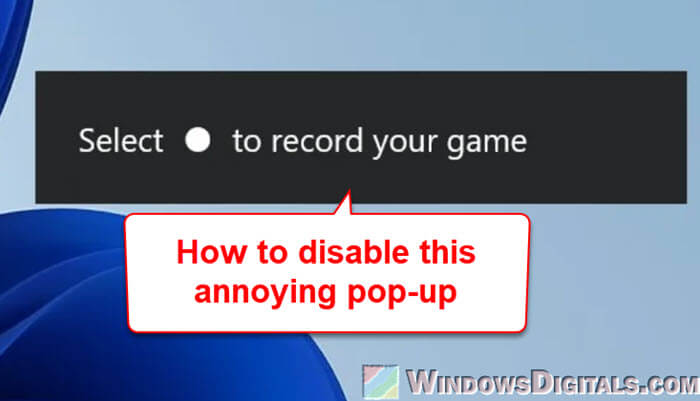
If you’re seeing an annoying pop-up that says “Select ◯ to record your game” whenever you start a game or open a full-screen app in Windows 11, this guide will show you how to completely disable this pop-up and prevent it from appearing again each time you launch a game.
Also see: How to Remove Xbox Game Bar From Windows 11
Page Contents
Why are you seeing the “Select ◯ to record your game” pop-up?
The “Select ◯ to record your game” prompt appears because of the Xbox Game Bar, a built-in feature of Windows 11. The Xbox Game Bar is a tool created by Microsoft for gamers to capture video, take screenshots, and even stream gameplay directly. However, for many users, the constant pop-ups and notifications can become more of a distraction than a help.
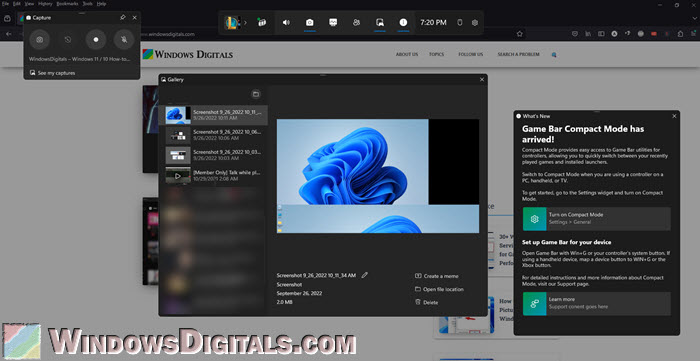
The reason why you may be seeing this pop-up after every game launch is due to the Xbox Game Bar being enabled by default. When you reinstall Windows 11, certain default settings are restored, including those related to gaming features like Game Bar. Unless you specifically disable it, Game Bar is set to show tips and reminders when you start a game.
In addition, Windows updates sometimes reset settings to their default, which means that if you previously turned off the Game Bar and suddenly it started appearing again, an update could be to blame.
The good news is that you have several ways to get rid of this annoying pop-up, and in this article, we will walk you through each method.
Might be useful: How to Disable Desktop Pop Up Notifications on Windows 11
How to disable the “Select ◯ to record your game” pop-up
Disable “tips” in Xbox Game Bar settings
One of the simplest ways to stop seeing the “Select ◯ to record your game” prompt is to turn off tips in the Xbox Game Bar settings. This can be done directly through the Game Bar interface.
- Press Win + G to open the Xbox Game Bar.
- Once the Game Bar overlay is on your screen, click on the Settings gear icon.
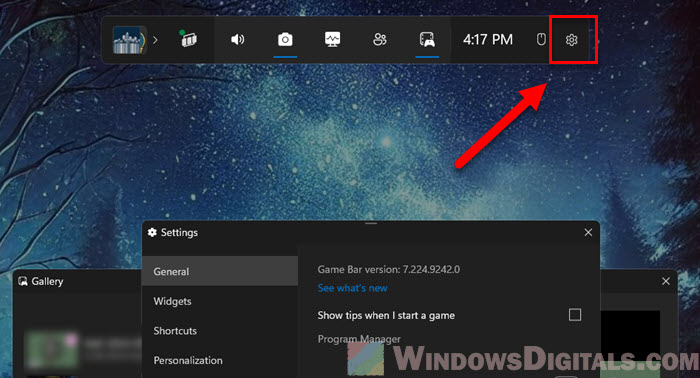
- In the settings menu, navigate to the General tab and uncheck the box that says “Show tips when I start a game“.
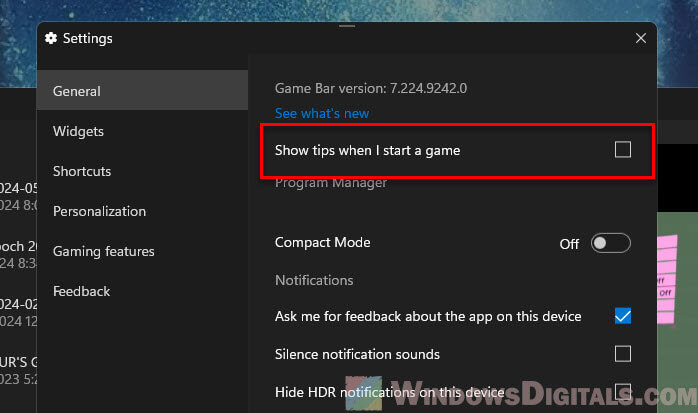
After completing these steps, the pop-up should no longer appear when you start your games.
Disable Xbox Game Bar recording feature
If you don’t really use the Xbox Game Bar for recording or taking screenshots, it may be best to just disable it completely. This can be done in the Windows settings.
- Press Win + i to open the Settings app.
- Click on Gaming from the left-hand menu, then select Captures.
- Toggle the switch to Off where it says “Record what happened“.
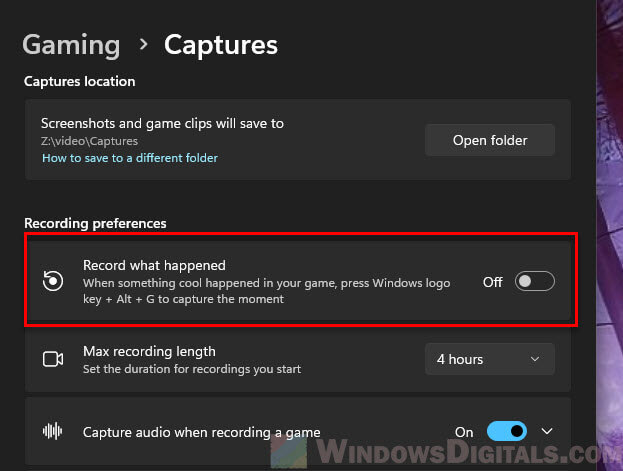
Optional guide: How to Record Screen on Windows 11 or 10 With NVIDIA Share
Uninstall Xbox Game Bar entirely via PowerShell
For those who prefer a more thorough approach, you can completely uninstall the Xbox Game Bar from your system using Windows PowerShell. This option is ideal (that’s what most pro users usually do when they reinstall Windows) if you do not plan on using any of the Game Bar’s features in the future.
- Press Win + S, type “PowerShell,” right-click on Windows PowerShell, and select Run as administrator.
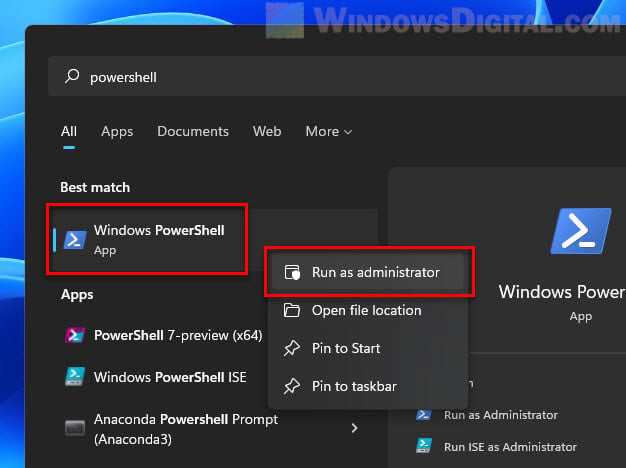
- Manually type or simply paste the following command and press Enter:
Get-AppxPackage Microsoft.XboxGamingOverlay | Remove-AppxPackage
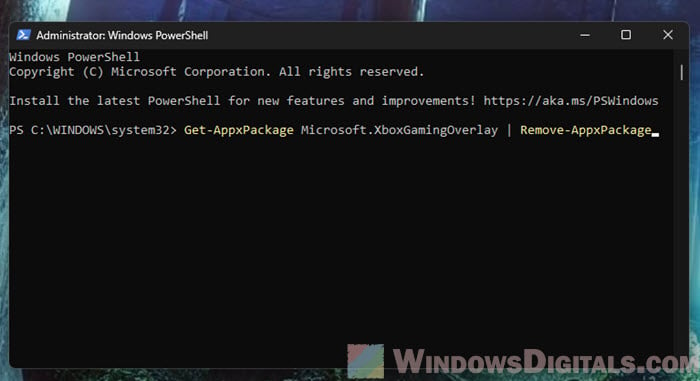
This command line will remove the Xbox Game Bar from your OS entirely, including the feature that triggers the “Select ◯ to record your game” pop-up. Note that this also means you won’t be able to use any of the Game Bar features unless you reinstall it later.
Disable Game DVR in the registry
After uninstalling Xbox Game Bar, some users might still see a pop-up called “ms-gaming-overlay“, which is a prompt to use Game Bar functions. To fully turn off game-related recording features, you can edit the registry settings.
Warning: Editing the Windows Registry can be very risky (it might brick your OS entirely) if not done properly. Proceed only if you are comfortable making system-level changes.
- Open PowerShell as administrator.
- To disable Game DVR, run the following commands one at a time:
reg add HKEY_CURRENT_USER\SOFTWARE\Microsoft\Windows\CurrentVersion\GameDVR /f /t REG_DWORD /v "AppCaptureEnabled" /d 0
reg add HKEY_CURRENT_USER\System\GameConfigStore /f /t REG_DWORD /v "GameDVR_Enabled" /d 0
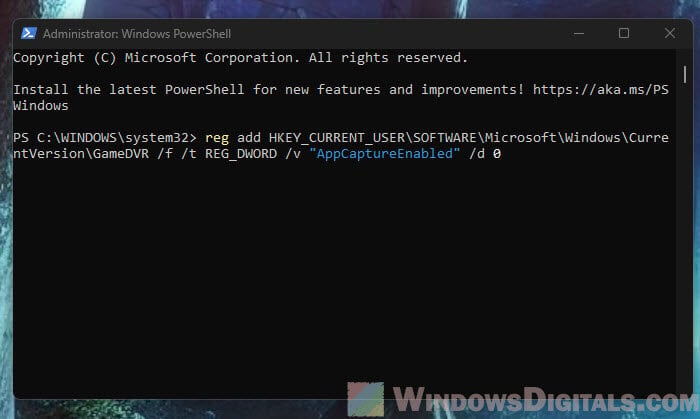
These commands will change the registry settings to turn off Game DVR and recording features, so you won’t see any more Game Bar-related pop-ups.
Pro tip: How to Allocate More RAM to a Game in Windows 11 or 10
Other tips to deal with pop-ups and notifications in Windows 11
Windows 11 is filled with features that can be quite helpful, but at times these features can also become annoying and intrusive, especially for gamers. The following are a few additional tips that could maybe help you remove unnecessary distractions.
Disable notifications while gaming
You can set your computer to minimize interruptions by allowing Focus Assist to turn on automatically whenever you’re playing a game.
- Press Win + i to open the Settings app.
- Click on System, then select Focus.
- Select Notifications under “Related settings”.
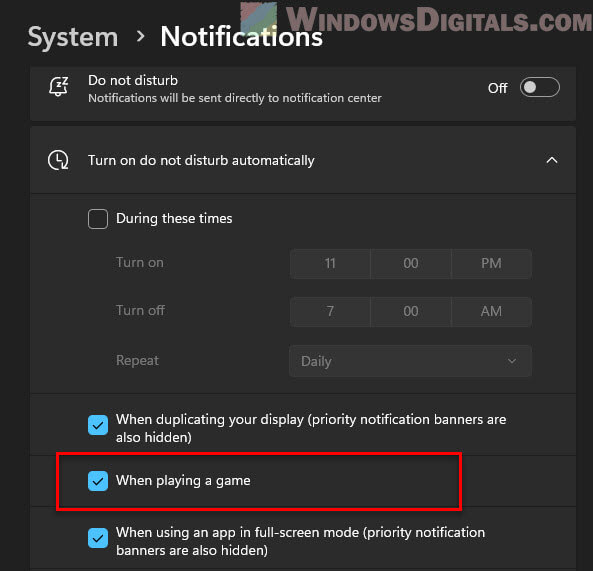
- Then, expand “Turn on do not disturb automatically” and toggle on “When I’m playing a game“. This will make sure that you don’t receive any system notifications while you’re in a game.
Use Steam Overlay instead of Xbox Game Bar
If you are primarily a Steam user, you might find that Steam’s built-in overlay is sufficient for your needs. It allows you to take screenshots, access browser windows, and chat with friends without the need for Xbox Game Bar.
- Open Steam, go to Settings, click on In-Game, and make sure Enable the Steam Overlay while in-game is checked.
- When you’re in the game, to open the Steam overlay, you can simply press Shift + Tab while in the game.
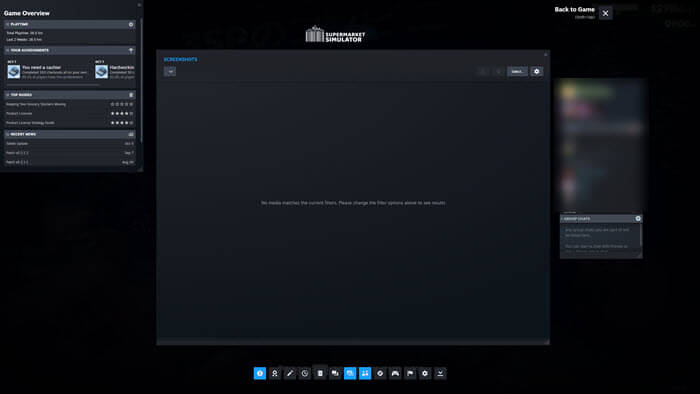
The Steam overlay is lightweight and doesn’t push tips or pop-ups on you, which makes it a more preferable option for many gamers.


