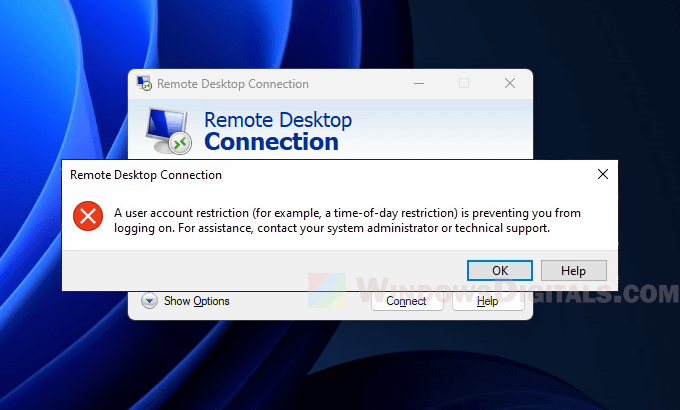
When you try to connect to a computer remotely via RDP (Remote Desktop Connection), there is a very common error message that you might see: “A user account restriction (for example, a time-of-day restriction) is preventing you from logging on. For assistance, contact your system administrator or technical support.” This guide will explain what this error actually means, and show you how to get around it.
Also see: Windows 11 Remote Desktop “An authentication error has occurred”
Page Contents
How to fix the “A user account restriction” error in Remote Desktop
Set up a password for the user account
Trying to connect to an account without a password is a common reason you might see the RDP error about user account restrictions. RDP usually won’t let you connect if the account has no password.
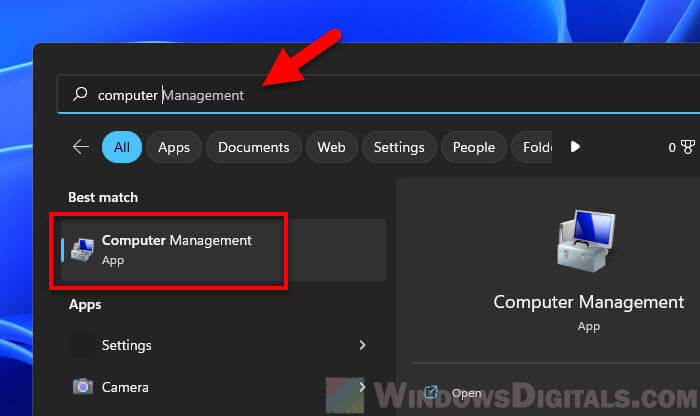
- Press the Windows key or click on the Start button.
- Type “Computer Management” and select it from the results to open.
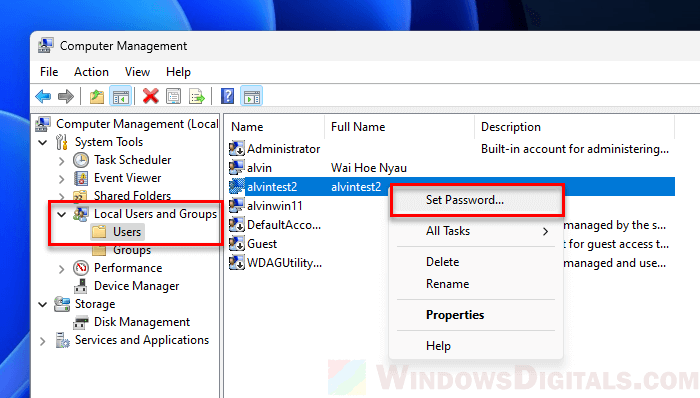
- In the Computer Management window, go to the System Tools tab.
- Click on Local Users and Groups, then select Users.
- Find the user account you want to set a password for, right-click it, and choose Set Password.
- After reading the warning, click Proceed, then type the new password, confirm it, and click OK.
Related resource: Disable Network Level Authentication in Windows 11 or 10
Allow blank passwords for Remote Desktop Connection
If you need to let RDP connect to accounts with no passwords, you can turn off the blank password block. You can do this in the Local Group Policy Editor or the Registry Editor. But be careful, this makes your system less secure.
Using local group policy editor
- Press Windows + R, type
gpedit.msc, and press Enter to open the Local Group Policy Editor.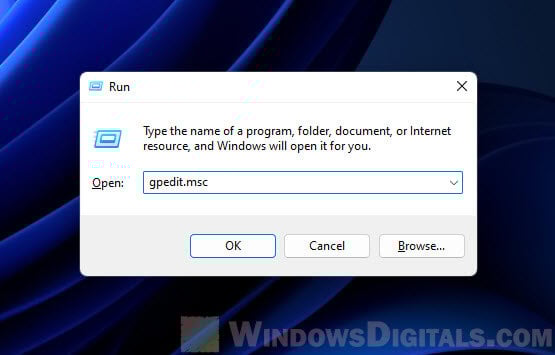
- Go to Computer Configuration > Windows Settings > Security Settings > Local Policies > Security Options.
- Find the policy named “Accounts: Limit local account use of blank passwords to console logon only” and double-click on it.
- Change the setting to Disabled.
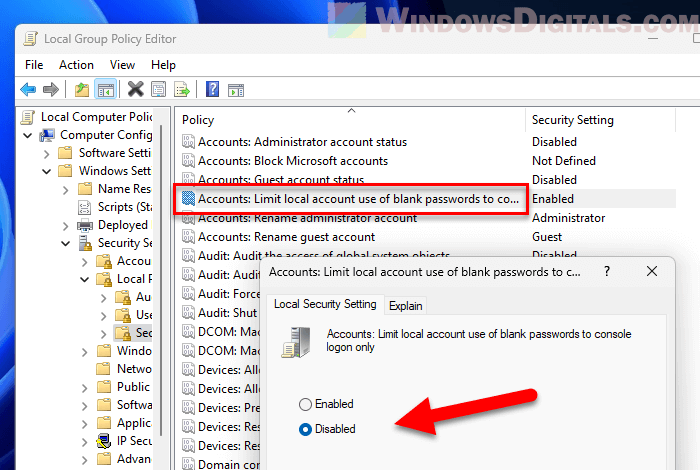
- Click OK and close the Local Group Policy Editor.
- To apply the changes right away, open Command Prompt and type
gpupdate /forceand press Enter.
Using registry editor
- Press Windows + R, type
regedit, and press Enter to open the Registry Editor.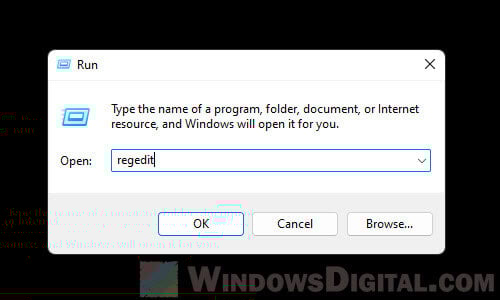
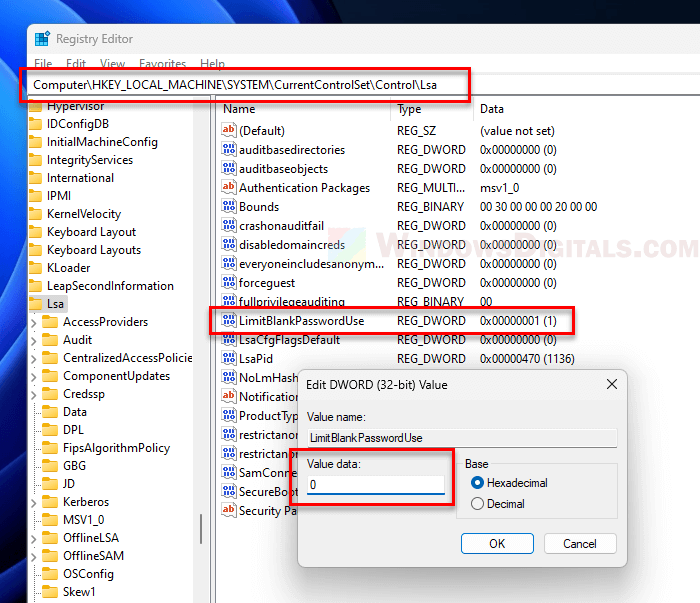
- Go to HKEY_LOCAL_MACHINE > SYSTEM > CurrentControlSet > Control > Lsa.
- Look for the DWORD named LimitBlankPasswordUse. If it’s not there, right-click, select New, then DWORD (32-bit) Value, and name it LimitBlankPasswordUse.
- Double-click on LimitBlankPasswordUse and set its value to 0.
- Close the Registry Editor and restart your computer for the changes to take effect.
Note: You should create a system restore point or backup your registry before making any changes. Changing the registry incorrectly can cause issues as serious as bricking your entire PC.
Pro tip: How to Open an RDP Connection via CMD in Windows 11
Time-of-day restrictions
Sometimes, administrators set time-of-day restrictions to limit when certain users can log into the system. If you’re trying to access the system outside these allowed hours, you’ll run into the “A user account restriction” RDP error. The option to set login hours is mainly available for domain user accounts through Active Directory Users and Computers on a domain controller.
How to check and change login hours
- Open Active Directory Users and Computers.
- Find the user’s account, right-click, and select Properties.
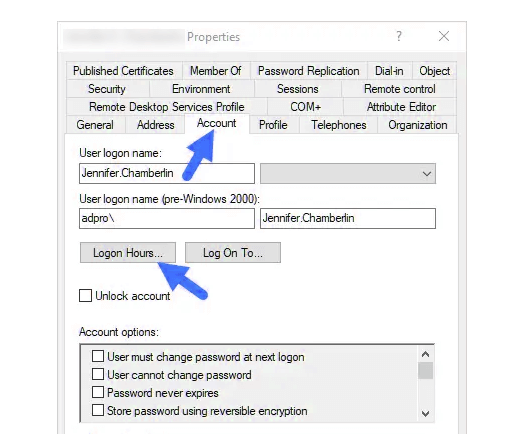
- Go to the Account tab and click on Logon Hours to see or change the allowed times.
Account is locked out
If you try logging in too many times and fail, the account might get locked out for safety purpose.
How to deal with account lockout
On the Remote Computer:
- Press Windows + R, type
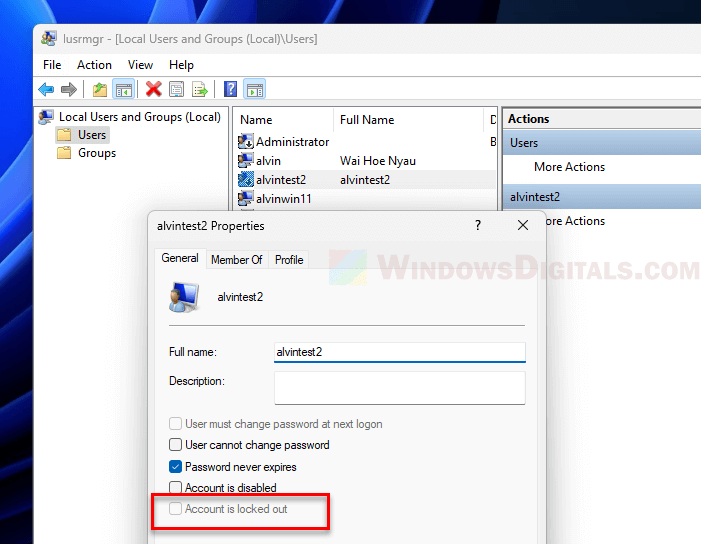
lusrmgr.msc, and press Enter to open Local Users and Groups. - Click on Users, then double-click on the account you’re concerned about.
- Make sure the Account is locked out option is unchecked.
On a Domain Controller:
- Open Active Directory Users and Computers.
- Find and right-click on the user’s account, then choose Properties.
- Go to the Account tab and make sure the Account is locked out option is unchecked.
Related guide: How to Remote Desktop Over The Internet in Windows 11
Group policy restrictions
There might be Group Policy settings that are stopping RDP access either for the user or the machine.
- Open
gpedit.mscto get into the Local Group Policy Editor. - Go to Computer Configuration > Windows Settings > Security Settings > Local Policies > User Rights Assignment.
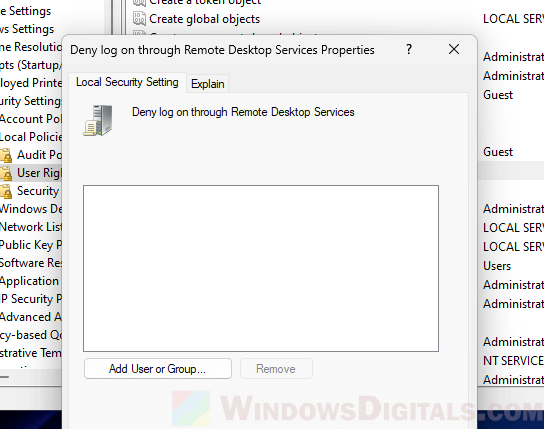
- Look for policies like “Deny log on through Remote Desktop Services” to make sure the user isn’t listed there.
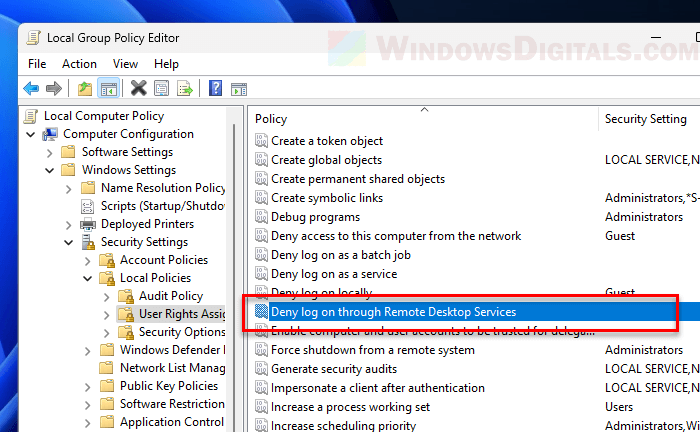
- If the user is listed, remove them to allow RDP access.
Rules that require complex passwords
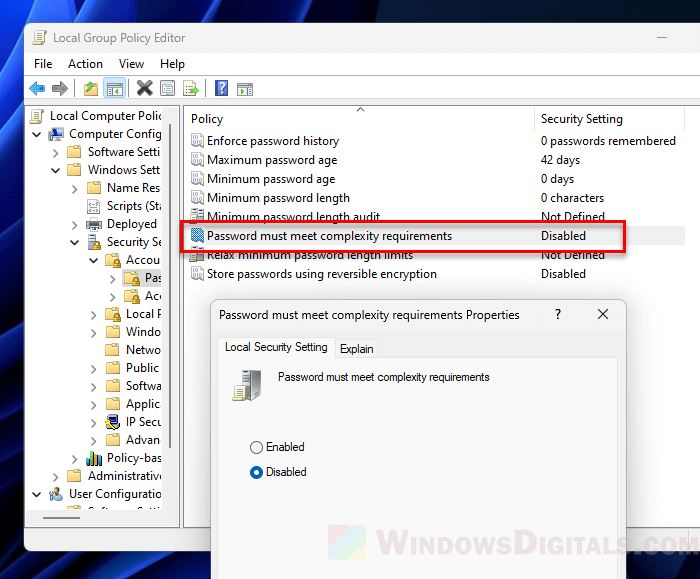
Windows might have rules that require strong passwords. If your account’s password doesn’t meet these rules, you might not be able to use RDP.
Check the password policies
- Press Windows + R, type
gpedit.msc, and press Enter to open the Local Group Policy Editor. - Go to Computer Configuration > Windows Settings > Security Settings > Account Policies > Password Policy.
- Look at the policies, especially “Password must meet complexity requirements.” If it’s turned on, passwords need to include uppercase and lowercase letters, numbers, and special symbols.
