When you’re trying to fix network issues, sometimes you need to send a ping to an IPv4 address instead of an IPv6 one. But, it’s not always a walk in the park because you might end up pinging an IPv6 address by mistake. This guide will show you how to ping IPv4 and IPv6 addresses using the command prompt in Windows 11 or 10, and answer some common questions you might have.
Also see: How to Ping IPv6 Address in Windows 11
Page Contents
Why ping an IPv4 address from an IPv6 network?
Even though IPv6 is supposed to replace IPv4, we’re not quite there yet. Since IPv4 is still around, there are times when you need to ping an IPv4 address from an IPv6 network. Here’s why you might need to do this:
- Testing how well your new IPv6 devices talk to the older IPv4 ones.
- Figuring out connectivity problems in networks that use both IPv4 and IPv6.
- Comparing the network speed or the loss of data packets between IPv4 and IPv6 addresses.
Related resource: How to Check IP Address in Windows 11
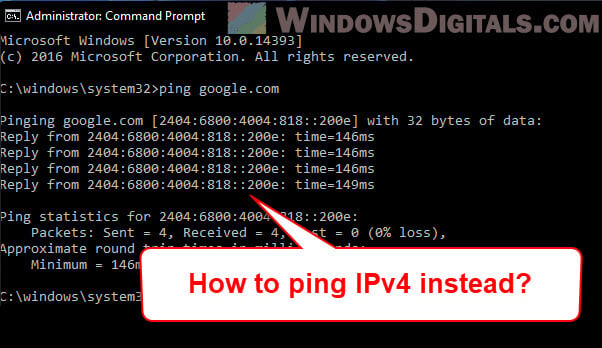
How to ping IPv4 address instead of IPv6 in CMD
In Windows 10 and 11, the system usually picks IPv6 over IPv4 if both are available, thanks to the push towards using IPv6. But if you want to make sure you’re pinging an IPv4 address, you can use the “-4” switch like this:
ping -4 www.example.com
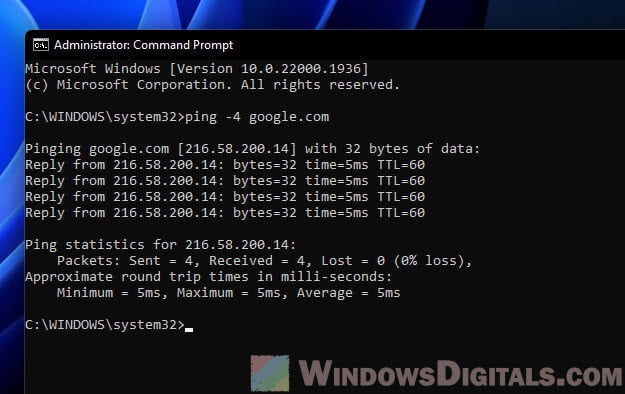
Just change “www.example.com” to the address or hostname you’re trying to ping.
Useful tip: How to Find The IP Address of a Website in Windows 11
Pinging using IPv6 Instead of IPv4
If you need to test IPv6 connectivity or functions, you might want to ping an IPv6 address on purpose. For this, Windows ping command has a “-6” switch:
ping -6 www.example.com
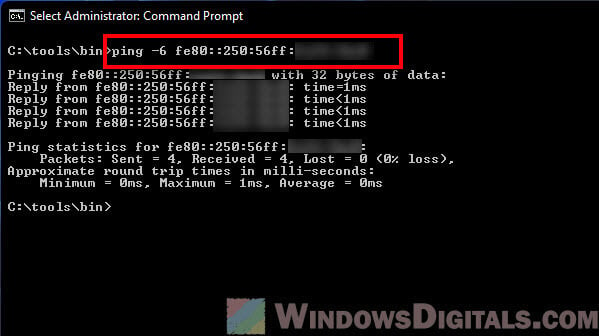
Swap “www.example.com” with the actual address or hostname you need to ping. This ensures the ping uses IPv6.
How to prefer IPv4 over IPv6 in Windows 11/10
If you often need to use IPv4 instead of IPv6, changing settings every time with the “-4” switch might be tedious. There’s a way to make Windows prefer IPv4 for all connections by tweaking the prefix policies:
- Open Command Prompt as an admin by searching for “cmd” in the Start menu, right-clicking Command Prompt, and choosing “Run as administrator”.
- Check the current prefix policies by typing:
netsh interface ipv6 show prefixpolicies
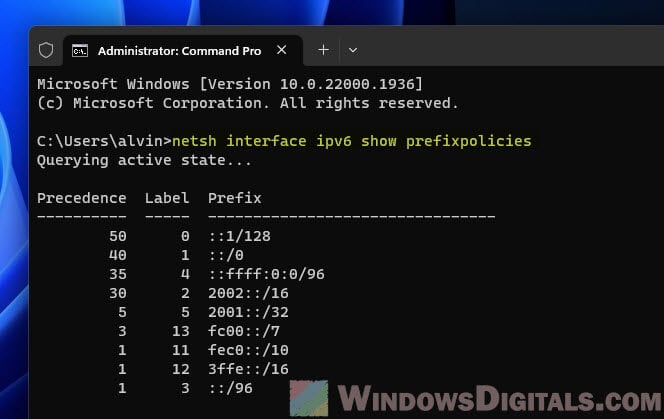
You’ll see a list of prefix policies with precedence levels. A higher value means more priority. - To make IPv4 the preferred option, increase its precedence with this command:
netsh interface ipv6 set prefixpolicy ::ffff:0:0/96 60 4
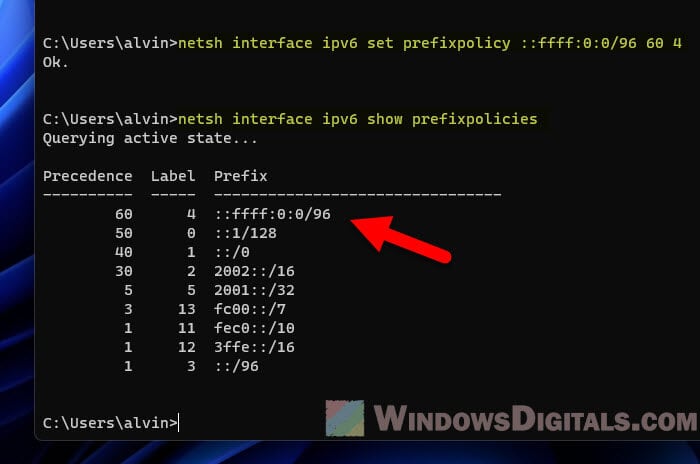
This bumps up IPv4’s precedence over the default for IPv6. - Running the “show prefixpolicies” command again will now show IPv4 with higher precedence.
Be careful with changing prefix policies, as it can significantly affect your network connections.
Learn more: How to Use Netsh Interface IP Set Address or DNS in CMD
If you need to go back to giving IPv6 priority over IPv4, you can reset the precedence with this command:
netsh interface ipv6 set prefixpolicy ::ffff:0:0/96 35 4
This sets IPv4’s precedence back to the default, putting IPv6 on top again.
Some final words
Dealing with network communication in a world that uses both IPv4 and IPv6 can be tricky. But, with the ping command in Windows and its “-4” and “-6” switches, you can flexibly diagnose and solve problems. Getting the hang of these commands will be super helpful as we move more towards using IPv6 (soon I believe).
