Windows 11 and Windows 10 both have a built-in file compression tool that allows you to zip files and folders without the need for any third-party software like WinRAR or 7Zip. This tutorial will show you how to quickly compress any number of files and folders with just a few clicks.
Also see: Use Tar to Create Zip Archive Files in Windows 11
Page Contents
Compress files and folders in Windows 10 or 11 without software
In the directory where the files and folders you want to compress are located, follow the steps below to zip them up:
- Select the files and folders you want to compress. You can do this by clicking on a single file or folder, holding down the Ctrl key and clicking on multiple items, or holding down the Shift key, left-clicking and dragging to highlight the items you want to zip.
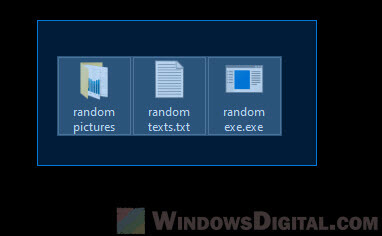
- Right-click on any of the highlighted items, and a menu will appear. Hover over the “Send to” option, and then select “Compressed (zipped) folder” from the submenu. Alternatively, you can also click on the “See more” three-dots menu icon in the File Explorer ribbon and select “Compress to Zip file”.
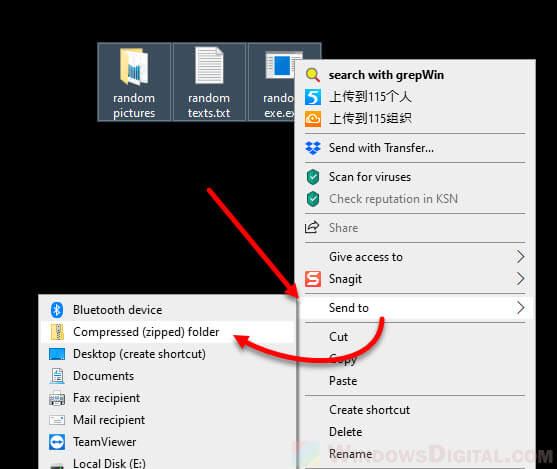
- A new zip folder will be created in the same directory where the files you’re zipping reside. The name of the zip folder will be the same as the first file or folder you selected by default, but you can rename it to something else if you want.
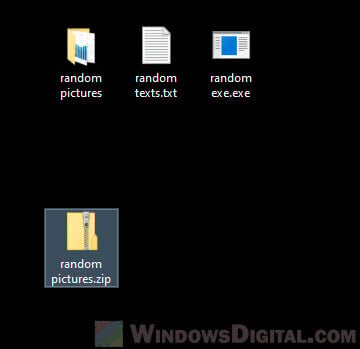
- To add more files or folders to the same zip folder, simply drag and drop them into the open zip folder.
You can zip multiple files and folders simultaneously by selecting and highlighting them together before starting the compression process. There is no limit to the number of files and folders you can compress in one go.
Pro tip: How to Split a File Into Multiple Files in Windows 11
How to unzip a zipped folder without software
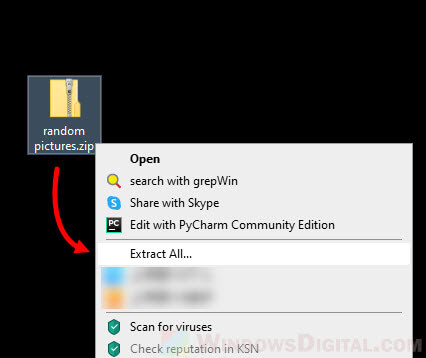
To unzip a zipped folder in Windows 11 or 10, simply right-click on the zip folder and select “Extract all“. This will extract all the files from the compressed folder into a new folder with the same name as the zip folder.
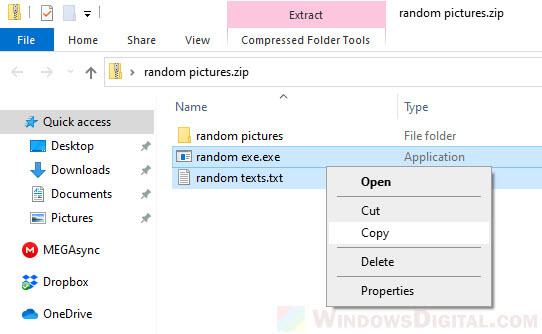
Alternatively, you can also browse the zip folder directly by double-clicking on it. From there, you can copy any files or folders you want and paste them elsewhere. Selectively copying and pasting them out of the zipped folder also means extracting them.
Please note that the default Windows built-in compression tool only works with “.zip” extension files without password protection. If you need to extract other compression extensions such as “.rar” or “.7z“, you will need to install the respective third-party compression software such as WinRAR and 7-Zip.
Linked issue: How to Extract Japanese Zip Files with WinRAR or 7-Zip
Zipping a file with password
If you need to zip files with password protection, you will need to use a third-party compression software such as WinRAR, WinZip, or 7zip. These third-party compression tools have password protection features that allow you to protect your files and folders with a password.
For example, to compress a file with a password using WinRAR, simply right-click on the file you want to compress and select “Add to archive“. From there, you can set a password for the zip file by clicking on the “Set password” button and entering your desired password.
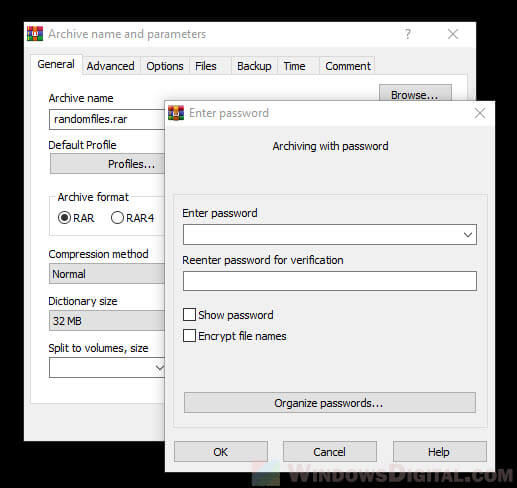
WinRAR, WinZip and 7zip are the 3 most popular file compression software for Windows users. Other than the password protected compression feature, they have much better compression method to further reduce the size of your files and folders. You can do a lot more with your zip files and folders with these software if you don’t mind the hassles of installing them.
