Windows 11 has a voice typing feature that allows users to type by speaking. Windows voice typing uses online speech recognition powered by Azure Speech services. This tutorial will show you how to voice type into any text box in Windows 11.
How to use voice typing in Windows 11
As mentioned previously, the voice typing feature in Windows 11 uses online speech recognition which requires your PC to be connected to the internet so that your voice can be recognized. You will also need to have a working microphone to receive your voice.
Read: How to test Microphone in Windows 11 to see if it’s working.
To start voice typing, first, you will need to place your cursor in a text box, just like you would before typing using your keyboard. In most text boxes or text fields, you will see a blinking cursor when the text box is actively selected.
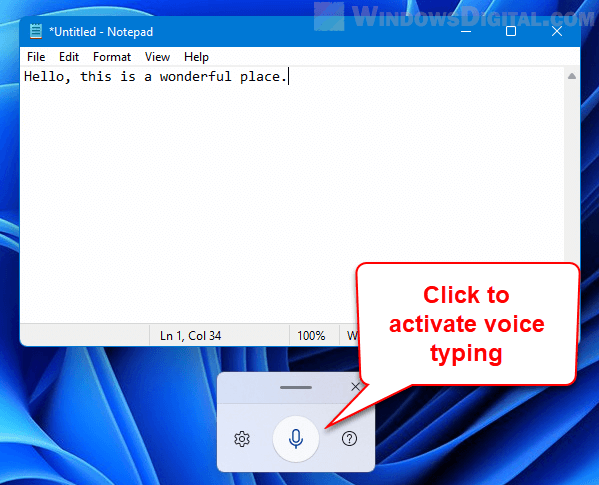
Then, press the Win + H key on your keyboard to turn on voice typing. Windows will then show a voice typing pop up window and will automatically start listening. You can start speaking as soon as it shows “Listening…“. As you speak, the texts will appear in the text box.
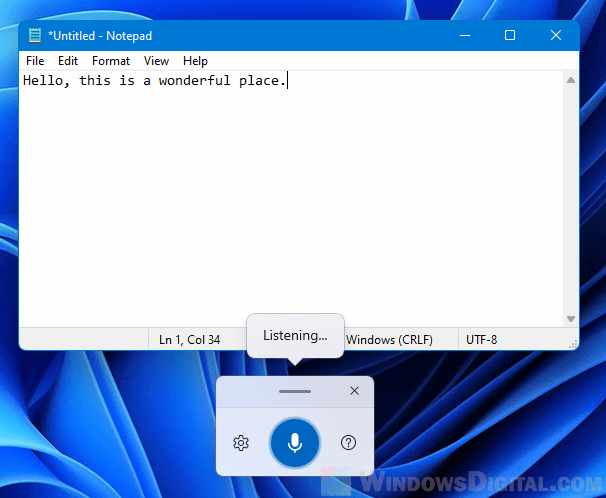
To stop voice typing, you can say the phrase “Stop listening” and the voice typing will stop listening right away. To re-start voice typing after telling it to stop listening, press the Win + H key again.
If the voice typing window doesn’t show the Listening alert or if the Microphone icon in the window is white in color instead of blue, manually click on the Microphone icon to activate the voice typing again.
Interesting tip: Funny Ways to Break Google Translate Voices into a Stroke
How to delete/erase last spoken word or phrase
To delete or erase the last word or phrase you voice typed, say the command “Delete that” or “Erase that”. For a list of voice typing commands you can use, see below.
| Voice typing command | What you can say |
|---|---|
| Stop or pause voice typing | Pause voice typing |
| Pause dictation | |
| Stop voice typing | |
| Stop dictation | |
| Stop listening | |
| Stop dictating | |
| Stop voice mode | |
| Pause voice mode | |
| Erase last spoken word or phrase | Delete that |
| Erase that | |
| Scratch that | |
| Select last spoken word or phrase | Select that |
To view voice typing commands for other languages, go to this page.
How to voice type punctuation in Windows 11
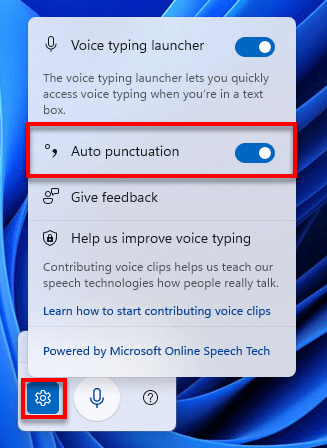
By default, punctuation is not automatically inserted as you speak. You can, however, enable the “Auto Punctuation” option in the voice typing settings to allow Windows to automatically add punctuation as you speak. To enable auto punctuation, press Win + H to open the voice typing window. Next, click on the settings icon and enable the checkbox that says “Auto punctuation“.
As for other less common punctuation marks, you can manually add a specific punctuation by saying a voice command (e.g. comma, full stop, hyphen, etc.). Refer to the list below for voice command you can say to insert a specific punctuation.
| Punctuation | What you need to say |
|---|---|
| ‘ | begin/open single quote |
| ’ | end/close single quote |
| – | Hyphen |
| minus sign | |
| n-dash | |
| — | m-dash |
| ! | exclamation mark/point |
| # | number/pound sign |
| $ | dollar sign |
| % | Percent sign |
| & | ampersand, and sign |
| ( | left/open parentheses |
| ) | right/close parentheses |
| * | asterisk |
| , | comma |
| . | period, full stop |
| … | ellipsis, dot dot dot |
| / | forward slash |
| : | colon |
| :( | frowny face |
| :) | smiley face |
| ; | semicolon |
| ;) | winky face |
| ? | question mark |
| @ | at sign, at mention |
| [ | left/open (square) bracket |
| \ | backslash |
| ] | right/close (square) bracket |
| ^ | caret symbol |
| _ | underscore |
| ` | backquote, backtick |
| { | left/open (curly) brace |
| | | vertical bar sign/character, pipe character |
| } | right/close (curly) brace |
| ~ | tilde symbol |
| “ | open quotes |
| ” | close quotes |
| £ | pound sterling sign |
| ¥ | yen sign |
| € | euro sign |
| + | plus sign |
| < | less than sign, left/open angle bracket |
| <3 | heart emoji |
| = | equal sign |
| > | greater than sign, right/close angle bracket |
| ± | plus or minus sign |
| × | multiplication sign |
| ÷ | division sign |
| § | section sign |
| © | copyright sign/mark |
| ® | registered sign |
| ° | degree symbol/sign |
| ¶ | paragraph sign/mark |
| new line | new/next line |
| new paragraph | new paragraph |
| ‘s | apostrophe-s |
Use voice typing for other languages
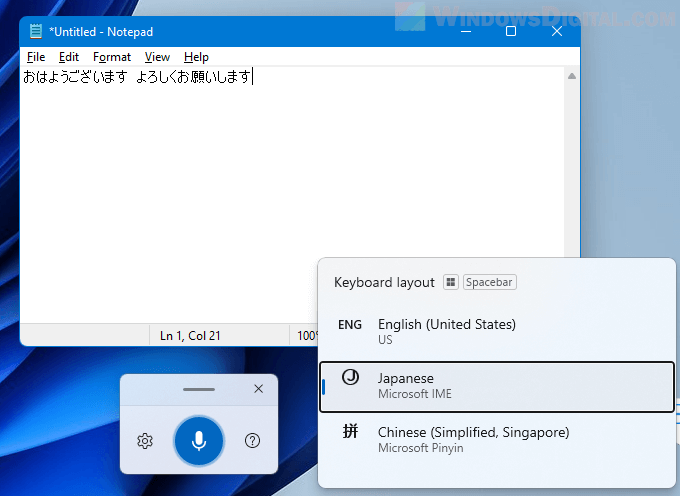
Windows 11 voice typing also supports other languages. If you have already installed the language on your Windows, you can voice type using your desired language by first placing your cursor in the text box you want to voice type. Then, press Win + Spacebar to switch to your desired language. After that, press Win + H to turn on voice typing and start speaking in your language.
If you have not already added the language in your Windows, refer to this guide: How to Add a Language in Windows 11.
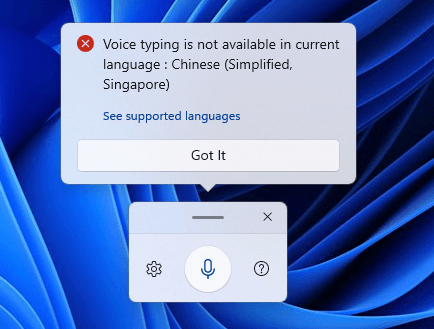
If the language you switched to does not support voice typing, it will tell you so by showing you an error that says “Voice typing is not available in current language“. Click the “See supported languages” link in the message to view a list of languages that support voice typing.
