If you have a Bluetooth wireless controller, such as a PS5 (DualSense), PS4 (DualShock 4), or Xbox controller, you can connect it to your PC and set it up as a wireless mouse, keyboard, or both combined on a Windows 11 PC. There are a few software options that can help achieve this. We recommend using the Steam client, which has a feature that allows you to configure your controller as a mouse and/or keyboard in Windows 11.
This is achievable by binding/mapping buttons on the controller to keyboard keys or mouse clicks and setting the analog as a joystick mouse or mouse scroll, all based on your preference. You can bind any button on your controller to any mouse click, keyboard key, or any Windows action you want. In this guide, we will show you how to set up and configure your wireless controller as a wireless mouse and keyboard in Windows 11 using Steam.
Also see: Play PC Game with PS5, PS4 or Xbox Controller in Windows 11
Page Contents
How to use PS5, PS4 or Xbox Controller as Mouse and Keyboard on Windows 11
To summarize, you need to first pair your wireless controller to your Windows PC. Then, you need to download and install the Steam client and configure your wireless controller as a mouse and keyboard via Steam. Follow the steps below to do so.
1. Connect your wireless controller to Windows 11 PC
First, connect and pair your wireless controller to your PC via Bluetooth on Windows 11. To connect a Bluetooth controller to your Windows PC, your PC must have a built-in Bluetooth adapter or an external USB Bluetooth receiver.
Press Win + i keys to open Settings on Windows 11. Select Bluetooth & devices on the left pane. Click on Devices. Make sure Bluetooth is turned On.
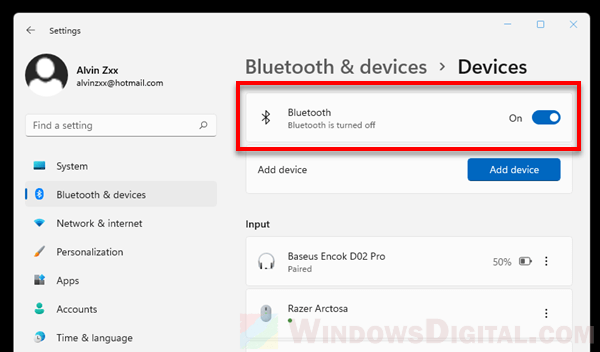
To put your PS4 or PS5 controller into pairing mode, press and hold both the Share and PlayStation buttons until the light bar flashes.
To put a Xbox controller into pairing mode, press and hold the Guide button and the Pairing button for three seconds until the Guide button flashes.
Related issue: Bluetooth Not Detecting Devices in Windows 11
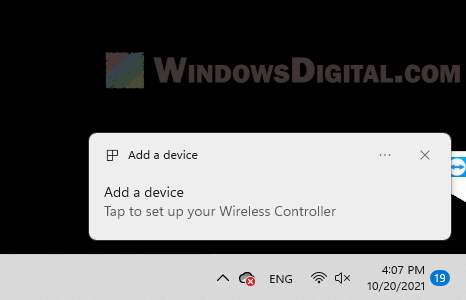
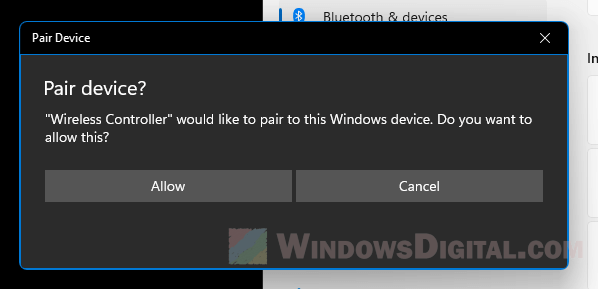
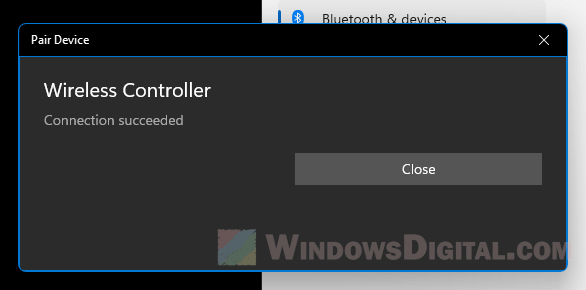
On your Windows PC, as soon as you put your controller into pairing mode, Windows should be able to detect it and prompt a notification asking if you want to pair the “Wireless Controller”.
Click Allow to allow Windows to pair your wireless controller.
If the pairing is successful, Windows will show a message that says “Connection succeeded”.
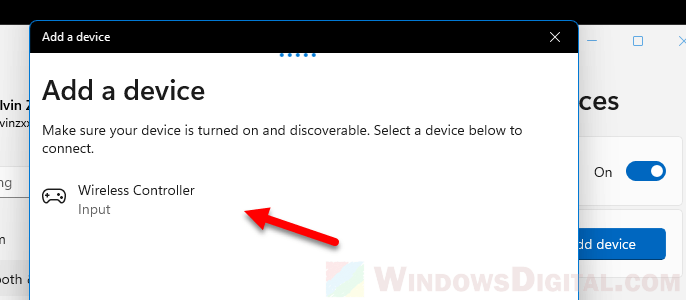
If no notification shows up, go to Settings > Bluetooth & devices > Devices > Add device > Bluetooth, to manually add your wireless controller (make sure your controller is in pairing mode so that Windows can detect it).
2. Download and Install Steam client
Next, download and install Steam client on your PC. You can download Steam client from Steam’s official website as shown below.
https://store.steampowered.com/about/
Once installed, open Steam and run it as administrator. Then, sign in to your Steam account. If you do not have a Steam account yet, click create a new account to create one.
Related resource: How to use PS5 DualSense Controller on Xbox Game Pass PC
3. Configure your controller as mouse and keyboard on Steam
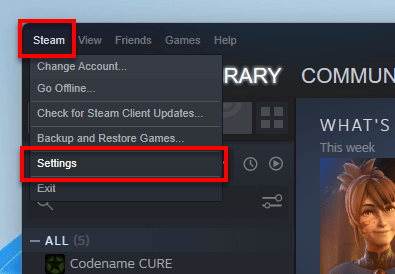
Once you’re signed into Steam, in the Steam client window, click on Steam at the top left corner of the window, and then select Settings.
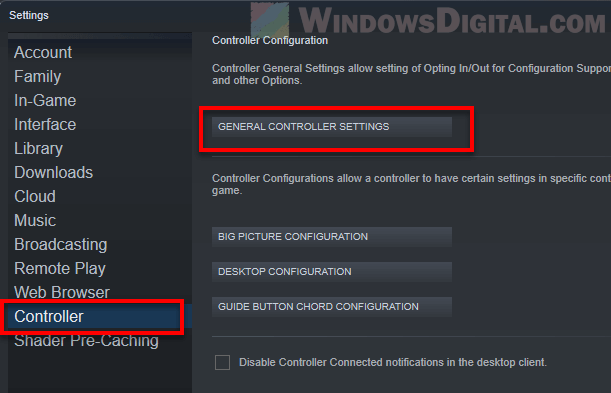
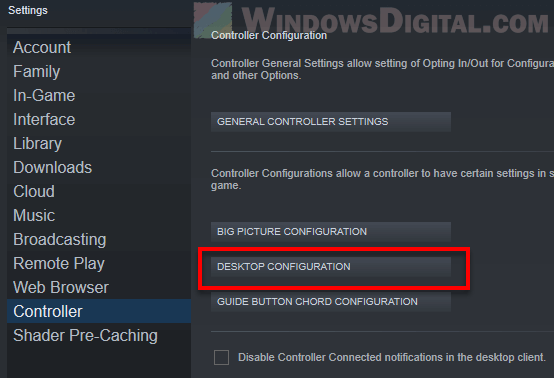
In the Settings window, click on Controller on the left pane. First, you will need to enable the configuration support for your wireless controller. Click on General Controller Settings.
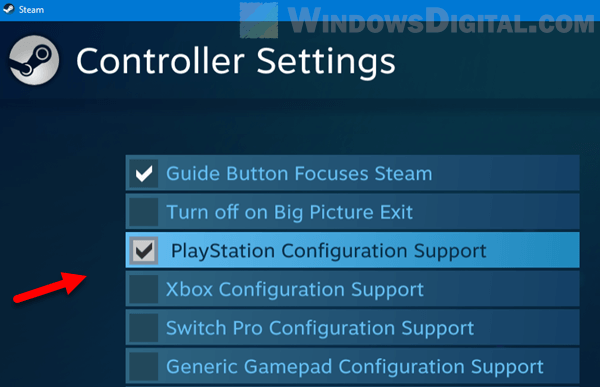
Then, enable the configuration support for your controller. For example, to enable PlayStation controller, select the PlayStation Configuration Support checkbox. Close the window.
Back to the Settings window, click on Desktop Configuration.
From here, you can configure and map any buttons on your controller to a mouse or keyboard action.
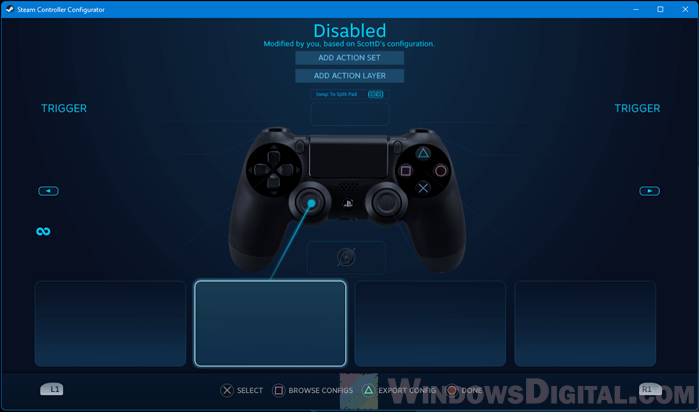
For example, to set the analog stick as joystick mouse, click on the analog stick. Under Style of Input, select Joystick Mouse.
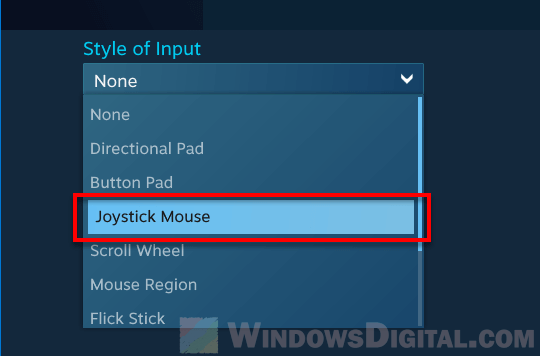
Optionally, you can configure other settings such as Mouse sensitivity (how fast mouse cursor moves on screen as you move your analog stick), analog click action, haptics intensity, mode shifting and output axis. For additional advanced settings, click on Additional Settings.
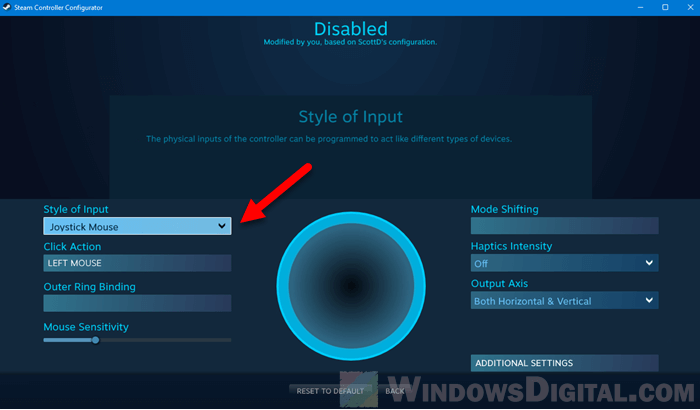
Click Back once you’ve done configuring the analog stick.
To map a controller’s button to a keyboard key or mouse click, click on the button pad. Under Style of Input, select Button Pad.
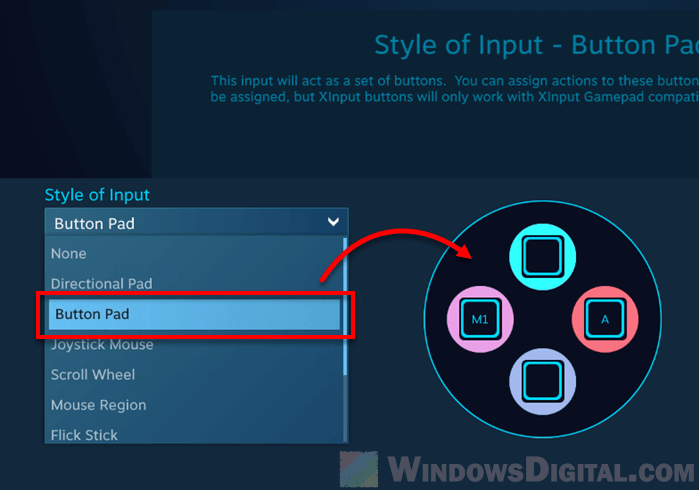
Next, click on the button that you want to bind an action to, and then click on the mouse or keyboard action you want to bind the button to.
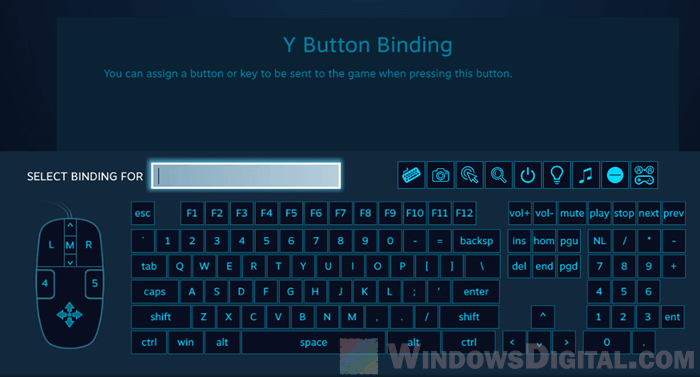
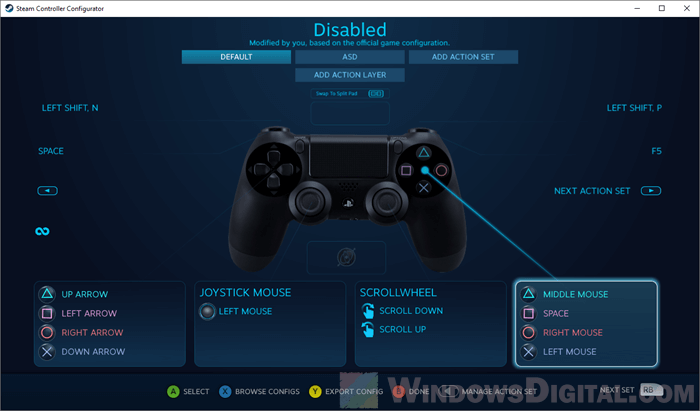
For example, as shown in the screenshot below, I’ve mapped the Square button on a PS4 controller to mouse left click action, and the Circle button to A keyboard key.
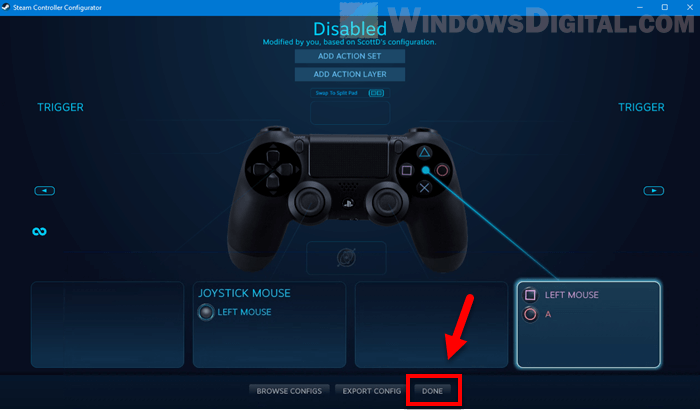
Click Done to save the changes after you’ve done configuring your controllers.
You can configure your controller’s buttons and analog sticks to any mouse or keyboard action you want. Simply select a button, then choose a style of input, and finally choose a key you want to bind the button to.
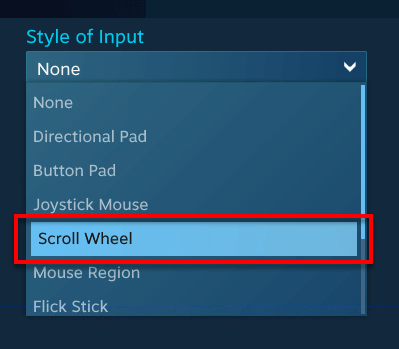
Tip: You can set one of your analog stick to mouse scroll wheel by selecting the analog stick and then select Scroll Wheel for the style of input.
The screenshot below shows how I setup my DualShock 4 wireless controller as my mouse and keyboard so that I can sit back and still be able to interact with my PC with just my controller.
Not enough buttons on Controller for more keyboard keys?
As buttons on a controller are limited, you can bind them to only a few keyboard keys. If you want to be able to press all keyboard keys wirelessly with your controller, you can try to use an on-screen keyboard instead.
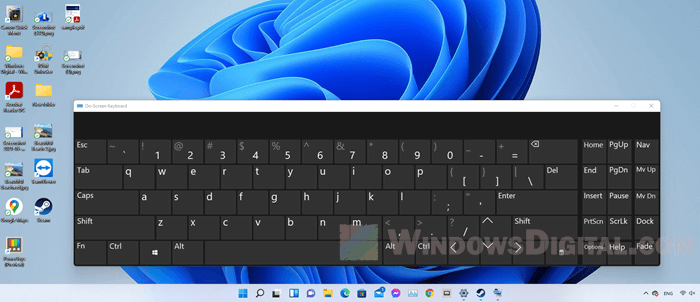
In Windows 11, there is a built-in app called On-Screen Keyboard which does just that. It will show a virtual keyboard on your screen which you can click on using your mouse cursor.
Simply search for “on-screen keyboard” on the Start menu and open the app to try it.


