If a file or folder is appeared to be hidden, or if you are not sure if it’s even there, you can configure Windows 11 to always show hidden files and folders so that they become visible in the File Explorer. Then, you can configure the properties of the file or folder to permanently unhide it so that they will always be visible even when “show hidden files” option is disabled.
The feature to hide files and folders is usually meant to protect important system files from accidental deletion or modification. If you set File Explorer to show hidden files, you should be able to see many of them in the Windows folder and on the root of your C: drive.
Some programs or apps also have hidden files and folders in their installation folders. Unfortunately, this feature is also utilized as a tactic in viruses and malware to hide a possibly malicious file from the user. Though most anti virus program would have no problem detecting malicious hidden files and folders and getting rid of them, if you believe such files exist in a directory, you can configure File Explorer to show all hidden files and folders, and then decide if you want to delete such files.
Users can also manually hide a file or folder so that it become invisible when show hidden files option is disabled. If you have hidden a file or folder by accident or if you want to check if there is any hidden file or folder in a directory and wish to unhide it, follow the instructions below to do so.
How to unhide file or folder in Windows 11
There are two parts in this guide:
- Set Windows 11 File Explorer to always show hidden files and folders.
- Permanently unhide a file or folder via its properties.
Page Contents
Always show hidden files and folders in Windows 11
Hidden files and folders are not visible in the File Explorer by default in Windows 11. To be able to see hidden files and folders, you need to change a setting called “Show hidden files, folders and drives” through the Folder Options in File Explorer. Follow the steps below to do so.
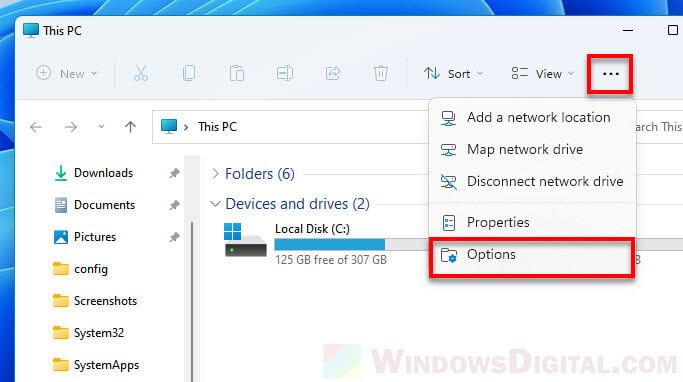
1. In Windows 11, open File Explorer or This PC. In the File Explorer window, click the See more button (three dots horizontal button) and select Options.
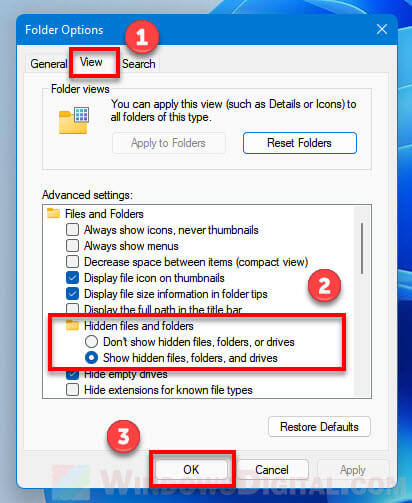
2. Next, select View tab. In the Advanced settings section, select “Show hidden files, folders, and drives” under “Hidden files and folders”. Then, click OK to apply the changes.
You should now be able to view all hidden files, folders and drives in the File Explorer in Windows 11.
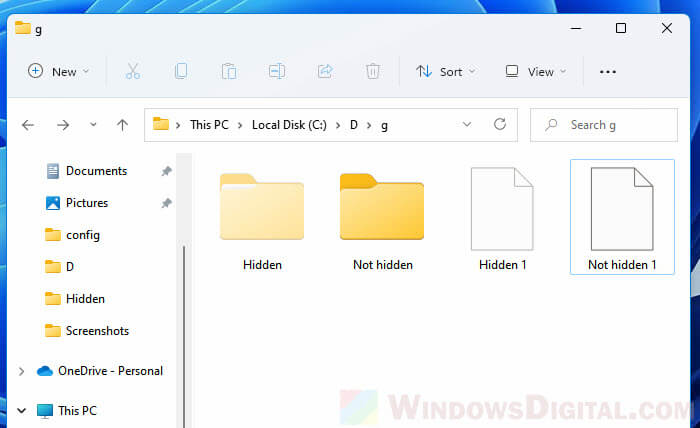
Unhide a file or folder in Windows 11
To unhide a file or folder so that they will remain visible even if you set File Explorer to not show hidden files or folders, do the following steps.
1. Right-click the folder or file you want to unhide, then select Properties.
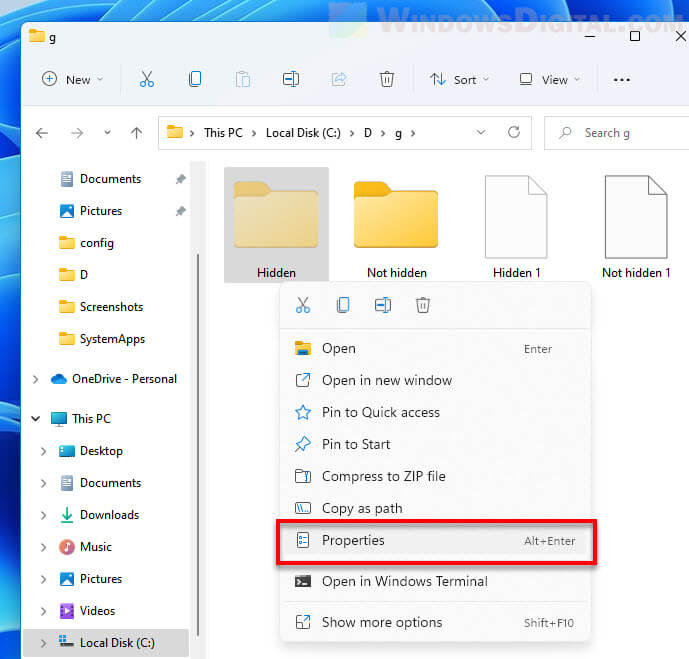
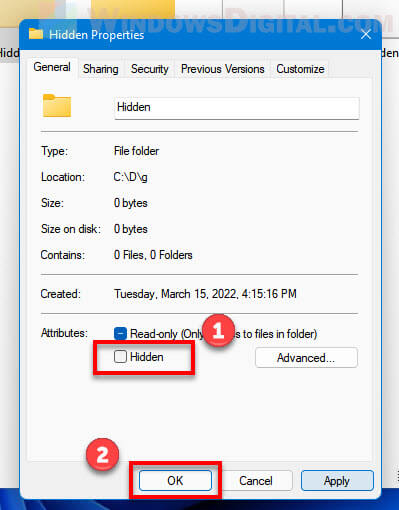
2. In the General tab, uncheck (disable) the checkbox that reads “Hidden” next to Attributes. Click OK to save the changes.
3. If it is a folder that you are trying to unhide and if there are other hidden files and subfolders in the selected folder, you will be prompted for if you want to apply the “unhide” attribute changes to this folder only, or to this folder along with all subfolders and files within it.
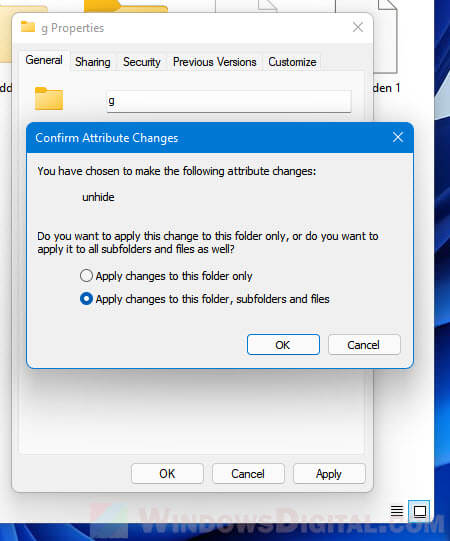
If you want to unhide the selected folder and everything in it, select “Apply changes to this folder, subfolders and files“, then click OK.
The file or folder you unhide should now be visible even if you choose to not show hidden files and folders.

