On smartphones and tablets, the Facebook Messenger app can easily access the camera and microphone. However, on a Windows 11 or Windows 10 desktop or laptop PC, certain settings need to be adjusted for the camera and microphone to work on the new Messenger app.
This short guide will show you how to allow Facebook Messenger to access your camera and microphone in Windows privacy settings and how to check if they are working properly.
Also see: How to Test Camera on Windows 11
Page Contents
Turn on camera on Facebook Messenger in Windows 11 or 10
By default, most apps on Windows 11 or Windows 10, including the Facebook Messenger desktop app, are not set to have access to a connected generic camera or webcam device due to security and privacy concerns. In most cases, when you make a video call for the first time on the Messenger app, it will ask for permission to access your camera. You only need to allow access the first time, and Messenger will not ask again in the future.
If you don’t see the pop-up asking for permission, follow these steps to manually allow Messenger to use your webcam via the Windows privacy settings:
- Search for and open Settings via Start menu or Cortana.
- In the Settings window, select Privacy. Then, in the left pane, select Camera under “App permissions.”
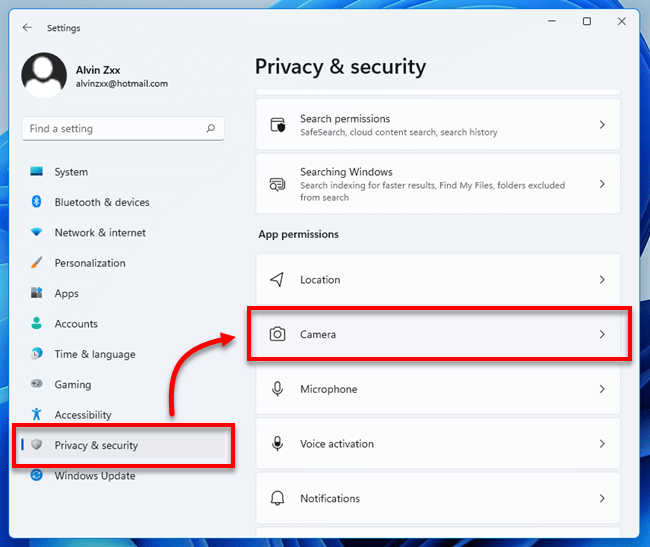
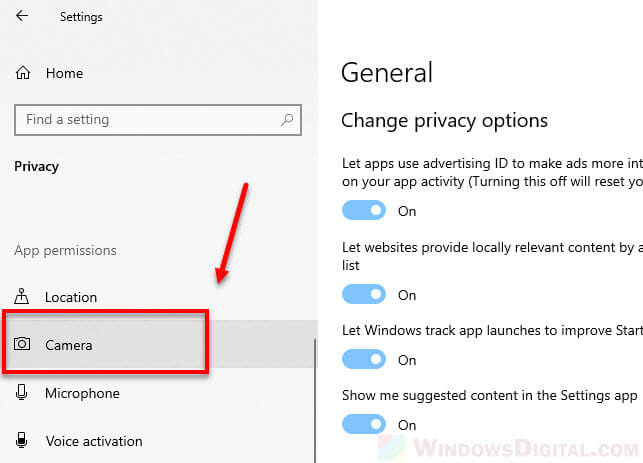
- Under “Allow access to the camera on this device,” click on Change and ensure the “Camera access for this device” option is turned on.
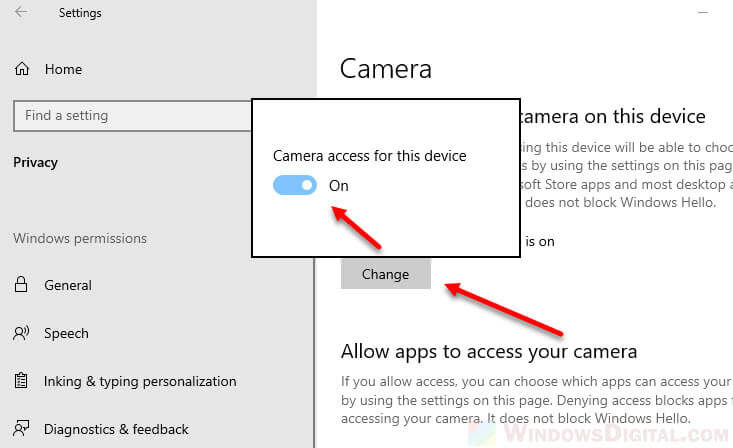
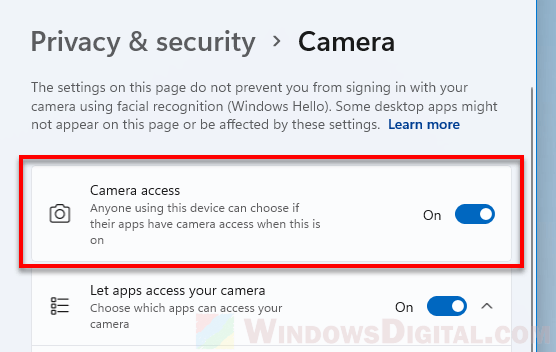
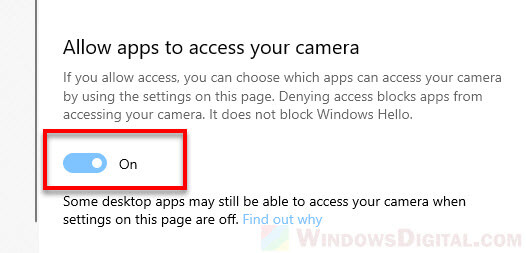
- Under “Allow apps to access your camera,” make sure the option is turned on.
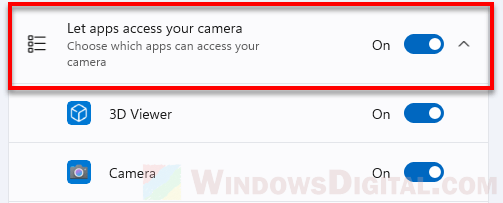
- Under “Choose which Microsoft Store apps can access your camera,” look for Messenger app and make sure the switch beside it is turned on to allow Messenger app to access your camera.
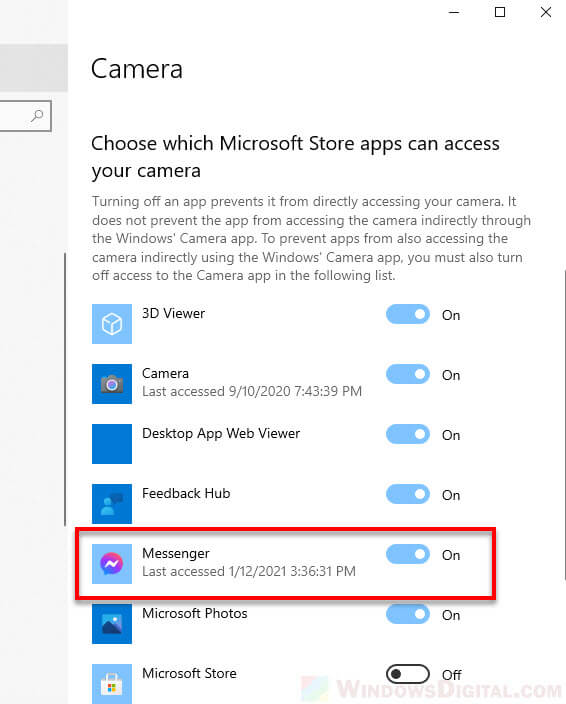
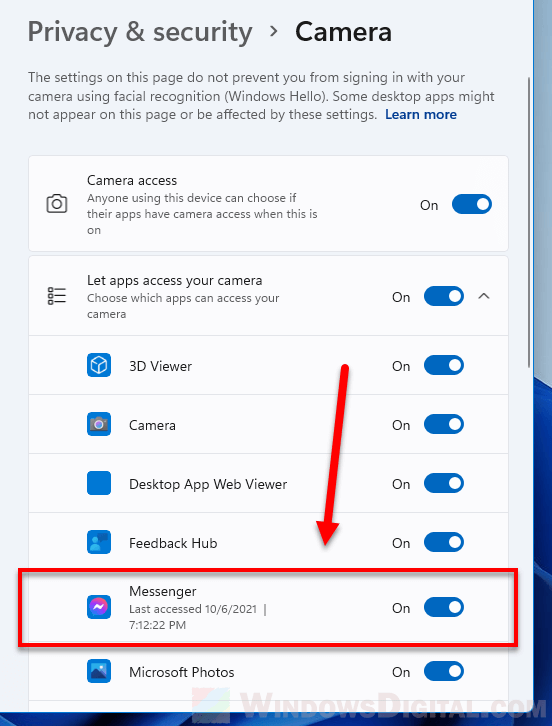
When you’ve completed these steps, try to make a video call again. It should connect right away without asking for access permission again, and your camera should work in the video call.
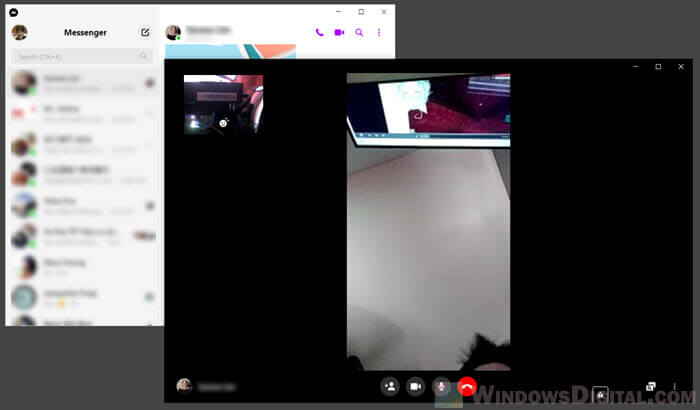
Facebook Messenger says “No camera detected”
If you get the error message “No camera detected” on Messenger, it could be due to your camera not being properly connected, a driver issue, or faulty hardware. To check if you have a working camera connected to your PC, follow these steps:
- In the Start menu, search for and open Device Manager.
- Expand Cameras and see if there is any listed camera.
- If there is, right-click it and select properties and see if the device is working properly.
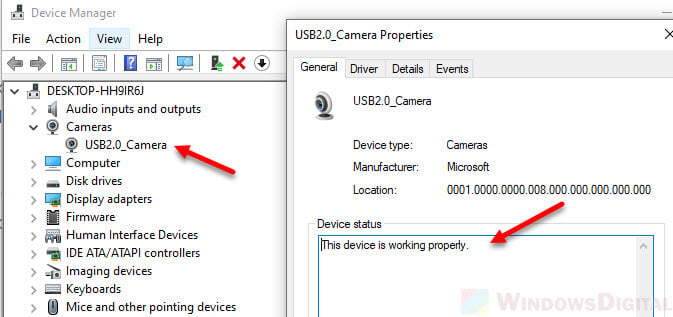
If there is none listed under the cameras section, it means your camera isn’t connected or installed. Double check if the camera is correctly connected to your PC and make sure to install the camera’s driver using the driver CD that comes along with it when you purchase the camera.
If you want to test your camera on a Windows laptop or desktop, you can refer to this guide: How to Test Webcam on Windows 11/10 Laptop or Desktop Offline.
Turn on Microphone on Facebook Messenger
Similar to camera privacy settings mentioned above, most apps by default do not have access to your computer’s microphone due to security and privacy reasons. You have to allow Messenger app to access your mic via the Windows privacy settings, so that it can use your mic to record and send voice messages, or to make voice calls.
Useful tip: How to Test Microphone on Windows 11 or 10 to See If It’s Working
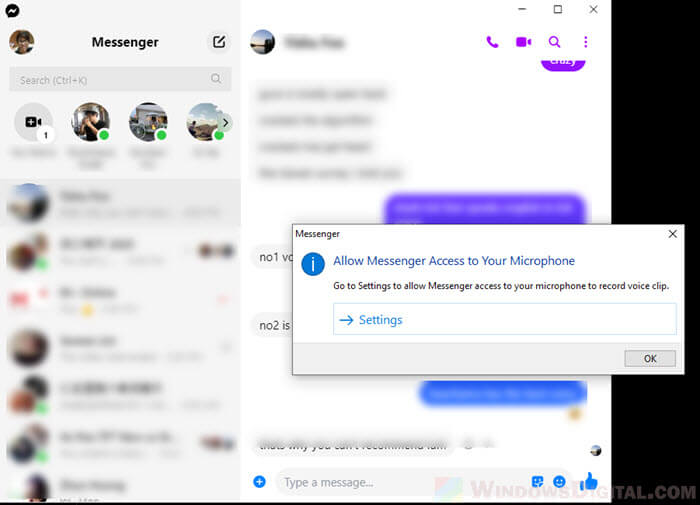
Follow the steps below to manually allow Messenger to have access to your microphone on your Windows PC.
- Go to Start menu, search and open Settings.
- Navigate to Privacy > Microphone (in the left pane).
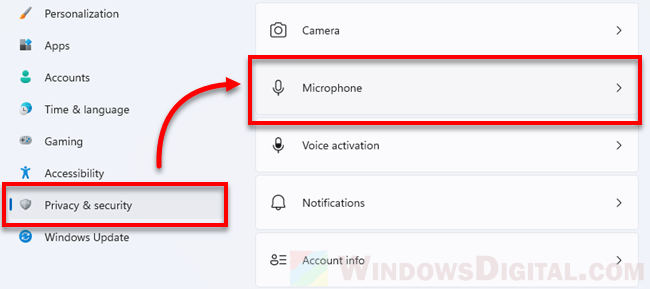
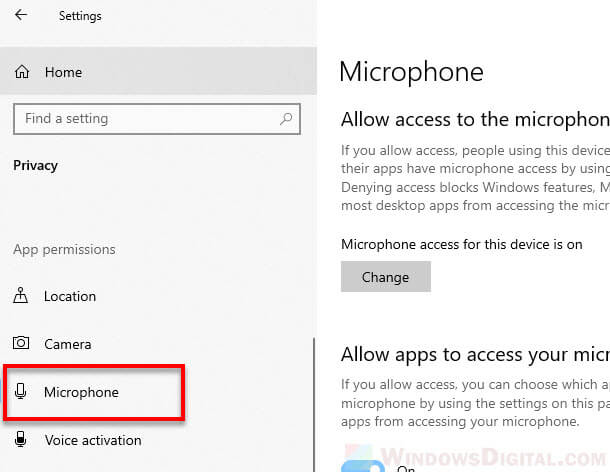
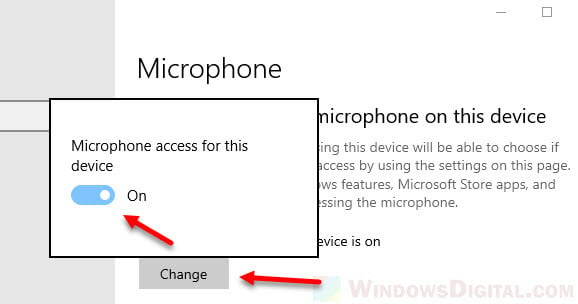
- Under “Allow access to the microphone on this device“, click on the Change button. Then, click to turn on the “Microphone access for this device” option if it isn’t already turned on.
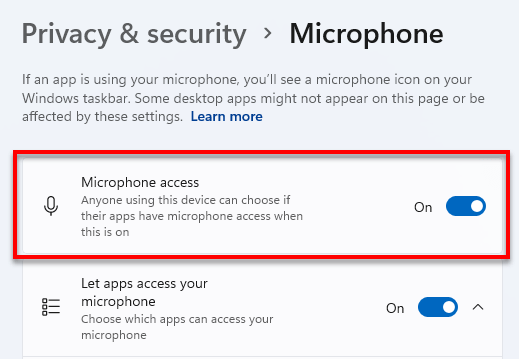
- Next, make sure the toggle option under “Allow apps to access your microphone” is turned on.
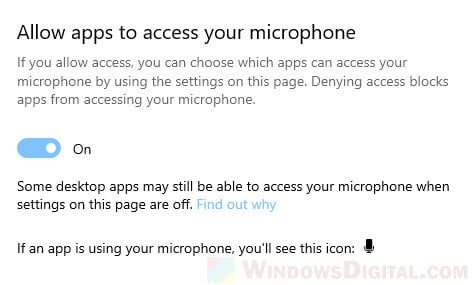
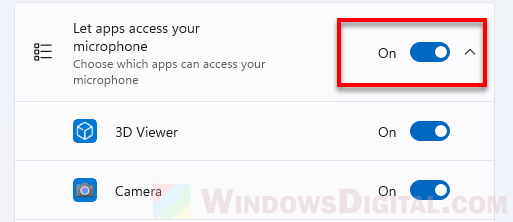
- Under “Choose which Microsoft Store apps can access your microphone“, look for Messenger app and make sure the toggle option beside it is turned on. This is to allow Messenger app to have access to your microphone.
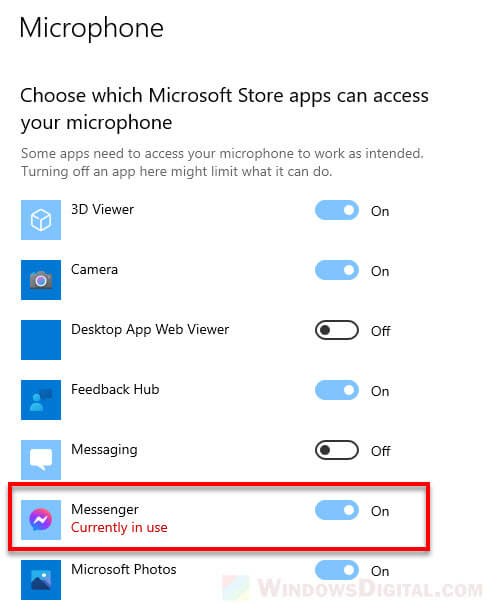
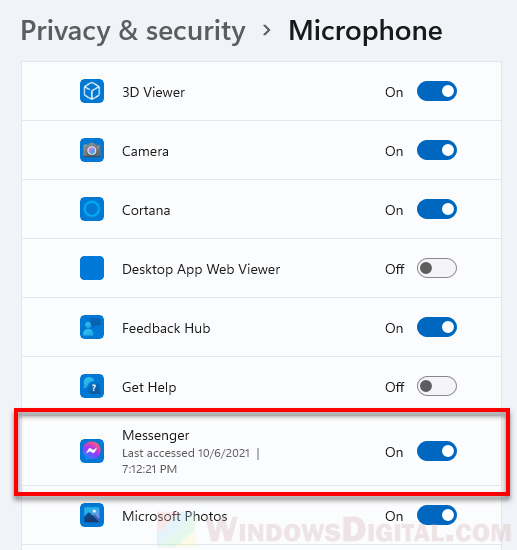
After completing all of the above, try to send a voice message or do a voice call in Messenger. It should work now.
Facebook Messenger couldn’t connect to your Microphone
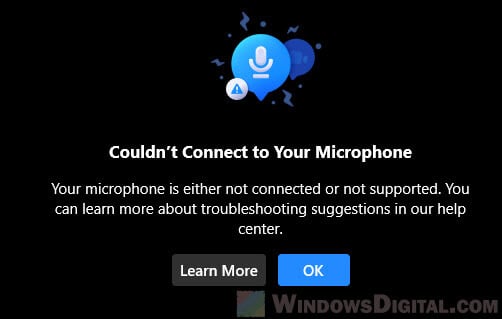
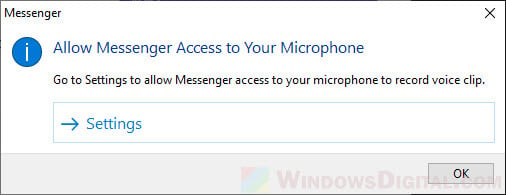
If Messenger shows “Couldn’t connect to your microphone” when you do a voice call, or keeps showing “Allow messenger access to your microphone” whenever you try to record a voice message, it could be due to your mic not properly connected, driver issue, or faulty hardware.
To fix that, you can refer to this guide: The Wizard Could Not Start Microphone in Windows 10 or 11 (Solved)
