Multiple monitors setup doesn’t only look great but also boosts productivity as things can be done much more efficiently. In Windows 11, you are allowed to connect (extend) any number of monitors. The limit depends on how many display ports you have on your hardware (particularly your graphics card).
If you have a multiple monitors setup and would like to switch between the monitors, e.g. changing the main display from monitor 1 to monitor 2, or moving a monitor from one side to the other, this post will show you a detailed guide on how to manage your multiple displays on Windows 11 desktop or laptop computer.
This guide outlines several methods on how to quickly switch between monitors or rearrange them on Windows 11 – via Display Settings, keyboard shortcuts, or Nvidia Control Panel.
Also see: How to Set Different Wallpaper on Each Monitor (Windows 11)
Page Contents
Switch between monitors in Windows 11
If you have two or more monitors and are using the “Extend these displays” setting, you can switch between the monitors by changing the main display from one monitor to another, or rearranging them (moving only with mouse) via the Windows 11 Display Settings.
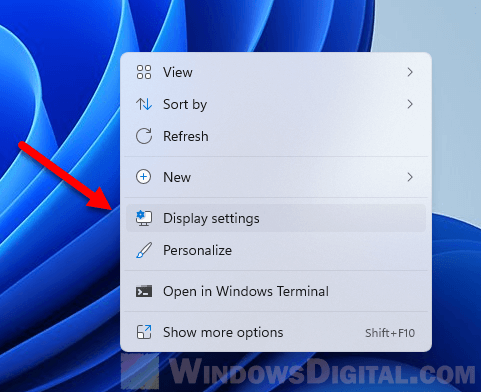
First, on Windows 11, right-click anywhere on your desktop and select Display Settings. Alternatively, you can open the display settings via Settings > System > Display.
In the display settings, you can change the main display by selecting a monitor and enable the “Make this my main display” option. For example, if Monitor 1 is your current main display, to change the main display to Monitor 2 instead, select Monitor 2 and tick the checkbox for “Make this my main display”.
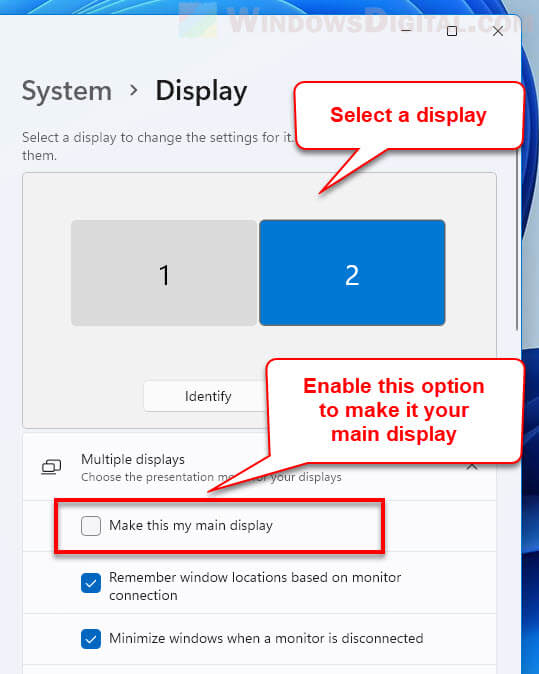
If you have no idea which monitor is monitor 1, 2 or so on, click the Identify button. Windows will then show you the number that represents the monitor on the screen of each of your monitors.
Related issue: Game Stuttering and Lag on Dual Monitor
Rearrange monitors on Windows 11
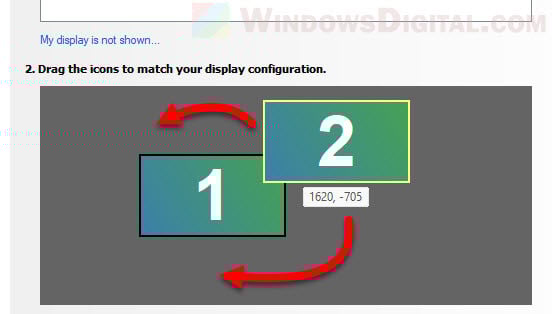
You can also move the monitor to rearrange them by clicking and dragging the display to any position you like to match your monitors setup. This is useful when you have physically swapped the positions of your monitors and you need to rearrange them. Click and drag a monitor to any position you want.
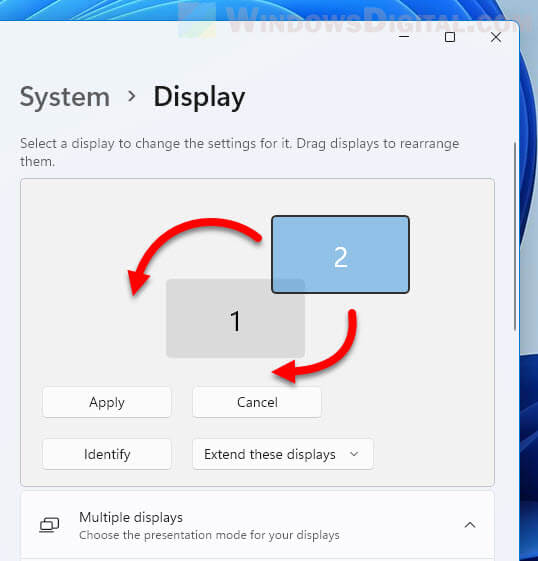
For example, if your monitor 2 is on top of your monitor 1 physically, you can drag the monitor 2 to the top of monitor 1 so that when you move your mouse upward from monitor 1, the mouse cursor can reach monitor 2.
Show only 1 monitor
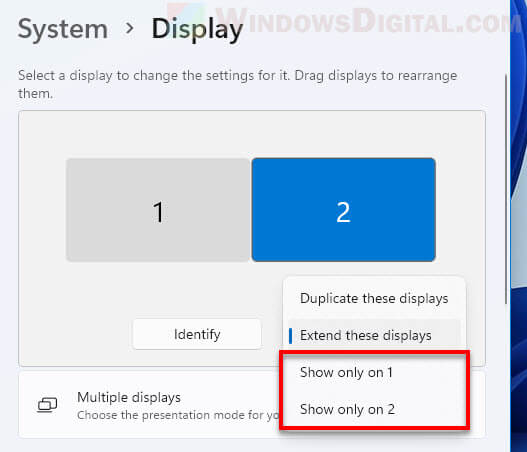
If you have multiple monitors connected to your PC but you only want to show your display on one monitor, to switch between which monitor to show the display on Windows 11, in the display settings, click the drop-down menu next to Identify, and then select “Show only on 1” or “Show only on 2” (or other monitor if you have more than just 2 monitors) to show your display only on the selected monitor.
Switch between two monitors with keyboard
To quickly switch between monitors or display mode using keyboard shortcuts, press the Windows + P key to open the “Project” pane. You can select one of the available display options in Windows 11.
- PC screen only – Showing only your main display.
- Duplicate – This mode will duplicate your main display across all other monitors.
- Extend – Extending the screen to other available monitors (the default display mode).
- Second screen only – When selected, Windows will show the display on second monitor only.
To switch between the available options, after opening the Project pane, use the Up Arrow or Down Arrow key to navigate between the options and then press Enter to select an option.
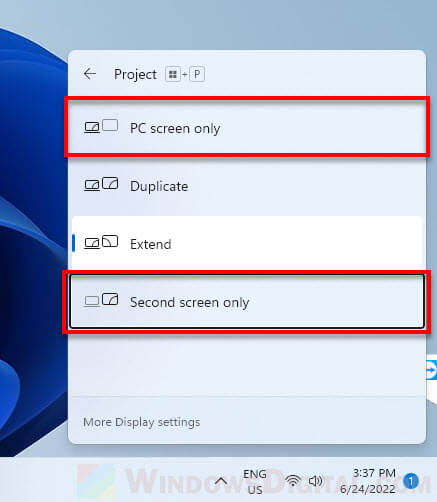
Alternatively, after bringing up the Project pane, you can continue pressing and holding the Windows key while repeatedly pressing the P key to navigate between the options. Then, release both keys to select the highlighted option.
Switch between monitors via NVIDIA Control Panel
If you are using an NVIDIA graphics card and have properly installed NVIDIA video driver and its companion software, you can also switch between your monitors in Windows 11 via the NVIDIA Control Panel.
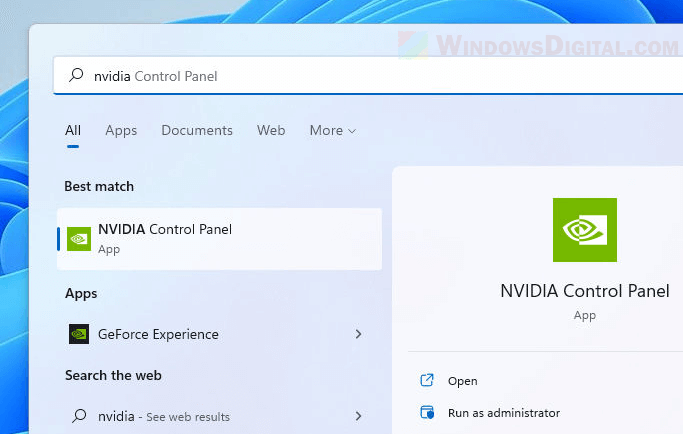
In Windows 11, search for and open NVIDIA Control Panel via Start.
On the left pane, click “Set up multiple displays” under “Display”. You may need to click Display to expand it in order to see the options. From there, you can select the displays you want to use, or deselect any display you don’t want to use.
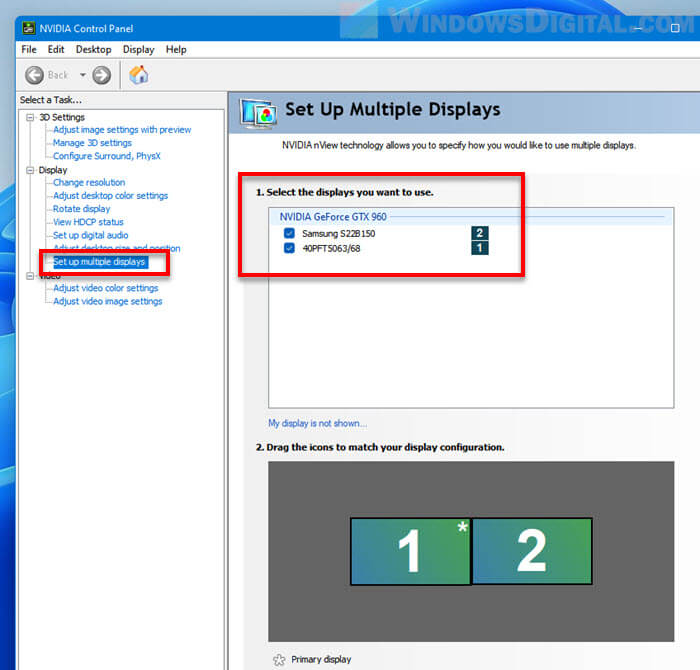
At the bottom part of the settings, you can make any monitor your main display by right-clicking it and select “Make primary“. Feel free to also experiment with the “Clone with” option if you want to clone your screen.
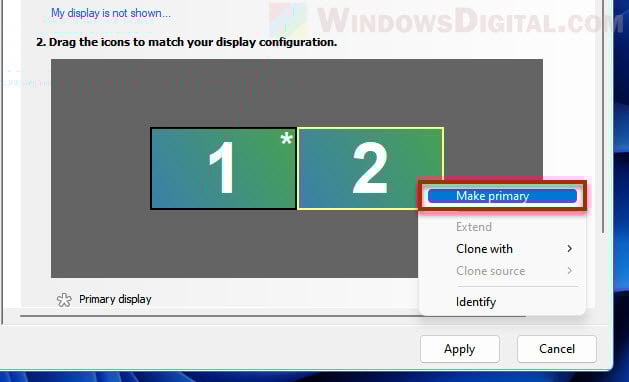
In addition, you can also reposition the display by simply dragging the display to match your desired display configuration.
