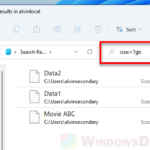
There are often times we need to sort files by size and we can do it just fine in the Windows File Explorer. However, when it comes to dealing with folders, there is currently still no way to sort folders by their sizes after decades and many versions of Windows evolution.
A task as simple as this is still a myth to most Windows users as they probably don’t even know this can’t be done in the default File Explorer in Windows. In this short tutorial, we will show you how to sort folders by folder size in Windows 10 with the help of a simple file explorer software.
Also see: How to Compare Two Folders in Windows 11
Sort Folders by Size using “Folder Size”
Since there is no way to sort folders by size in the default File Explorer, we will have to rely on a third party software called “Folder Size” by MindGems. This little software acts similarly to the file explorer in Windows, but with an extra function that allows sorting of folders by size.
Folder Size is free to download and use. It also has a paid version with more advanced features such as being able to save or load projects, customized filters, and more. If you only want to be able to sort folders by size, the free version would be sufficient to do it.
To sort folders by size in Windows 10 using “Folder Size”, follow the steps below.
Step 1: Download “Folder Size” from the official website.
https://www.mindgems.com/products/Folder-Size/Folder-Size-Download.htm
You can download either version, though we recommend the portable version so you can use it right away without having to install it.
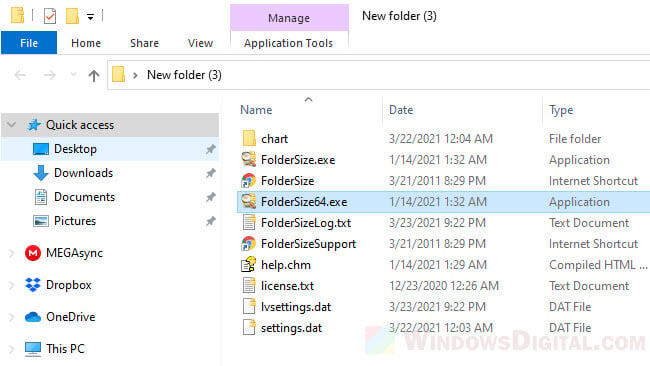
Step 2: Once downloaded, extract the zip file to anywhere you want. Run FolderSize.exe as administrator from the extracted files (by right-clicking it and select Run as administrator). If you are using Windows 10 64-bit, launch FolderSize64.exe instead. It’s important that you run the software as administrator, otherwise some functions may not work if they require administrative privileges.
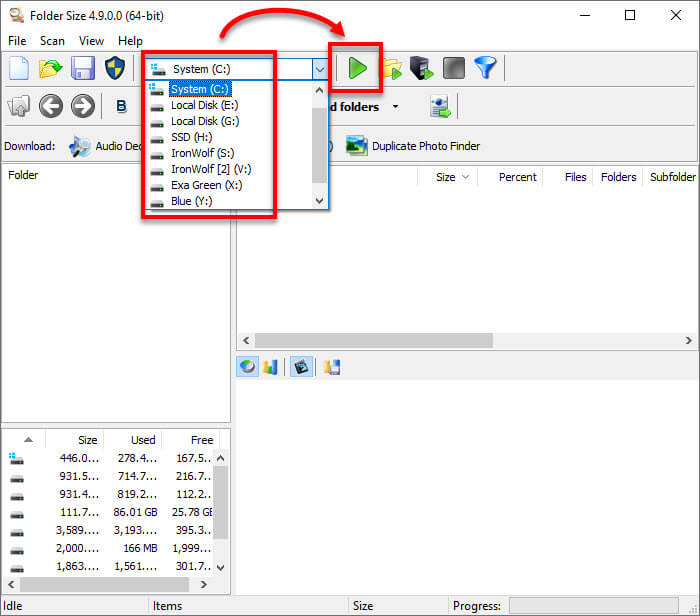
Step 3: Folder Size makes sorting folders by size possible by scanning the sizes of files and folders in a selected directory in order to show you a scanned result where you can sort the folders. Thus, the very first thing to do is to allow the software to scan the directory where you want to sort the folders.
- You can scan an entire disk drive by selecting a drive (for example C: drive), and then click on the “Scan selected drive” button (the green play button) to begin scanning all the folders in the selected drive.
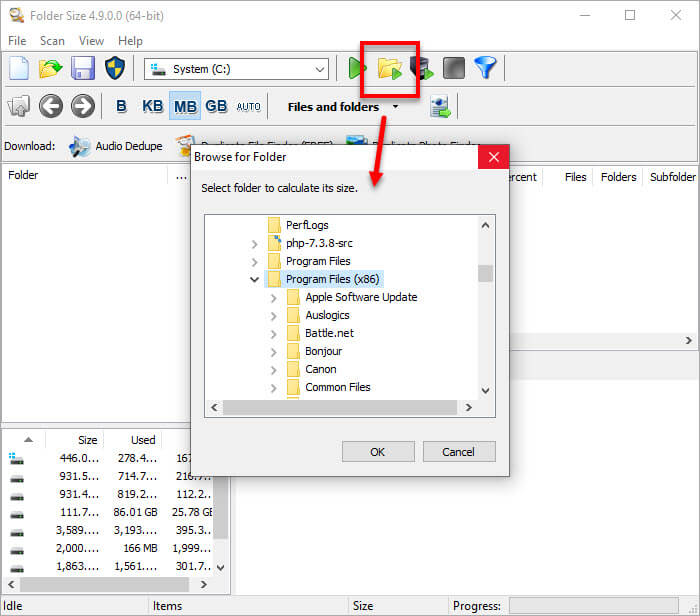
- To scan only a specific folder or directory, click on the “Scan folder” button and browse to the directory/folder you want to scan.
Step 4: Once the scan is completed, you can now browse to any folder or directory from the scan results and sort the folders by size in any scanned directory. To sort folders by size, click on the “Size” column. To switch the sorting from ascending to descending or vise versa, click on the “Size” column again.
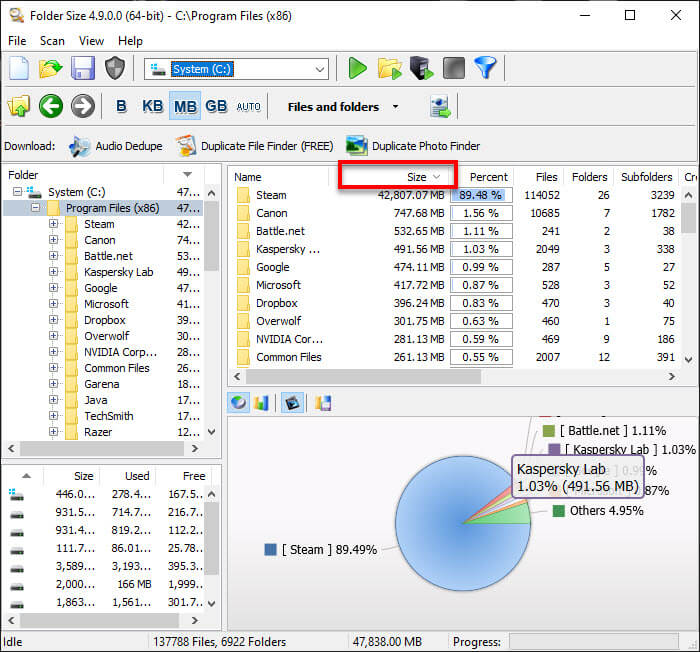
How to sort files and folders together by size in Windows 10
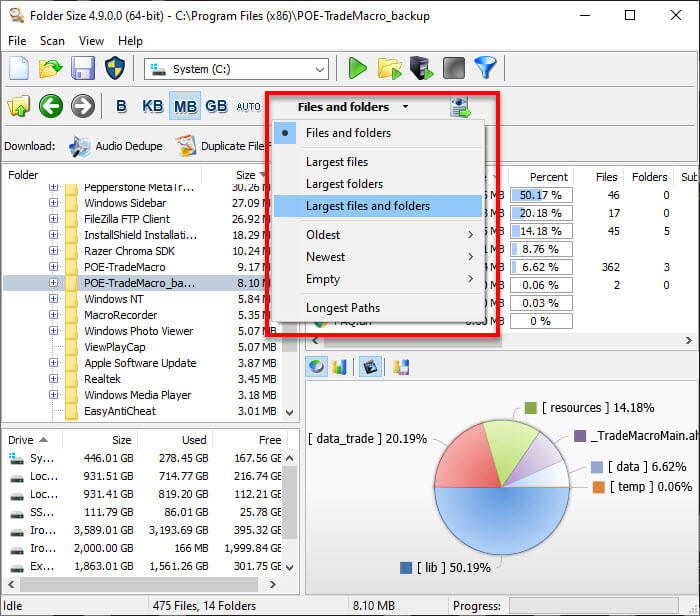
Optionally, you can choose to sort only files, only folders, or both files and folders together, by clicking on the “Files and folders” option and choosing the respective sorting option you want from the toolbar in Folder Size after scanning.
Tip: You can also sort the folders by number of files or subfolders in each folder by clicking on the respective column.
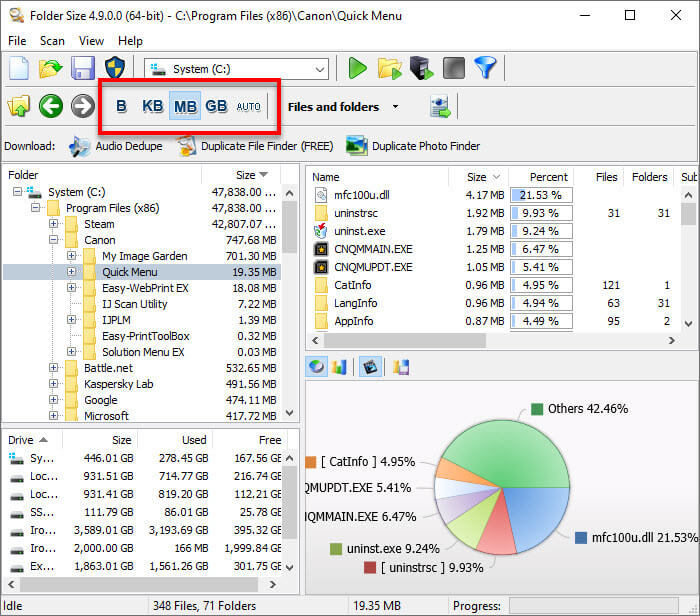
Tip 2: Additionally, you can switch the unit used to display file size between B (Byte), KB (Kilobyte), MB (Megabyte), GB (Gigabyte) or Auto, by clicking on the respective file size unit you want to use from the toolbar


