Check Disk, or more often known by its abbreviation CHKDSK, is a built-in tool in Microsoft Windows to scan hard disk drives for errors and bad sectors and repair them. This short tutorial will show you how to skip or disable disk checking on Windows 10 or Windows 11 so that it won’t run on startup again.
Page Contents
Why is disk checking forced to run on startup
If a disk check is automatically scheduled to run every time you turn on your laptop or desktop computer without your consent, it can indicates two possibilities:
- Windows has detected unusual shut down or restart behavior.
- Windows has detected issues on one of your hard disk drives.
If you attempt to interrupt and cancel the disk check by “pressing any key”, you can temporary cancel the disk check for the current session. However, the disk check operation will repeat on every startup until the process can be completed at least once and that the disk has no issue.
What are the proper things to do
Let’s not ignore the obvious. Repeated forced startup disk check is an indication of possible disk errors or even hardware failure. The proper action to be taken is to let the disk check run to completion.
The disk check process will automatically scan for errors and repair them. Once the errors are fixed, Windows will stop scheduling disk checking on startup if there is no other issue detected in any of your disk drives.
If the disk check finds any error that can’t be fixed, it will let you know in the scan reports at the end of the scan. If this is the case, it usually indicates that your hard drive has started to fail or has already failed. You may want to quickly backup any existing data on the disk if you don’t want to lose them later.
How to skip disk check on Windows 10/11
There are two methods to force cancel a scheduled startup disk check on Windows 11/10. If one doesn’t work, try the other.
Stop disk checking via “Command Prompt”
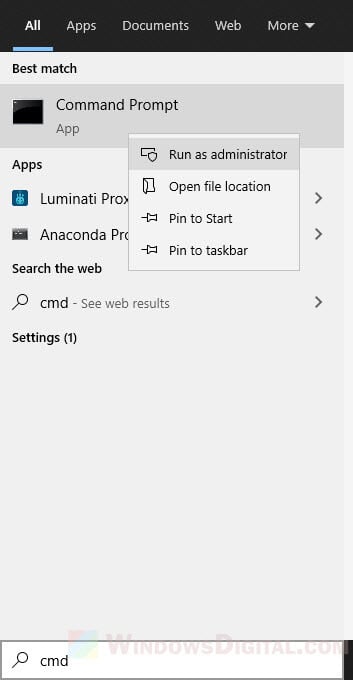
- On Windows 10/11 search bar, search for “cmd“. Right-click on Command Prompt from the search result and click “Run as administrator“.
Windows 10
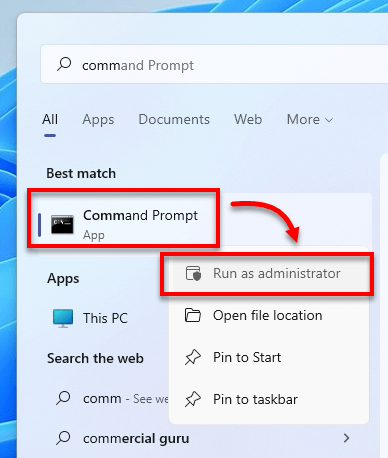
Windows 11
- Enter the following command:
chkntfs /x c:
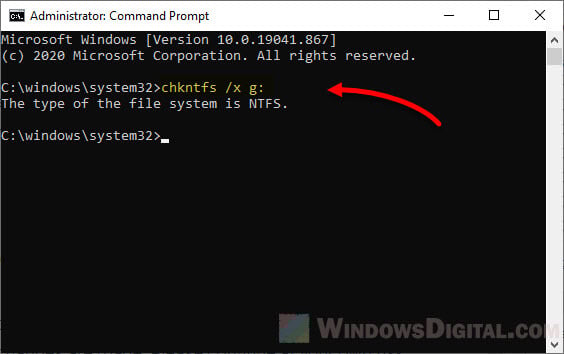
- Note: Replace C: with the letter of the drive you wish to stop disk checking on Windows startup.
- The /x parameter is to disable auto check for the selected drives on startup.
- To stop disk check for multiple drives, add the drive letters to the end of the command. For example:
chkntfs /x c: d: e:
Disable startup check disk scan via “Registry Editor”
Caution: Registry editing can cause serious problem and may potentially corrupt your operating system if incorrect changes are made. Please continue at your own risk.
- On the Windows 10/11 start menu, search for and open “regedit” (Registry Editor).
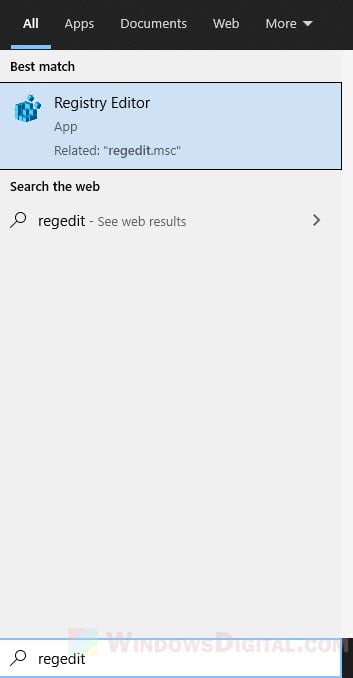
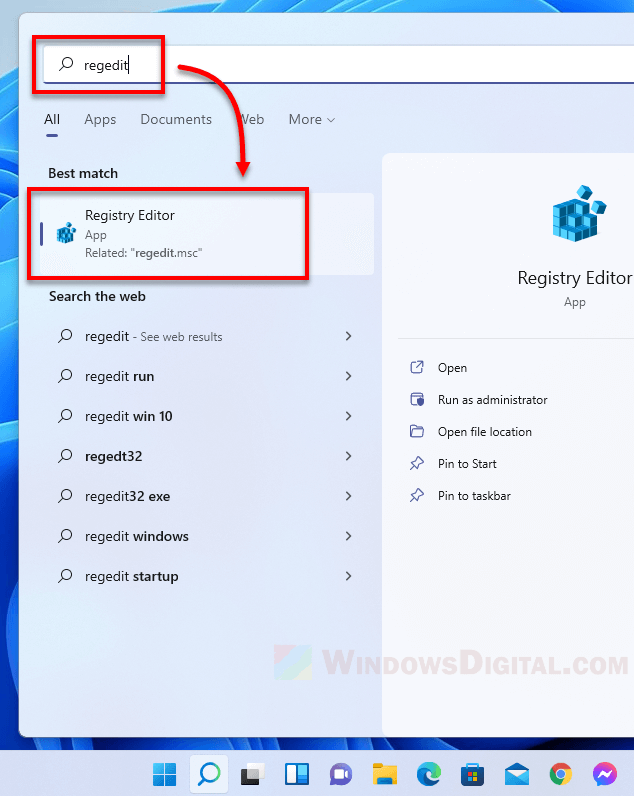
- In the Registry Editor window, navigate to the following path.
HKEY_LOCAL_MACHINE\SYSTEM\CurrentControlSet\Control\Session Manager
- Double-click on the “BootExecute” key in the right pane.
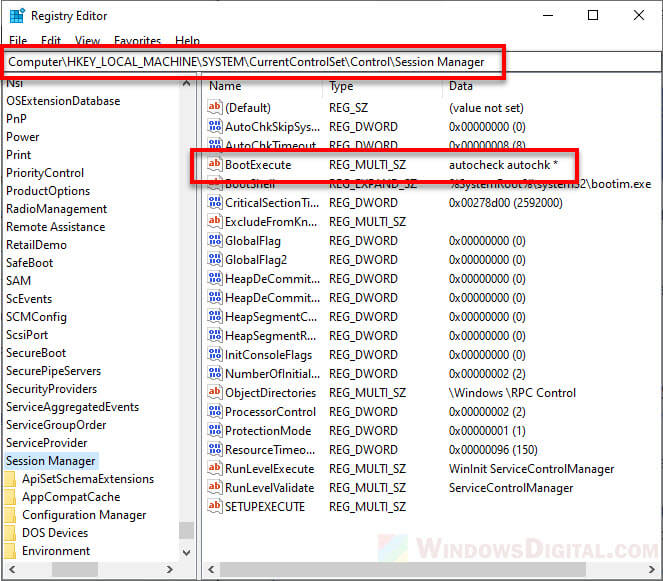
- In the “Value data” field, change the value to:
autocheck autochk /k:C *
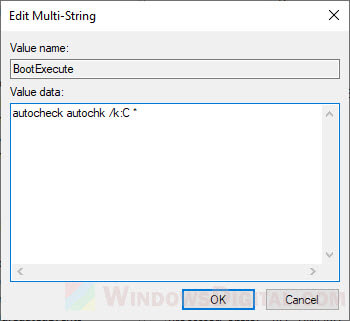
- NOTE: Replace C with the letter of the drive you wish to disable disk checking on Windows startup.
- To disable disk checking for multiple drives, repeat the /k:x. For example:
autocheck autochk /k:C /k:D *
- The /k parameter is to tell autocheck to stop checking C: drive on Windows startup.
- Should you meet any unexpected result, you can change the key’s value back to its default:
autocheck autochk *
- Click OK to save changes.
Close Registry Editor and restart your PC. On the next Windows startup, the disk checking should not appear again.
If the disk checking persists on every startup
If the disk checking continues to run on every startup even after trying the methods above, you may want to seriously consider letting the disk check to complete the scan. If the scan finds any error that cannot be fixed, you may want to backup the existing data immediately before it’s too late, and replace the drive.
If you don’t care if the disk is faulty and that you might lose the data on the disk when it eventually fails, and just want to skip the disk checking on Windows startup, you can create a shortcut file to run the “chkntfs /x c:” (replace c: with the drive letter you wish to skip disk checking on startup) command and include the shortcut file as a startup program.
To create a shortcut file, right-click anywhere on your desktop, select New, then Shortcut. Enter the command as the shortcut path and follow the rest of the on-screen instruction to complete creating the shortcut.
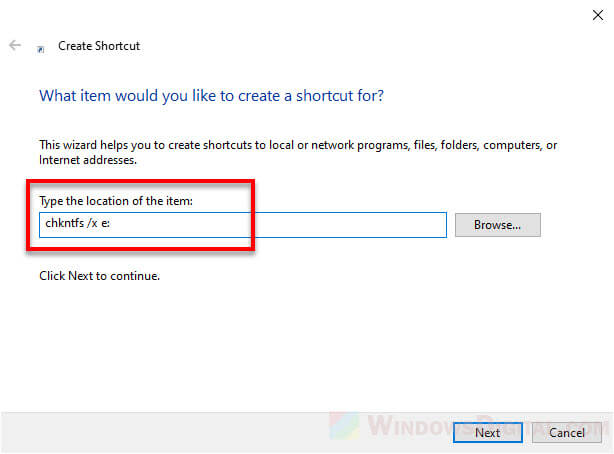
Note that the shortcut file has to be run as administrator for the command to be executed successfully. You can set it to always and automatically run as admin by right-clicking the shortcut file > Properties > Shortcut tab > Advanced > Run as administrator.
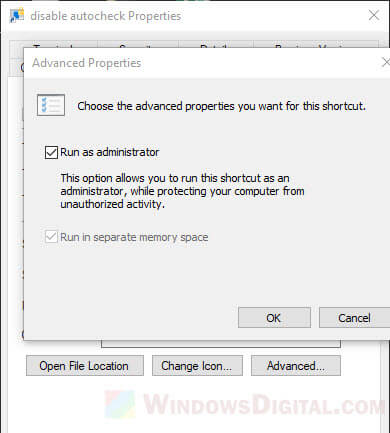
To set the shortcut file as a startup program, press Win + R keys to open Run window. In the Run window, type in “shell:startup” and press enter. This will open a folder where all startup programs’ shortcuts are placed. Move the shortcut you’ve created to the startup folder.
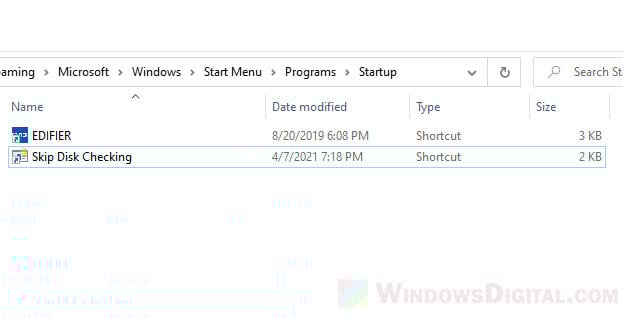
After doing so, the shortcut to execute the skip disk check command will automatically be run on every startup so that Windows will automatically skip the disk checking on the next startup.
