If you are looking to share your desktop screen with friends or broadcast your gameplay to them, this guide will show you 3 methods on how to quickly host a screen sharing session on Windows 11 for free.
Page Contents
3 methods to screen share on Windows 11
Although most streaming and screen sharing software either requires a subscription or has video quality restriction on free version, the software and website used in the methods below are mostly free to use when you host a screenshare or streaming using them.
Share screen via NVIDIA ShadowPlay to YouTube or Facebook
If you are using an NVIDIA graphics card on your computer, you can use the NVIDIA built-in feature called ShadowPlay included in NVIDIA GeForce Experience, which comes as a companion software when you install the graphics driver.
You can also use this method to share screen on Windows 11 to TV – by streaming your computer screen to YouTube, and then watch the live stream on your TV (If your TV has the YouTube app or a web browser).
See also: How to Check Graphics Card on Windows 11 (NVIDIA, AMD or Intel)
If you have NVIDIA GeForce Experience installed, to start streaming or broadcasting your desktop screen or game to YouTube, Facebook or Twitch, follow the steps below.
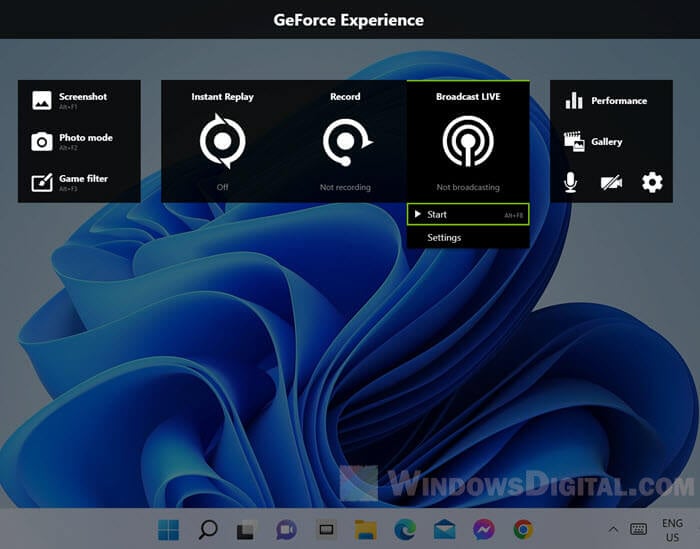
1. Press Alt + Z to open the GeForce Experience interface. Click the Broadcast LIVE and then select Start. Alternatively, you can press Alt + F8 (might be different if you have ever changed the hotkey before) to directly start the broadcast.
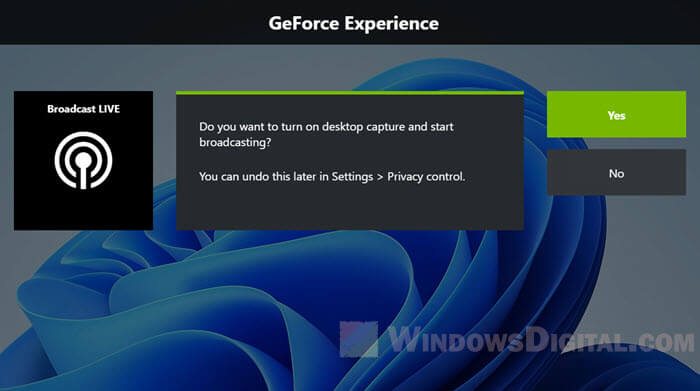
2. If you are streaming your desktop screen for the first time, Shadowplay will prompt a confirmation that says “Do you want to turn on desktop capture and start broadcasting“. Select Yes to continue.
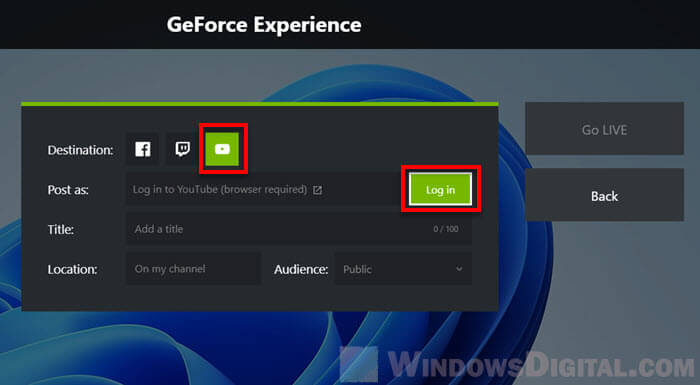
3. To share your screen in Windows 11 by streaming to YouTube, select YouTube as the Destination, and then click Log in next to “Post as”.
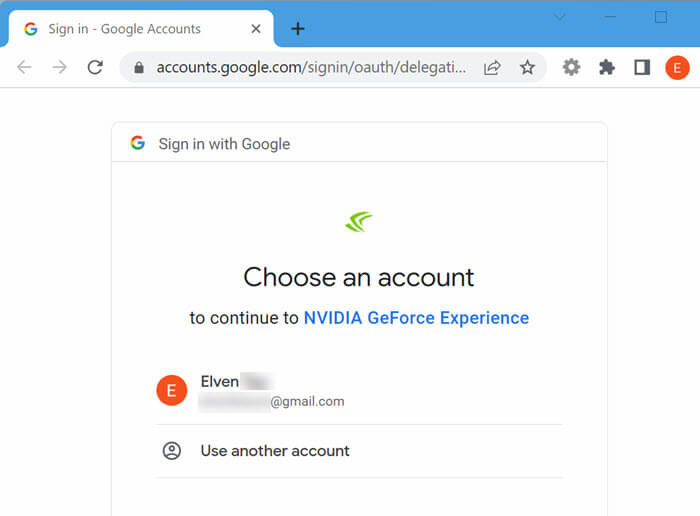
4. A browser will open and you will need to sign in to your Google account. After signing in, you will also have to Allow GeForce Experience to access and manage videos on your YouTube account.
5. Once you have signed in to your Google account, enter a Title for the stream and select the Audience you allow to view the stream (screenshare).
- Public – The video will be visible on your YouTube channel and everyone will be able to view the stream.
- Unlisted – Only those who have the link to the stream can view the stream.
- Private – Only those you specifically allow can view the stream.
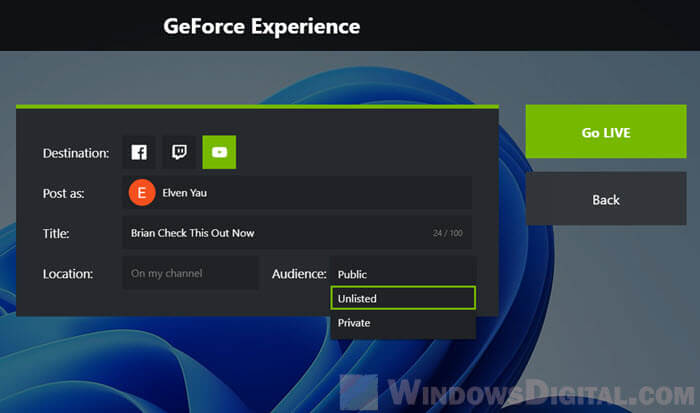
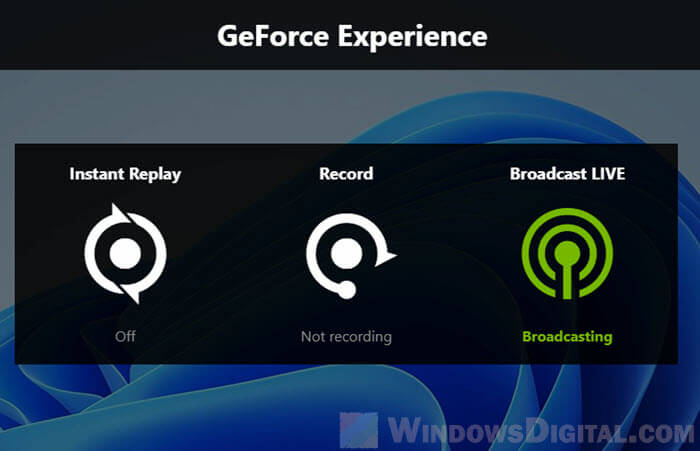
6. Once everything is set, click Go LIVE to start the streaming. If your broadcast is successfully live, the broadcast option will turn green as shown in the screenshot below.
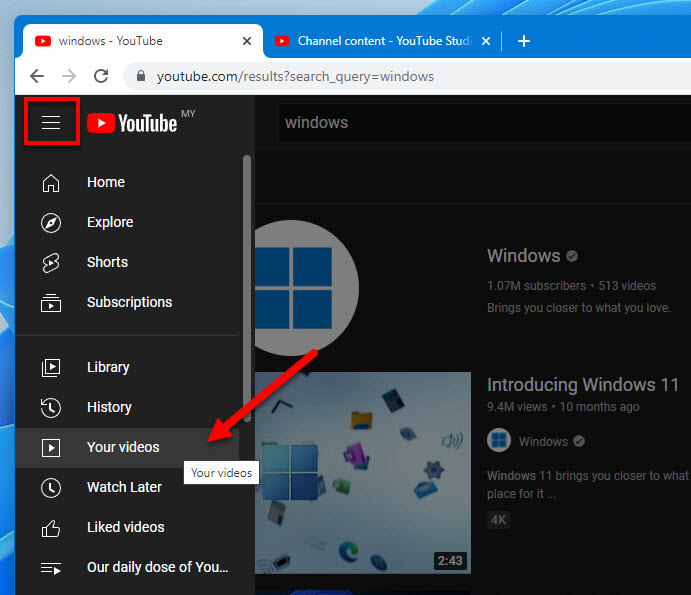
7. Now, to get the link of the stream, first go to YouTube and sign in to your YouTube account if you haven’t already done so. Click the menu button in the upper-left corner of any YouTube page, and select “Your videos“.
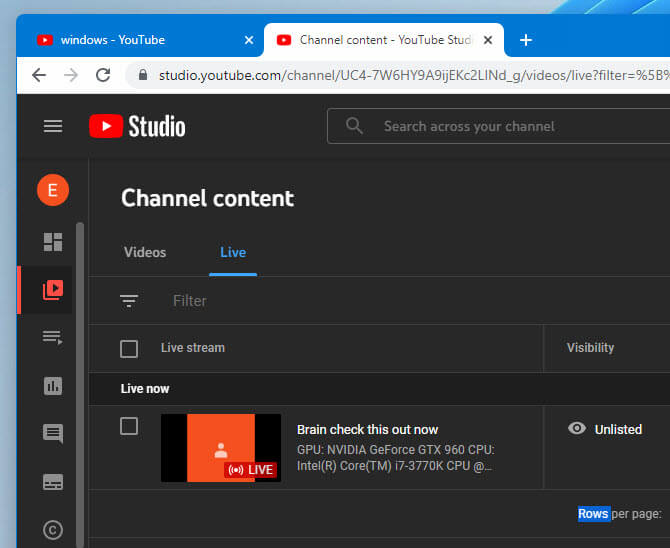
8. Next, in the YouTube Studio page, click Live under Channel content. You should then see the live stream you are broadcasting right now in the list.
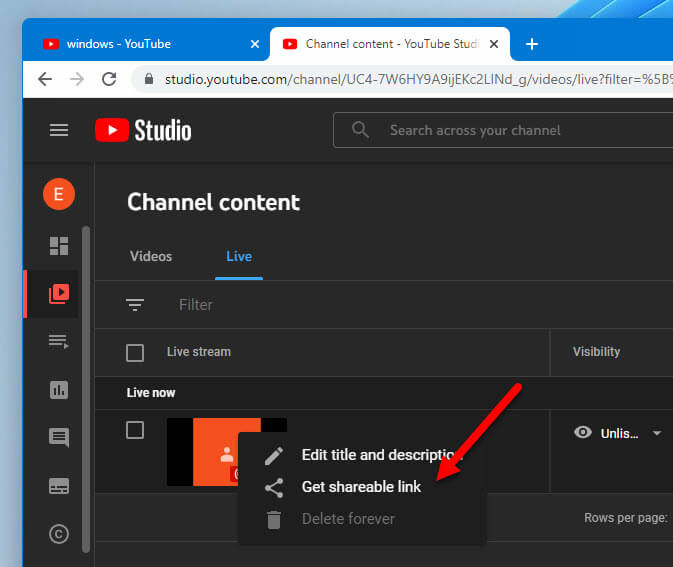
9. Click the option button next to the video and select “Get shareable link“. Share the link with your friends or whoever you want to share your screen with.
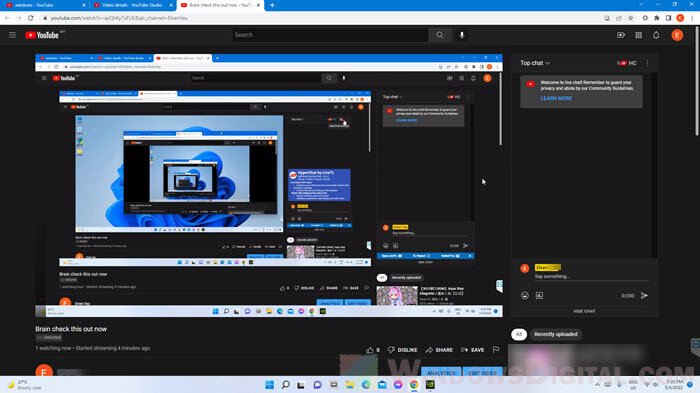
10. Your friend will then have to open the YouTube video link (your live stream) on a browser in order to view your screenshare broadcast.
To share screen on Windows 11 by broadcasting your screen to Facebook, follow step 1 and 2 in the instruction above, and then select Facebook instead of YouTube. Next, click Log in and sign in to your Facebook account. Enter a title for the stream and select the audience group you allow to view the stream – Public, Friends or Only me. Click Go Live to begin the broadcasting.
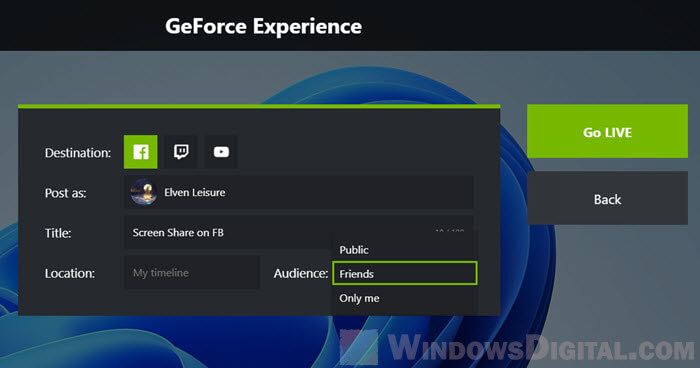
To stream your Windows 11 screen to Twitch instead, follow the same steps above and select Twitch. Login to your Twitch account and fill in the required details for the broadcast, then click Go Live to start the stream.
Related: How to Record Screen on Windows 11 With Nvidia Share
How to change video quality, resolution, frame rate and bit rate of the stream
To change the NVIDIA Shadowplay video streaming quality and settings, press Alt + Z to open the GeForce Experience interface, click Broadcast and select Settings.
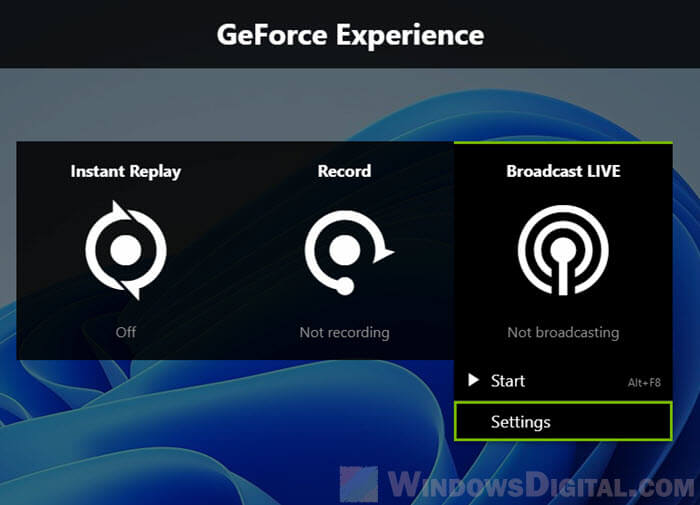
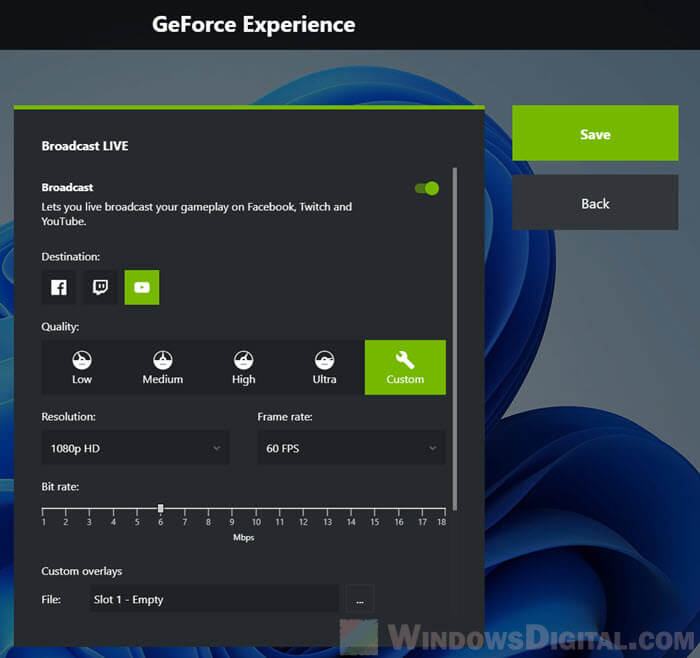
Next, select the platform you would like to change the settings for under Destination. From there, you can change various stream settings such as video quality, resolution, frame rate, bit rate and custom overlays.
Discord Screen Share for Windows 11
Discord is one of the most popular VoIP and instant messaging apps in the world. Other than text messaging, Discord also allows 1-to-1 or group voice or video call. One of its main features include the ability to screen share one-to-one or one-to-many. The instruction below will show you how to use Discord Screen Share feature to share screen with friends on Windows 11.
1. You and your friends need to have a Discord account and have Discord installed. First, add your friends in Discord via the “Add Friend” feature in Discord. Next, create your own Discord server and invite your friends to join the server.
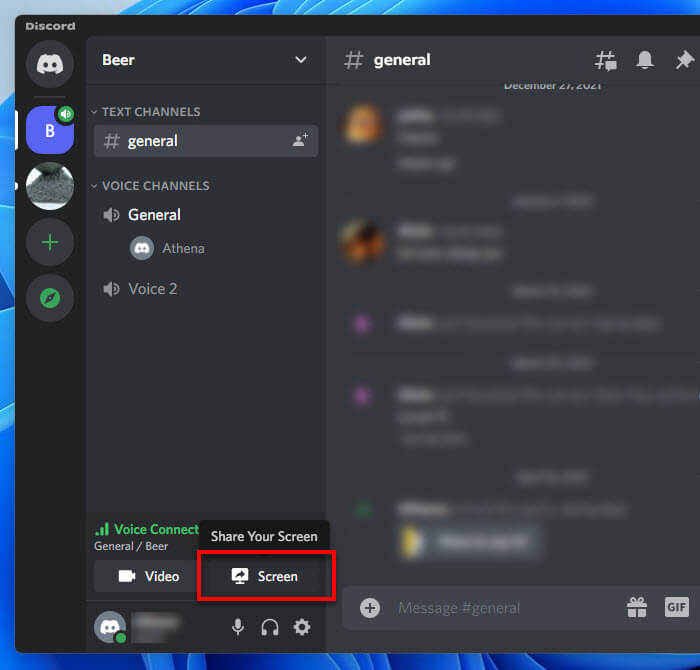
2. Once both you and your friend are in the same server, join the same voice channel in the server. To start sharing your screen on Windows 11 via Discord, click the Screen button in Discord after you have joined a voice channel.
3. Next, select the application or screen you would like to share.
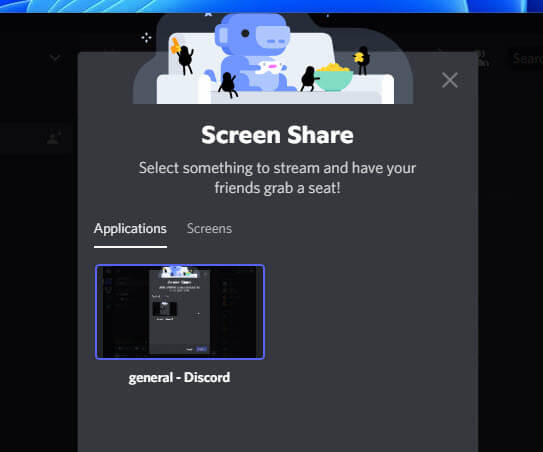
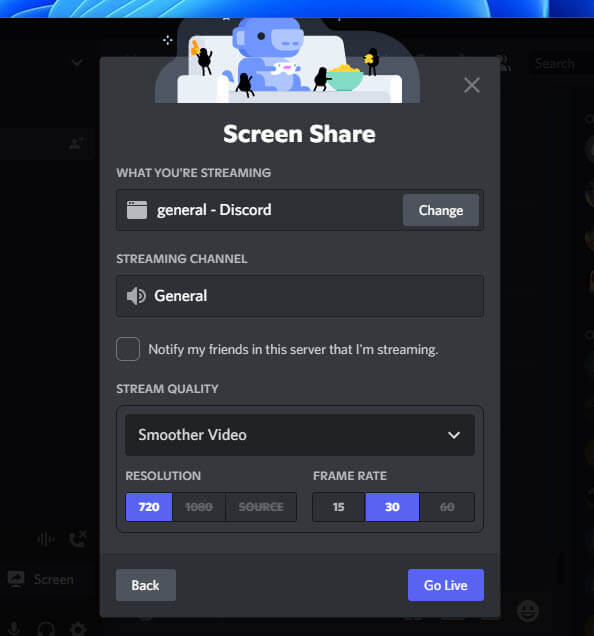
4. Select the stream quality, resolution and frame rate for the screen share session and click Go Live to start sharing the screen.
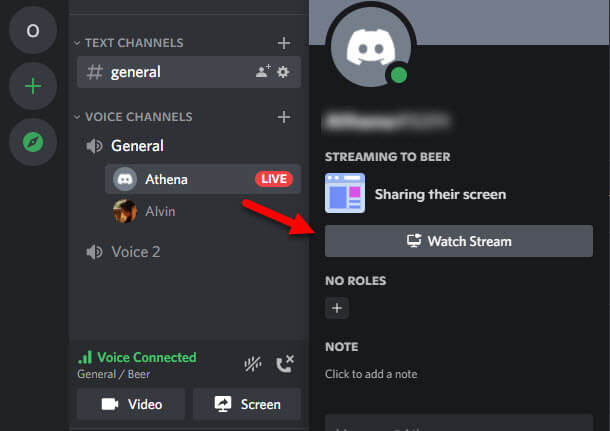
5. To view your screenshare, your friends need to join the same voice channel you are currently sharing screen on, then click your name and select “Watch Stream“.
Share screen using TeamViewer (include control)
TeamViewer is a remote desktop app that allows users to connect from one PC to another in order to view the screen of that connected PC and to remote control it (keyboard and mouse, as if you are using the computer yourself while not being there).
As remote access also shares the screen in real time, you can use this method to share your desktop screen on Windows 11 with your friend. Note that this method also allow him or her to have control over your computer upon connected.
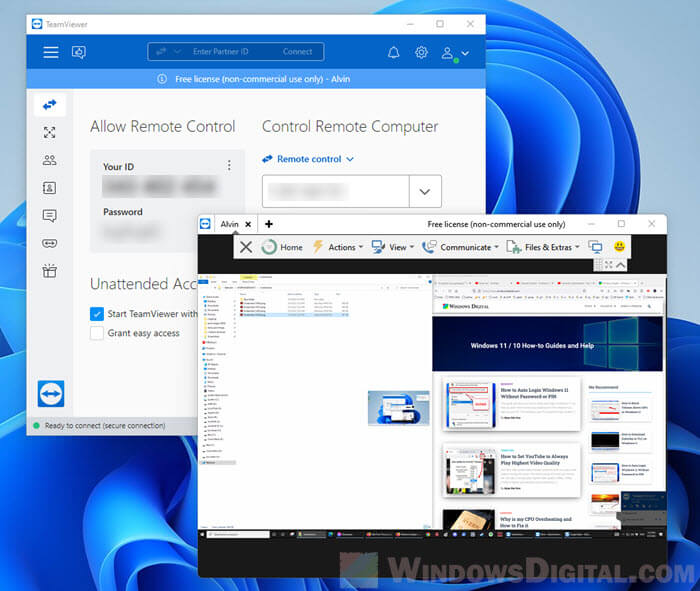
Both you and your friend need to have TeamViewer installed. Once installed, you can share the auto-generated ID and password to your friend and allow him/her to connect to your PC. When connected, your friend can then view the screen of your computer and remote control it.

