When it comes to printing, you can save money, paper and the environment by printing double-sided, fully utilizing the paper instead of printing only one-sided and wasting the other side of the paper. This guide will show you a step-by-step instruction on how to print double-sided on Google Docs.
Unlike many other office apps such as Microsoft Office that requires a paid subscription, Google Docs is a free cloud-based document creator and editor. It is widely used by people from all around the world and different professions (from a student to a businessman, or any other profession).
Also see: How to Print Large Image on Multiple Pages in Windows 11/10
However, when you want to print something on Google Docs, Google Docs will use the print settings of the web browser you use to open Google Docs. In other words, you will see different print preview and print options on different web browser.
Google Docs does not have a clear instruction on how to print double-sided when it comes to printing a document or spreadsheet. The option is somewhat hidden in some browsers and can be confusing to people who are not very computer literate.
If you have a printer that supports duplex printing (capable of printing both sides of the paper), you can find the two-sided printing option in the Print Preview on Google Docs. The instruction below will show you how to print front and back on Google Docs using Google Chrome.
Useful tip: How to Move an Image to the Front or Back in Google Docs
How to Print Front and Back on Google Docs
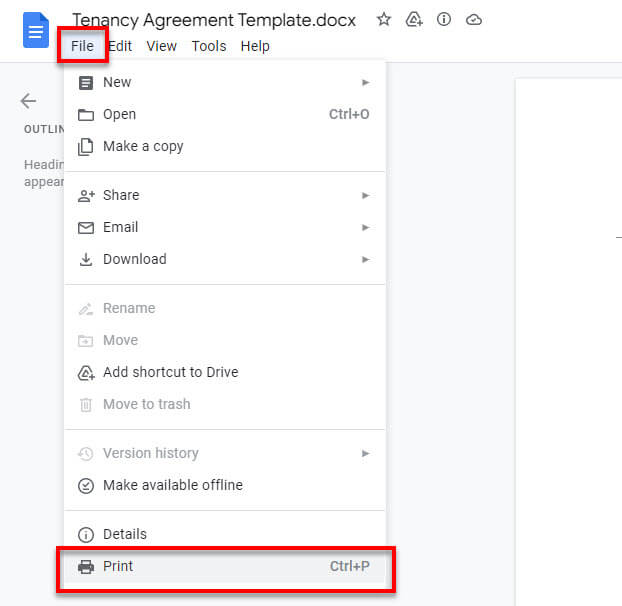
Firstly, open the document you want to print double-sided on Google Docs. While the document is opened, click File and select Print. Alternatively, you can press Ctrl + P keyboard shortcut to open the print preview directly.
This guide uses Google Chrome as the web browser to open Google Docs. If you use a different browser, you may see a slightly different print preview interface.
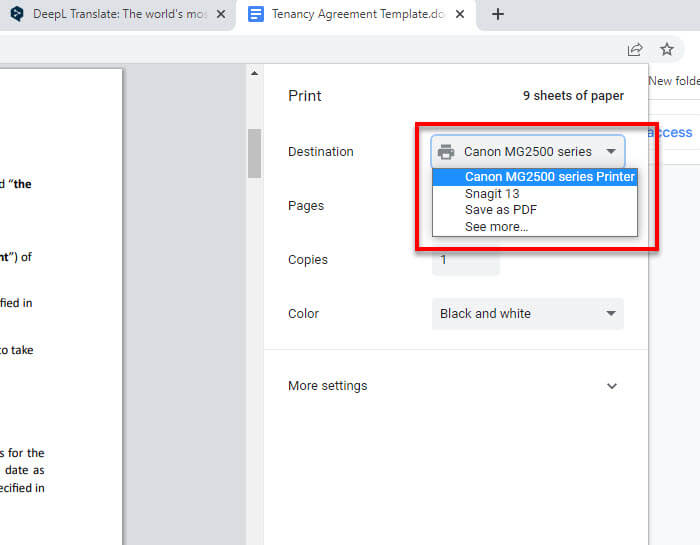
Next, click the drop-down menu next to Destination and select your printer. Note that this step is important. If you don’t select a printer but something else, the More settings option that you will need to access later will not appear.
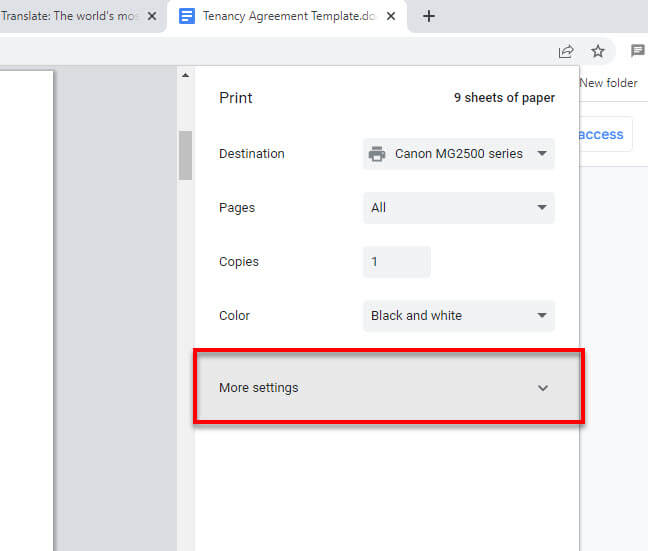
After selecting the right printer, click the More settings to expand the advanced printing options.
Once the more settings is expanded, look for and option called Two-sided. Enable the checkbox for “Print on both sides” next to it. Then, select whether you want to Flip on long edge, or Flip on short edge. Flip on long edge is usually what you are looking for if you are printing a document in the regular portrait orientation (like a regular book).
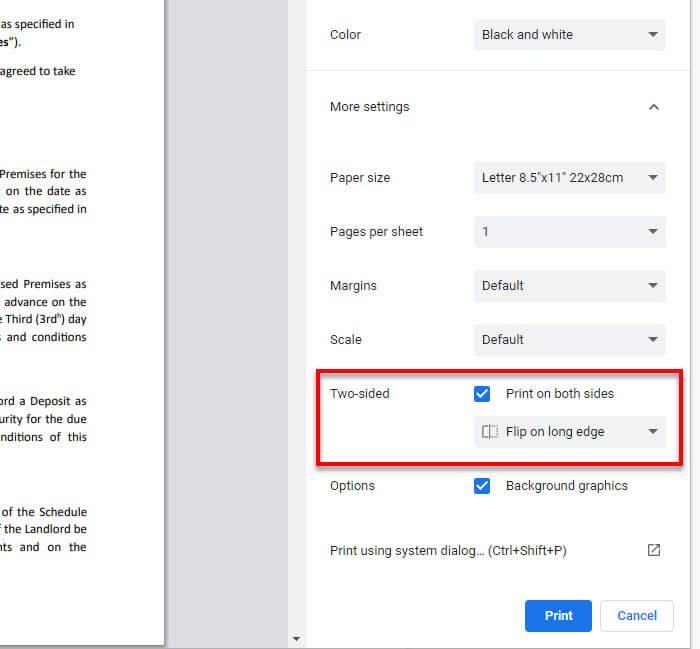
Lastly, click Print to execute the print procedure to print the Google Docs document on the front and back of a paper (double-sided).
Related: How to Clean Print Head in Windows 11
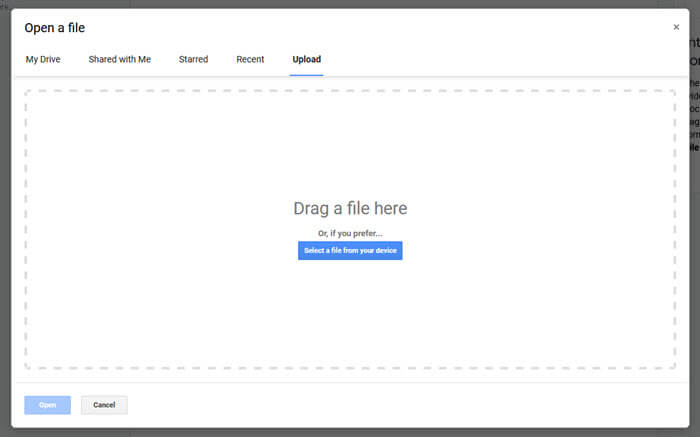
If this is your first time trying to use Google Docs to print a local document, go to https://docs.google.com/ and click on Blank under “Start a new document”. Next, click File and select Open. Select Upload and upload the document you want to open with Google Docs. After that, follow the steps above to print your document front and back on Google Docs.
Why is the double-sided print option missing?
If you select something else other than a printer (such as Save as PDF, etc.) for the destination, the screenshot below is what you will see. There will be no “More settings” option on the print preview because Google Docs and Chrome couldn’t detect a printer.
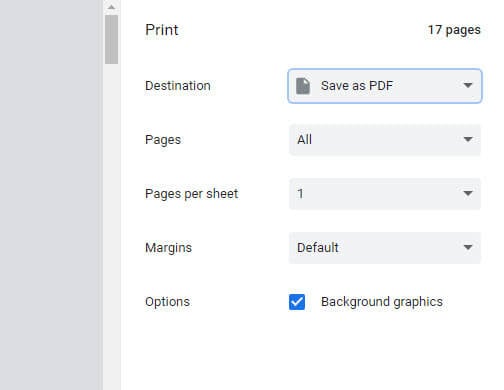
If you don’t see your printer in the destination drop-down menu, you may need to check your printer to see if it is properly connected to your computer or if its driver is properly installed.
Suggested Guide: How to Reinstall Printer Driver on Windows 11
Also, note that even if you see the More settings (or other advanced printing options on other browser), you might not see the “two-sided” or “double-sided” printing option if your printer does not support duplex printing (the ability to print front and back of a paper).
