This tutorial will show you how to partition new SSD and how to create new partition on an existing or external SSD in Windows 11 or Windows 10 without formatting or losing any data. Since all these can be done using Disk Management – a Windows built-in disk manager, you don’t have to pay for or install any third party software just to format or partition your SSD.
Also see: How to Format New SSD Drive in Windows 11/10
Page Contents
Partition new SSD in Windows 10/11 using Disk Management
When you plug in a brand new SSD you’ve recently purchased, it won’t show up in This PC or File Explorer immediately. In general, there are 3 states a SSD or HDD can be in.
- Not Initialized – You need to initialize the SSD first to make it detectable and usable in Windows. It is usually the case for a brand new SSD.
- Unallocated – The SSD is initialized but the disk space is unallocated yet. This is the state where you can create new volume / partition on the SSD from the unallocated space.
- Already partitioned – If a SSD is already partitioned, the partitioned volume(s) will show up in “This PC”. It means that the SSD can be used right away (or that the SSD is already in use). You can still create new partition from the available empty disk space on the SSD without formatting (follow the second part of this guide about how to “partition existing SSD without formatting” below).
To check what states your SSD is in right now, on the Windows search bar, search for a open “Disk Management“. From there, you can see whether the SSD shows “not initialized”, “unallocated” or that there are already partitions on it.
All the disk drives, regardless if it’s a HDD or SSD, will show up as Disk # in Disk Management. You can identify them by right-clicking them and select Properties. The disk’s name will be shown in the properties window.
Initialize SSD
To initialize a new SSD, right-click on the SSD that shows “Not initialized”, and then click on Initialize Disk.
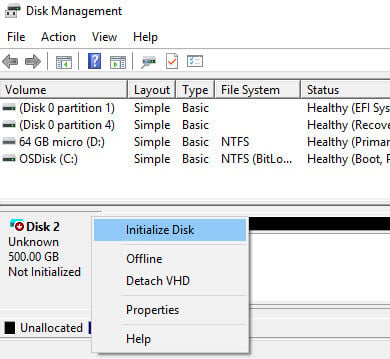
You will then be given two choices for the partition styles to be used on the SSD – MBR or GPT (You may want to do some research on this prior to making your choice). Select your preferred partition style and proceed to initialize the disk.
Create partition on unallocated space
After initializing the SSD, the disk should show up as “Online” with unallocated space in Disk Management. To create partition on the unallocated space, right-click on the SSD and select “New Simple Volume“.
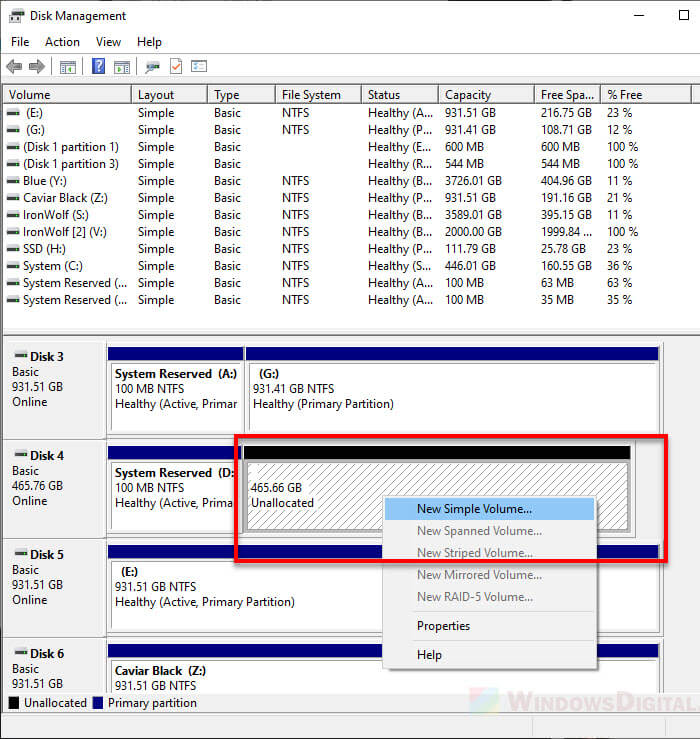
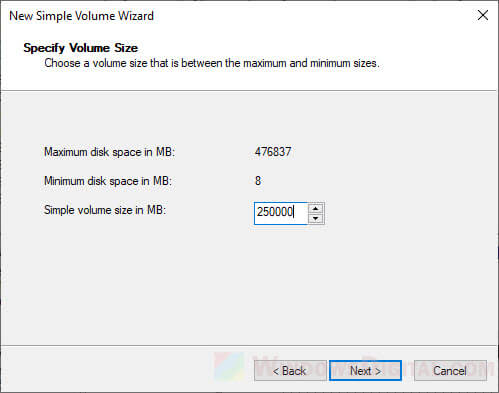
When you are prompted to specify volume size, enter a volume size for the new partition.
For example, if you want to create only one partition that fully utilize all the unallocated space, simply enter the “maximum” disk space as the volume size.
If you want to divide the disk space so that you can create multiple partitions on it instead, enter a volume size of your choice (between minimum and maximum disk space). You can repeat the “New Simple Volume” process later to create other new partition using the remaining disk space.
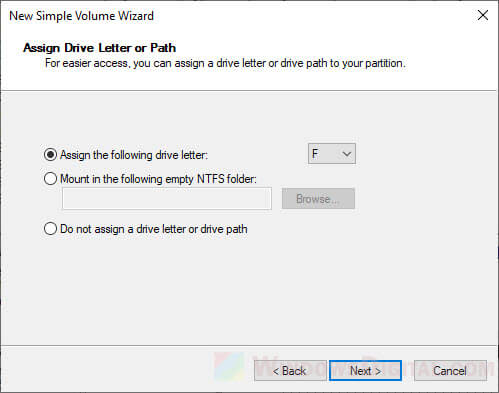
On the next screen, assign a drive letter for the new partition. Click Next to continue.
Next, select “format this volume with the following settings” and enter a volume label (a name for the partition which will be shown in places such as This PC). Click Next to start formatting the new volume.
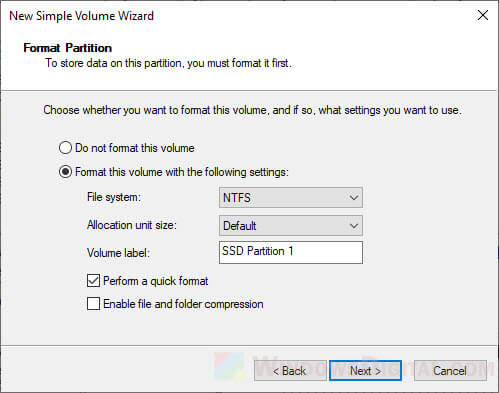
Once formatting process is completed, the new partition will then be created. You can now start using the new partition / volume.

Partition existing SSD in Windows 11/10 without formatting or losing data
If you have an existing or already in-use SSD (even after installing Windows 11 or 10 on it), you can still create new partition from the available empty disk space on the SSD without formatting or losing data. The feature that makes this possible is the Shrink volume function in Disk Management.
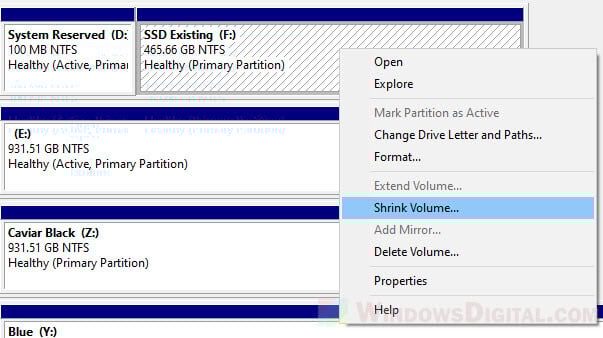
For a detailed step-by-step guide on how to create new partition on an already in use SSD using Disk Management, go to: How to Split Drive in Windows 11 or 10 Without Formatting.
