If you don’t already know, ThrottleStop is a simple tool for Windows that is able to stop the throttling of your CPU that is usually done by the OS. It’s a favorite app for many laptop users that prefer not to have their laptop throttled automatically by Windows. But you should also know that doing so might risk damaging your computer because when your CPU gets too hot, it will no longer throttle your CPU to prevent overheating. ThrottleStop also lets you change things like the processor’s clock speed and other settings.
One thing that ThrottleStop doesn’t do is it doesn’t really start automatically when you start your Windows. You will have to open it every single time you boot your PC, which can be easy to forget sometimes. This guide will show you a workaround to force ThrottleStop to start itself automatically when you log into Windows 11 or Windows 10.
Also see: How to Disable CPU Throttling (Settings) in Windows 11
Page Contents
Configure ThrottleStop to automatically run at Windows startup
To make sure ThrottleStop starts with Windows, we can use the Task Scheduler. Task Schedule is a very useful tool that allows you to set up tasks to run automatically at specific times or events. The following is a step-by-step guide on how to make a new task just for ThrottleStop.
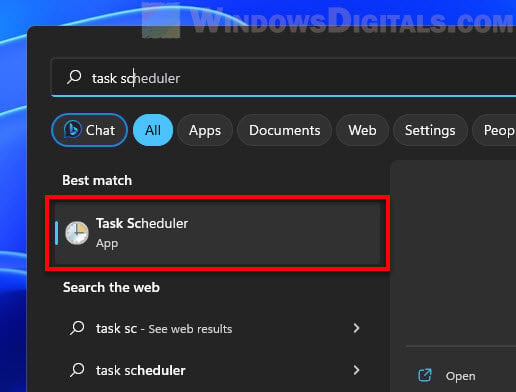
- Open Task Scheduler by typing “Task Scheduler” in the search box next to the Start menu and selecting it from the results.
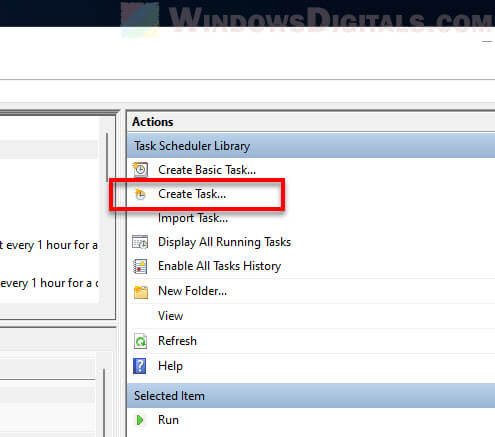
- Once Task Scheduler is open, go to the “Create Task” option on the right side to start setting up a new task.
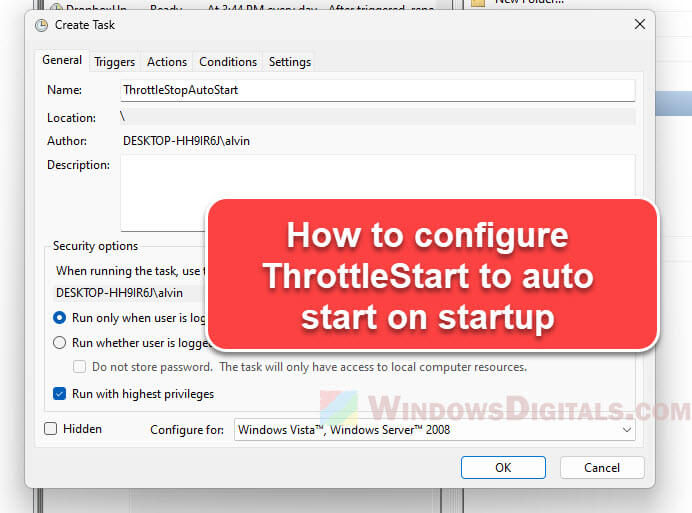
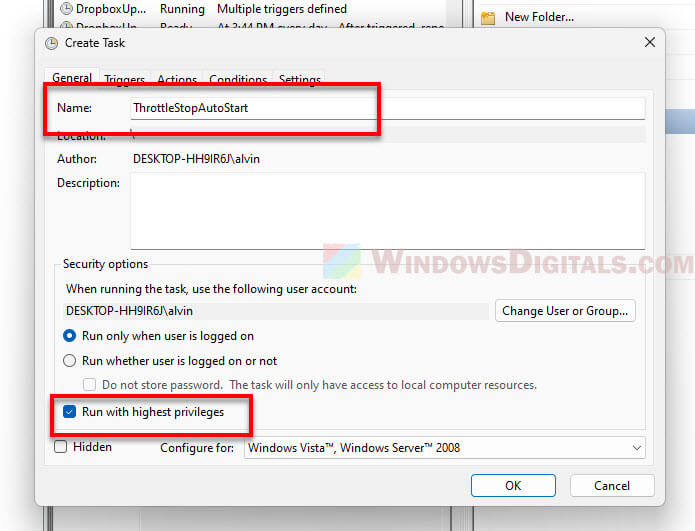
- A new window will show up where you will set up the basic info. Start by naming the task, let’s call it “ThrottleStopAutoStart“. If you have admin rights, make sure to check the “Run with highest privileges” box to make sure ThrottleStop can run properly.
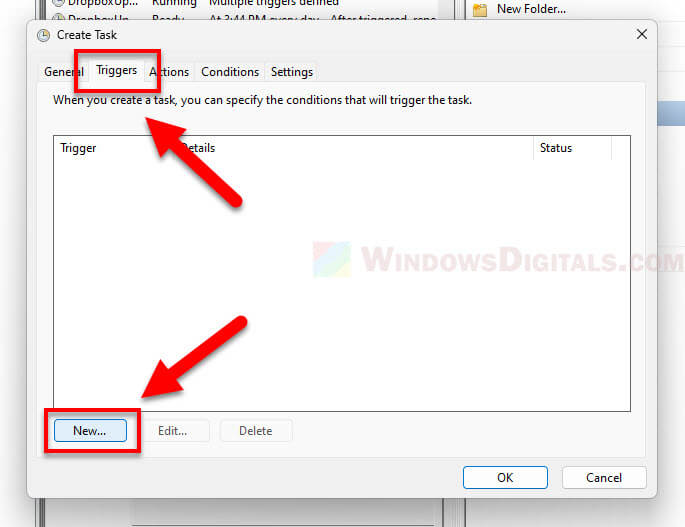
- Go to the “Triggers” tab and hit “New“. Here you decide when and how often ThrottleStop should start.
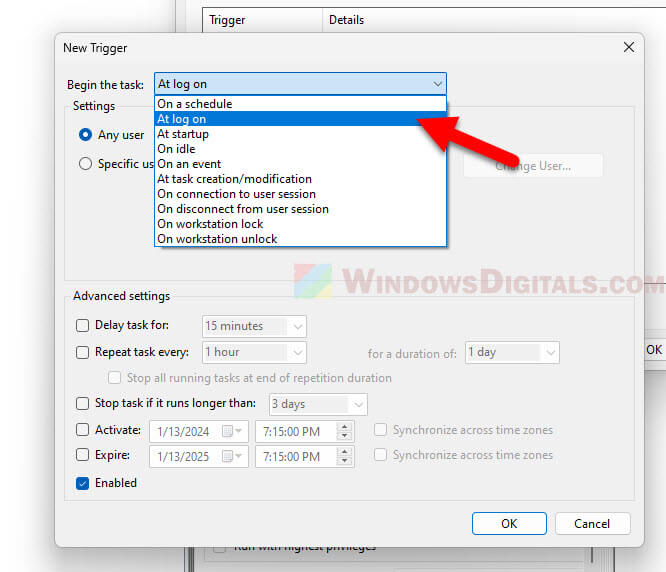
- Set the trigger to “Begin the task: At log on” for any user. This will make ThrottleStop start automatically every time someone logs into Windows.
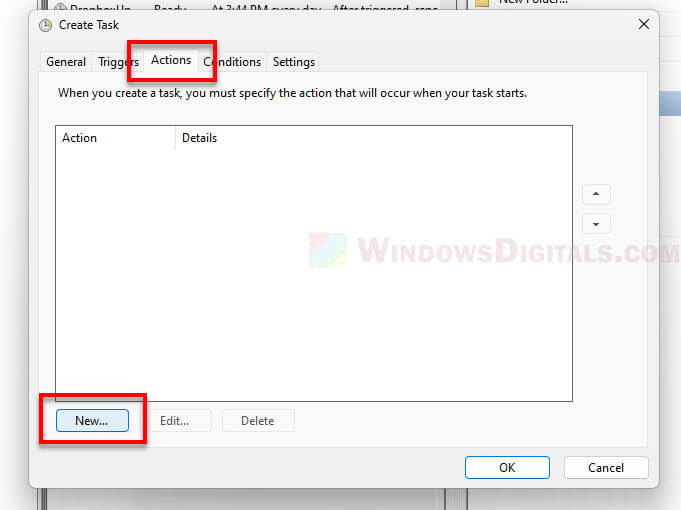
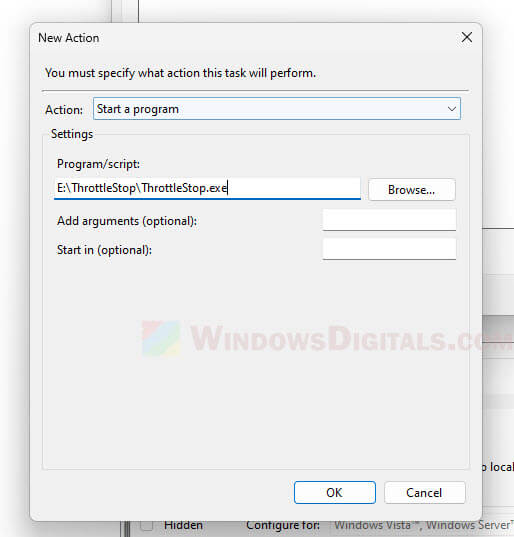
- Next, go to the “Actions” tab and click “New“.
- Here, set the action as “Start a program“. Find and choose the “ThrottleStop.exe” file from where you saved it on your computer.
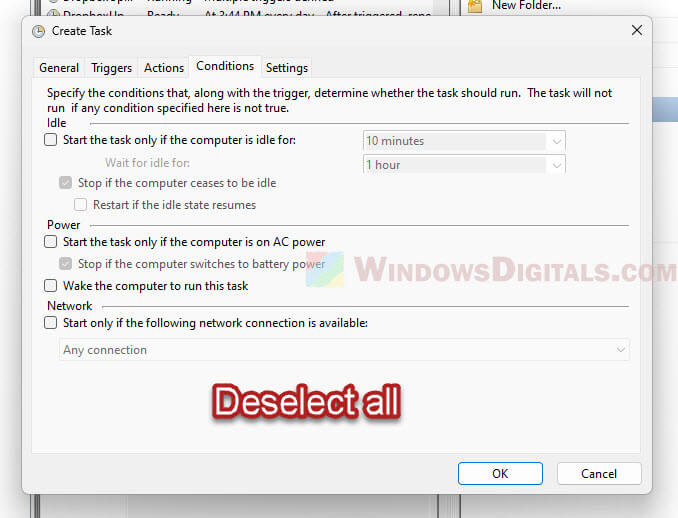
- In the “Conditions” tab, you might want to unselect all conditions to make sure ThrottleStop always starts up.
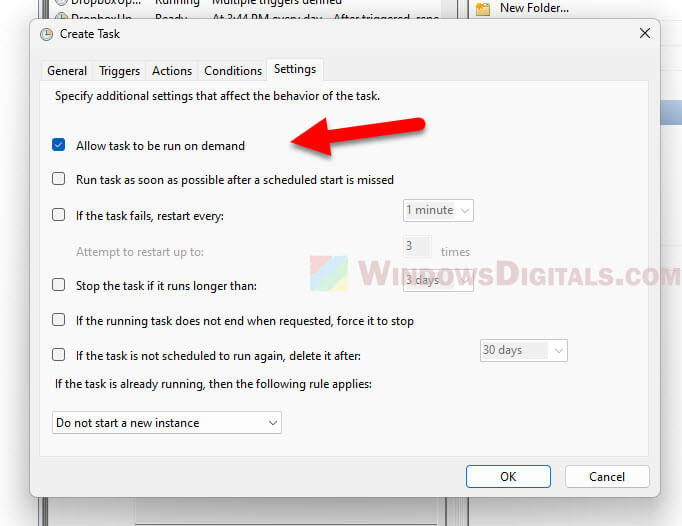
- Lastly, in the “Settings” tab, make sure “Allow task to be run on demand” is checked and uncheck all other options that could stop the task from running.
Pro tip: How to Test CPU Throttling in Windows 11
Some tips to fine-tune ThrottleStop
After setting ThrottleStop to start automatically, it’s important to make sure it’s set up correctly to avoid issues like causing your system to be unstable. The following are some tips on how you can fine-tune ThrottleStop.
- Start by watching your CPU’s usual performance without any changes from ThrottleStop. Use Task Manager or another system monitoring tool to check the temperature and how well it performs under normal use.
- Slowly change settings in ThrottleStop, starting with little steps. For instance, if you’re lowering the voltage, do it bit by bit to find the best mix of cooler temperatures and stable performance.
- Use ThrottleStop’s own benchmarking tool to see how your changes affect performance. This lets you compare how things were before and after your adjustments.
- Write down every change you make in ThrottleStop, including when you made them and what effects you noticed. This is really helpful if you need to fix problems or go back to settings that worked better.


