In Windows 11, you can change and customize the icon of any folder, file or app through its Properties window. By default, there is only a limited number of icons you can choose from. The available icons are usually the generic system icons provided by Windows. However, you can actually turn any picture you want into an icon and then use it as the app, file or folder icon in Windows 11.
There is a standard in which Windows recognize a picture as an icon. If a picture or image is not properly converted as an icon, Windows will not be able to use the picture as an icon, and you will not be able to select the picture when choosing an icon for a shortcut, file, folder or app.
Also see: How to Change Desktop Icon Spacing in Windows 11
Page Contents
How to turn a picture into an icon in Windows 11
In this guide, we will show you a detailed instruction on how to make a picture into an icon and set the picture as file or folder icon in Windows 11.
Step 1: Convert the picture to icon format
The first step is to convert the image or picture you want to use as folder icon into an ICO file – a standard icon file format. The quickest method would be to use an online tool to do so.
There are plenty of sites that can help you convert a picture into ICO. You can use the following website, or Google search for another tool using the keyword “convert image to ICO” if the following doesn’t work for you.
https://image.online-convert.com/convert-to-ico
Visit the website and drag-and-drop the picture you want to convert as icon to the area where it says “Drop Files here”. Once your picture is uploaded, click the Start button.
![]()
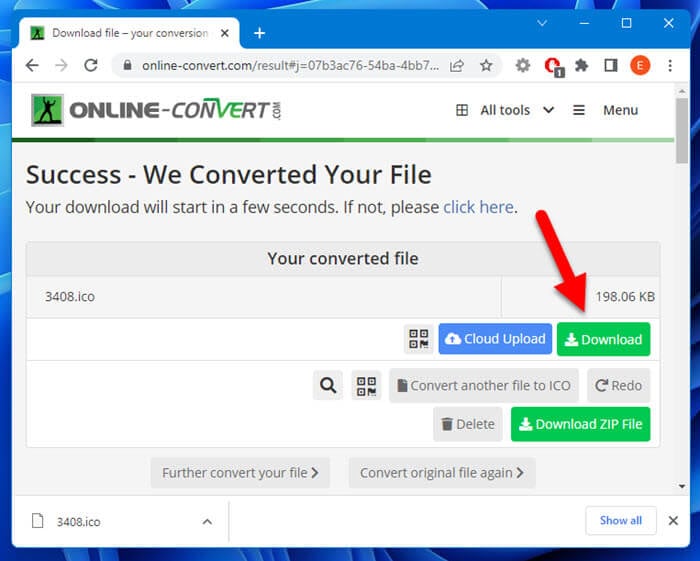
The tool will then begin to process the image and convert it to ICO format. Once completed, click the Download button to download the converted ico file.

Optionally, you can move the downloaded icon file to a place easier to remember and browse to as you will need to browse to it later when selecting an icon.
Suggested Guide: How to Save and Restore Positions of Desktop Icons in Windows 11
Step 2: Set the picture as file or folder icon
Now that you have the converted picture ready to be selected as the file or folder icon, you can head back to the customize icon section to change the icon for any file, folder, app or shortcut to the converted picture icon in Windows 11. Here’s how to do it.
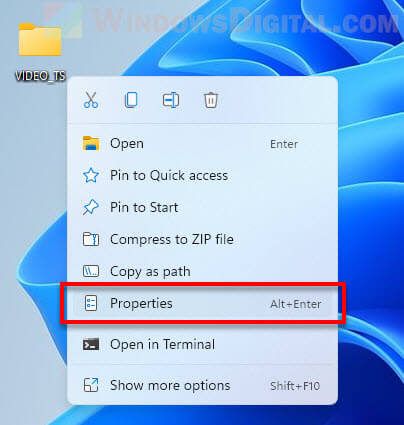
Right-click the file or folder you want to change the icon for, and then select Properties.

Next, select the Customize tab, and then click the Change Icon button in the Folder icons section.
![]()
In the window where you get to select an icon, click the Browse button. The icons shown in the list of icons are the generic icons provided by Windows. Your converted picture icon will not be listed here. You will need to manually browse to and select it.
![]()
Then, browse to the picture icon you have converted and downloaded in the previous step. Select it and click Open.
![]()
Next, back to the previous window, select the picture icon and click OK to set the picture as the folder icon.
![]()
Once you are back to the Properties window, click OK to save the changes.
![]()
Now, your folder icon should then be changed to the picture you have selected. If you can’t see the changes yet, try to refresh the desktop or File Explorer.
![]()
You can use the same steps above to make any picture to icon and then use the picture as the icon for any file, folder, app or desktop shortcut in Windows 11.


