The Quest 3 comes with either 128GB or 512GB of storage, where you can store your VR games, movies, and photos. But when you want to, for example, send your movies from your PC to your Quest 3 so you can watch them locally on your VR headset, you need to enable file transfer first. While it’s usually easy to do so, sometimes the button to enable the file transfer just isn’t there at all.
Also see: Quest 3 Charging While Playing Link Cable Doesn’t Work
Page Contents
Enable file transfer or MTP on your Quest 3 when you plug in the USB
Normally, when you connect the USB-C cable to your headset with the other end to your PC, a pop-up notification will appear on the headset asking whether to allow the file transfer or not. It is extremely common for people to miss the notification or have “Do Not Disturb” mode set to “On”, which prevents the notification from ever appearing. They might just think that the file transfer is not working at all, when in fact, it’s just somewhat hidden.
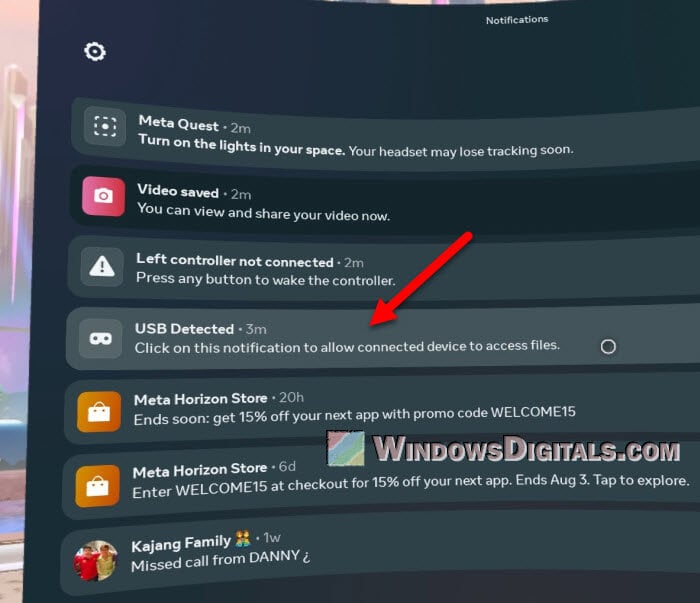
There are two things you can do. The easiest way is to just go to the “Notification” area on your Quest 3.
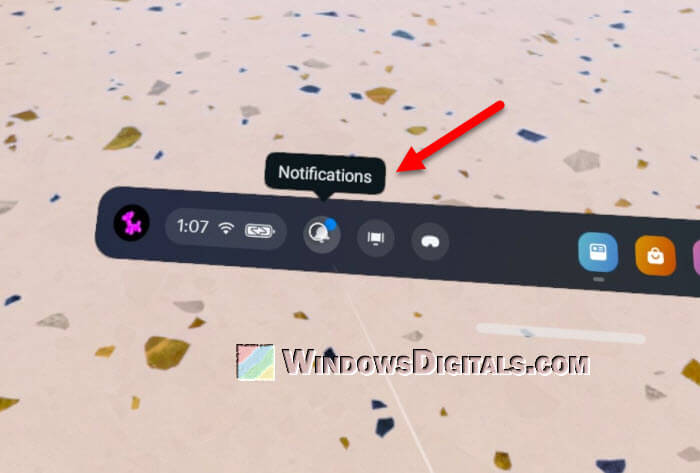
From there, you can manually enable file transfer by clicking on the “USB Detected – click on this notification to allow connected device to access files.” item.
Another method is to disable “Do Not Disturb” mode first, and then reconnect the USB cable from your Quest 3 VR headset to your PC. After that, the USB notification about enabling MTP should show up again.

Pro tip: WiFi 5 vs WiFi 6 vs WiFi 6E for Virtual Desktop (VR)
What if you’ve accidentally denied the USB file transfer option?
Well, if you’ve accidentally denied the USB file transfer pop-up, you’ll have no choice but to do a factory reset on your headset (you can do it through the Meta Quest App on your phone) and retry the connection. There is currently no other way (as of the writing of this guide), but there might be an update in the future to correct this since it’s clearly a problem.
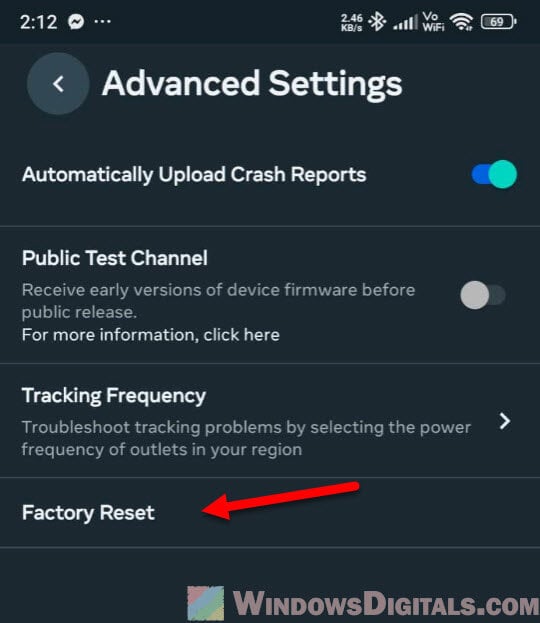
Be warned that by factory resetting your Quest 3 headset, you’ll be wiping everything, removing all games, and resetting all settings back to their factory defaults. It will be as if it’s a new headset. You might want to check other methods, like enabling developer mode, before deciding if you want to factory reset your headset.
Might be useful: How to Find the Best Channel for Your WiFi (VR)
Enable MTP (for those who have Developer Mode on)
If you already have Developer Mode on, you can just use SideQuest on your Windows PC to manually enable MTP for your headset. Download and install SideQuest on your computer if you don’t already have it. Open it and follow the setup instructions to set up your Quest 3 headset.
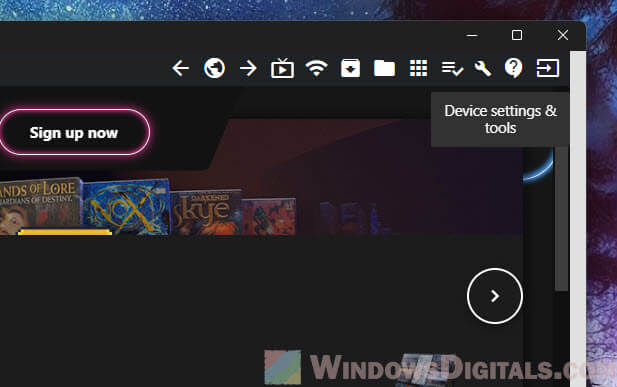
When everything is set up and SideQuest is able to detect your “Oculus Quest 3”, click on the wrench icon that says “Device settings & tools“.
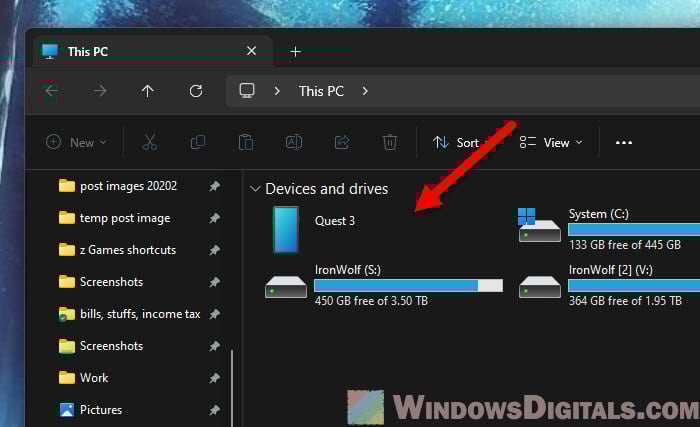
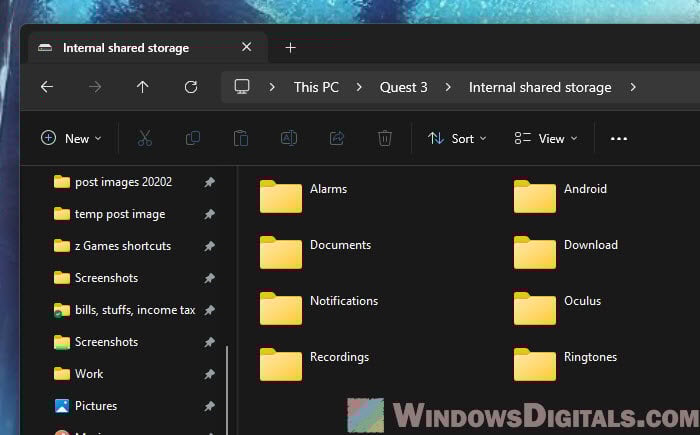
Scroll down until you see a section called “MTP (Media Transfer Protocol)“. This option allows you to transfer files between your PC and your VR headset using File Explorer.
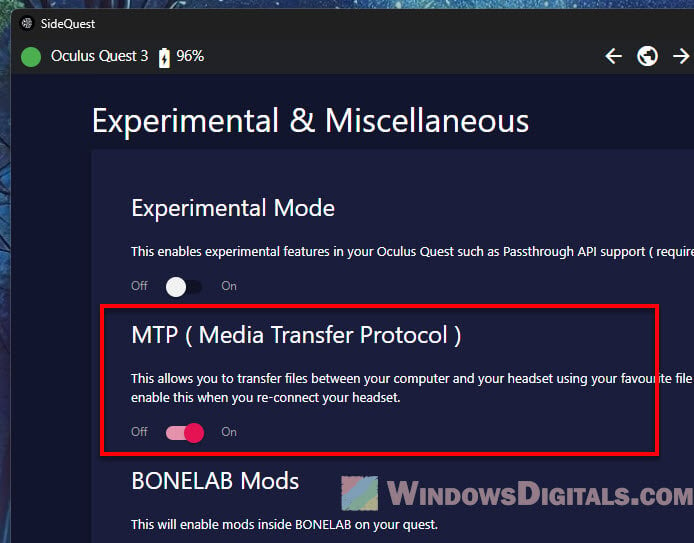
Once enabled, your Quest 3 will immediately show up in File Explorer in the “This PC” section.
The only problem with this method is that you’ll need to re-enable this MTP option whenever you reconnect your Quest 3 to your PC.
Linked issue: Meta Quest 3 “General Device Problem” in Link (Cable)
How to enable developer mode
Enabling developer mode for your Quest 3 headset is a pretty tedious process and should only be done if you know what you’re doing. The following is a brief guide on how to enable developer mode for your Meta headset.
- First, you will need to go to
developer.oculus.com/sign-upto create an “organization“. - You’ll need to accept the developer agreement.
- Next, and the most troublesome part, is that you will need either a credit card or a phone number to verify your account.
- Once you’ve become a “developer”, open your Oculus app on your smartphone.
- Tap on your profile picture and then tap the three horizontal lines icon to open the “Menu“.
- Under “Device management“, tap on Devices and then select your Quest 3 headset.

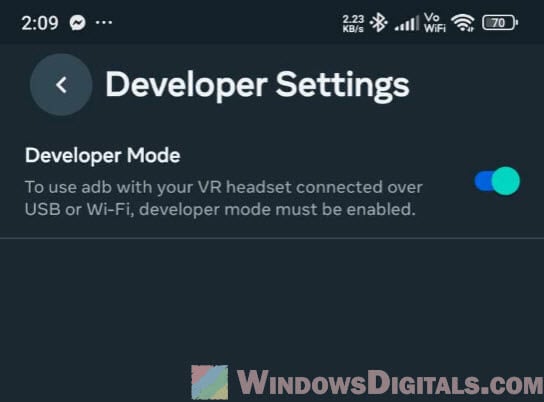
- Next, tap on “Headset settings“, then enable the “Developer mode“.
- Reboot your VR headset.
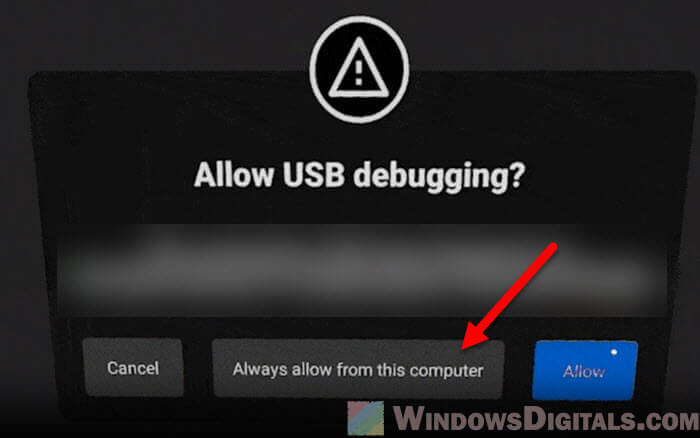
- Reconnect the USB cable, and you should then see the “Allow USB debugging” pop-up in your headset.
- It’s recommended to just select “Always allow from this computer” if you don’t want it to bother you every time you connect your USB.
- And that’s it! You’ve successfully enabled developer mode and should be able to use SideQuest’s features, including enabling MTP for your Quest 3, and much more.