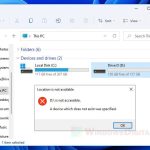
This guide shows how to safely eject USB drive or external hard drive in Windows 11, and what to do if there is no “Safely remove hardware and eject media” icon on the taskbar.
Page Contents
How to eject USB or external drive in Windows 11
To safely eject an external media such as a USB thumb drive or external hard drive in Windows 11, first click the Show hidden icons button on the taskbar to view all hidden icons and look for the Safely remove hardware and eject media” icon.
![]()
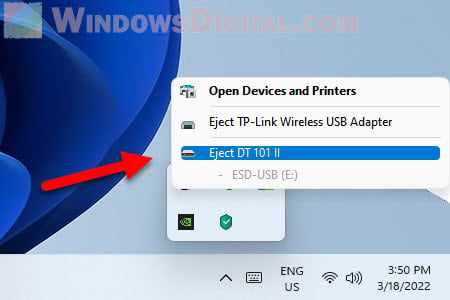
Right-click the said icon and select the hardware or external drive you want to remove.
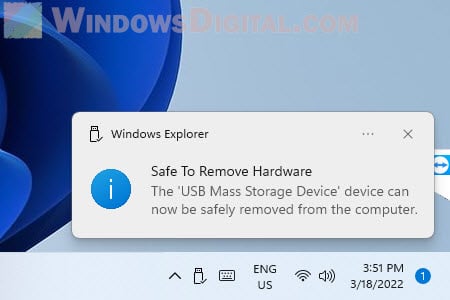
Once Windows has ejected the media, it will prompt a message that says it is now “Safe to remove the hardware – The USB Mass Storage Device can now be safely removed from the computer”. You can then proceed to remove the USB external drive physically.
Safely Remove Hardware icon missing in Windows 11
If the safely remove hardware icon is missing and cannot be found on the taskbar even when one or multiple external drives are currently connected to your PC, you can first try to eject them via the File Explorer window. Here’s how.
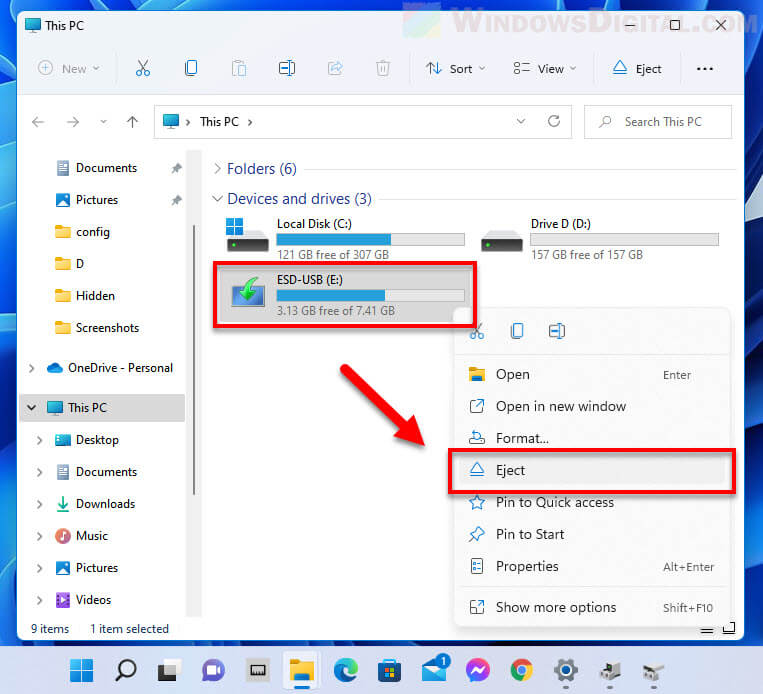
Open File Explorer and navigate to This PC where all connected drives are listed. Right-click the removable/external drive you want to remove, and then select Eject.
If the external drive is not even listed in the File Explorer, it means it may have already been ejected.
Is it safe to disconnect external drive without using the “Safely Remove Hardware” icon?
In Windows 11, there are two main policies for removing external drive or media: Quick removal and Better performance. These policies control how Windows interacts with removable devices such as USB flash drive, external hard disk drive, external SSD, etc. Here’s a quick overview of what each of these policies do.
- Quick Removal – This removal policy disables writing caching on the device and in Windows. However, you can disconnect the device safely without using the Safely Remove Hardware notification icon.
- Better performance – This policy enables writing caching in Windows, but you must eject the external drive using the Safely Remove Hardware icon first before disconnecting the device.
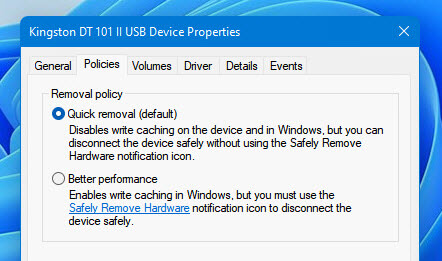
Since Windows 10 version 1809 update, the default policy has changed to Quick Removal. What this means is that, in Windows 11, you can actually remove any USB or external hard drive safely without using the Safely Remove Hardware icon first, provided if you have never change the removal policy for any external drive to Better performance.
To make sure your external drive is using the Quick Removal policy, which it should be by default, follow the steps below.
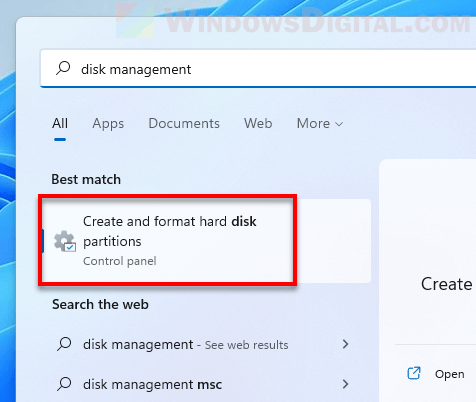
1. Search for “Disk Management” via Start and open it. It may appear as “Create and format hard disk partition” in the search result.
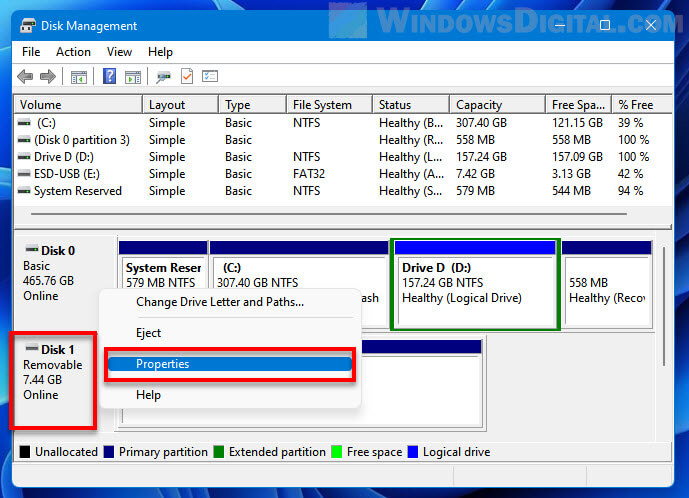
2. At the bottom part of the Disk Management window, right-click the disk that represents your external drive, and select Properties. External or removable storage drive such as a USB flash drive will be marked as “Removable”.
3. In the properties window, select Policies tab and make sure Quick removal (default) is selected.
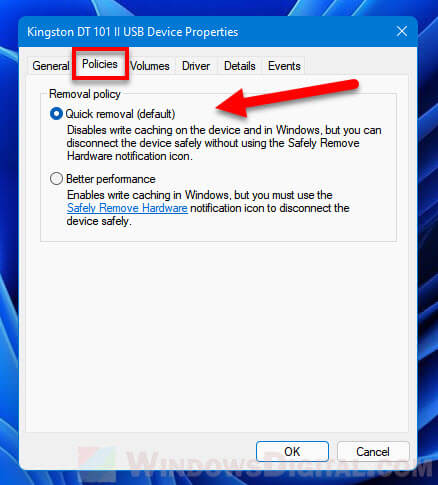
If the Quick removal policy is selected, you can safely disconnect your USB external drive without using the Safely Remove Hardware icon in Windows 11. You can configure this policy for each of your external devices. You can also have different policy for each of them. Windows 11 will remember the policy you have selected for each device even if you disconnect the device and connect it again.

