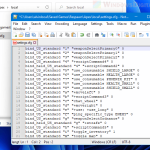
In Windows 11 and Windows 10, there is a specific file in the system folder called “hosts”. This file allows mappings of IP addresses to host names. For example, if you would like the host name abc.example.com to resolve to the IP address 127.0.0.1, you can add the mapping to the hosts file. So when any application tries to access abc.example.com, it would go to the IP address 127.0.0.1.
The hosts file is mostly used to block certain programs or software from being able to reach a certain host name or to redirect the host name request to another IP address. It is also often used to block (or redirect) certain websites you don’t want anyone who has access to the same computer (or any of your programs) to be able to reach the host name upon request.
See also: How to Block a Website Such As YouTube in Windows 11
If you’re told to edit the hosts file to block or redirect a certain host name to an IP address, this guide will show you where the location of the hosts file is, how to correctly edit the hosts file in Windows 11 and Windows 10, and why you were unable to save the hosts file after editing.
Page Contents
How to Edit Hosts File in Windows 10
Note: Edit the hosts file with caution and at your own risk. Adding and remapping any crucial host name would possibly cause some software to fail or render some features unavailable should a host name they need to connect to be inaccessible or invalid due to remap of the host name in the hosts file.
To edit or add an entry to the hosts file in Windows 11 and Windows 10, follow the steps below.
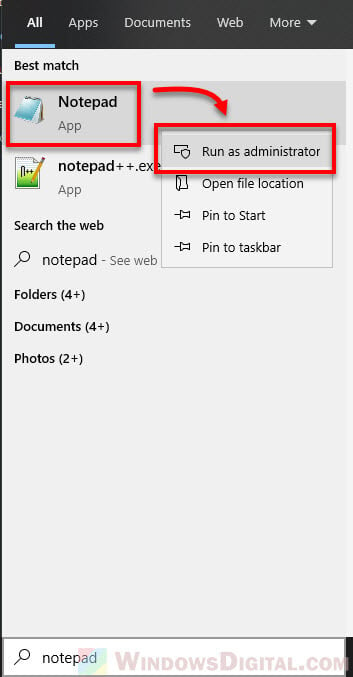
- On the Windows 11 or Windows 10 search bar, search for Notepad. Right-click Notepad from the search result and then select “Run as administrator“.
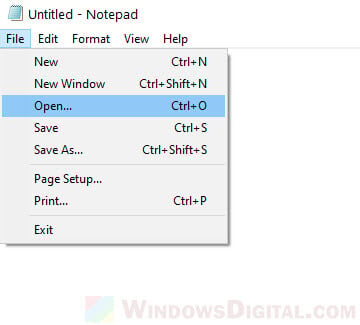
- In the Notepad, click on File, then select Open.
- In the “Open” window, click on the drop-down menu that shows Text Documents (.txt) at the bottom of the window, and then select All Files. Doing this will allow you to see all files instead of only txt files.
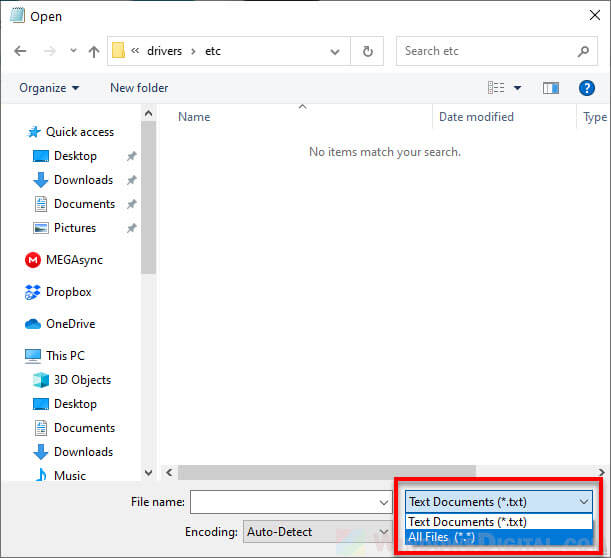
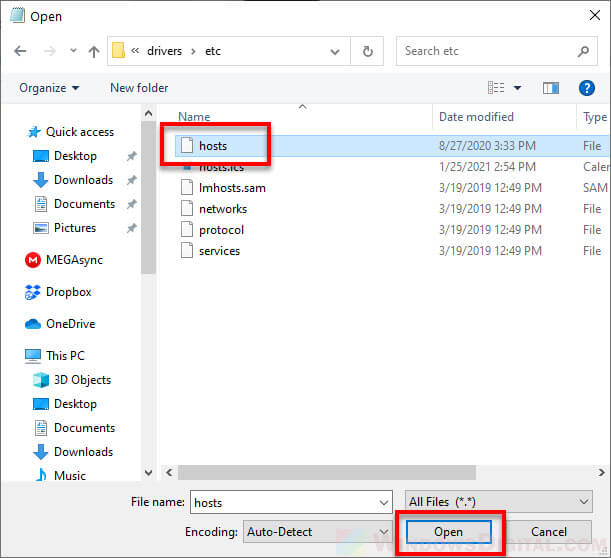
- Next, navigate to C:\Windows\System32\drivers\etc (Change the C: drive if your Windows is in another drive). Select the file named “hosts” then click on Open.
- To resolve a host name to a specific IP address, on a new line, enter the IP address (e.g. 127.0.0.1), followed by a space (or TAB), and then enter the host name (e.g. abc.example.com).
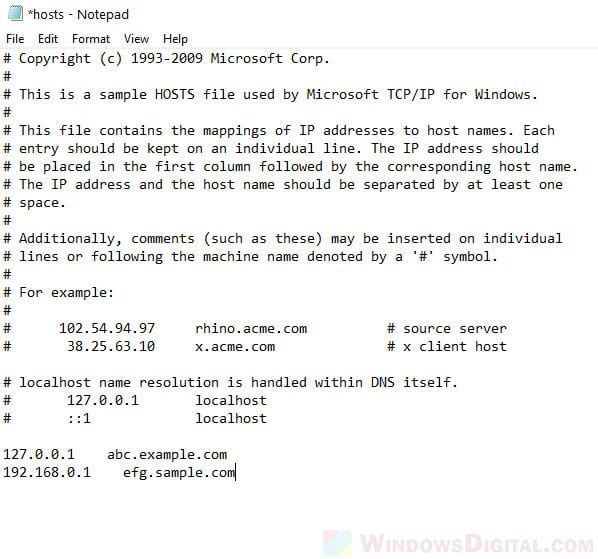
- When you’ve done editing, press CTRL + S keys (or File > Save) to save the changes.
What are the rules for editing the hosts file?
You can add as many mappings as you want. Make sure there is only one mapping per line. Also, make sure there is no # symbol at the beginning of the line where you add your mapping as # (commenting) means to ignore the line.
Additionally, the hosts file does not have an extension and must not have one. Thus, it cannot be opened normally by double-clicking it. You need to open it with Notepad or other text editor. We recommend Notepad as it’s the easiest to use.
Useful tip: How to Block Websites on Chrome Without Extension
Unable to save hosts file because access denied?
This is a common error users receive when they try to edit the hosts file without admin rights and cannot save the hosts file after editing. What you need to do is to get permission to edit the hosts file in Windows 11 and Windows 10.
This can be done by running Notepad as administrator first, then navigate to and open the hosts file from within Notepad. If Notepad has admin rights, you should be able to save the hosts file normally by pressing CTRL + S.
What IP address should I use in the hosts file?
If you have no idea what you are about to do, please do not add any mapping in the hosts file as it may brick some software that needs access to the host name. It will also block you from accessing the mapped host name or website address.
However, if you already have a set of mappings that you’ve decided to add beforehand, just follow the steps above to add them into the hosts file.
If you simply want to block a website or host name so that no program or software can access it, you can use the address 127.0.0.1 followed by the host name or website you want to block. This will resolve the host name or website address to the IP address 127.0.0.1, which is usually inaccessible.
