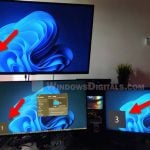
If you want to mirror your screen onto a projector or multiple monitors so that both or all displays would show the same contents, this short tutorial will show you a few methods on how to quickly duplicate screen on Windows 10 or Windows 11.
Also see: How to Use Snap Layouts in Windows 11
How to duplicate screen on Windows 11/10
Mirroring screen on Windows 11 or Windows 10 can be done without any third party software. It’s a built-in Windows feature that allows you not only to duplicate but also to extend or to show only certain screen. There are two ways to access to this feature – by using shortcut key to quickly switch modes to duplicate, or by changing the multiple displays option in the Settings.
If this is not what you were looking for, try the following:
- Windows 11 Different Wallpaper on Each Monitor
- How to Display Different Things on Two Monitors on Windows 11
Page Contents
Duplicate screen with shortcut keys
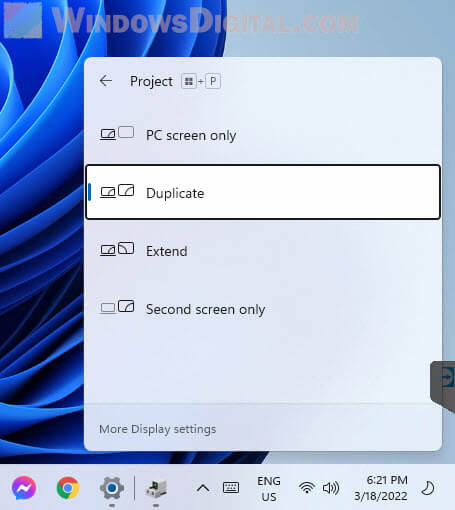
To quickly switch to duplicate screen mode in Windows 11/10, press and hold the Windows key and then press the P key.
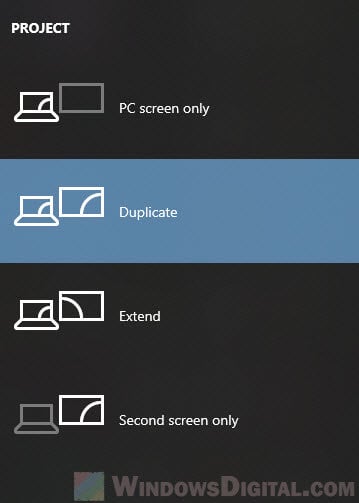
To switch to any of the available modes, press the P key again while holding the Windows key to toggle between the available modes:
- PC screen only – when selected, Windows will only display your primary screen / PC screen.
- Duplicate – Windows will duplicate the primary screen onto all other available displays.
- Extend – The accessible screen will be extended to other display.
- Second screen only – when selected, Windows will only display the second screen / TV.
Windows 10
Windows 11
If you want to mirror or clone your primary screen onto all other displays, select Duplicate from the list of available options. When selected, windows will immediately duplicate the screen across all your connected displays.
Change to duplicate screen via Display Settings
If the shortcut keys method doesn’t work for you, you can change the display mode to duplicate screen from the display settings. To do so, follow the steps below.
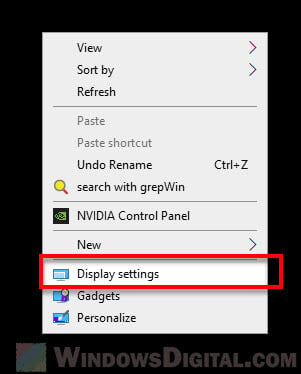
- Right-click anywhere on your desktop, then select Display settings.
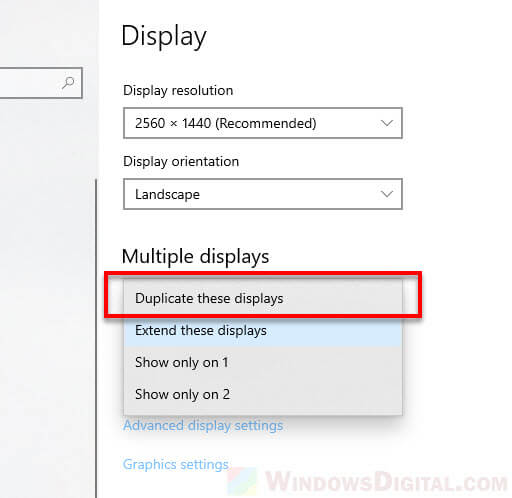
- In the Display settings, scroll down until you see the Multiple displays option.
- Click on the drop-down menu and select “Duplicate these displays” to duplicate the primary screen on all displays.
Options unavailable or monitor not detected
If you’re plugging in a new monitor or projector, make sure they are plugged correctly using the correct cable and connected to the correct port.
If there is any driver CD that comes with the hardware, make sure to also install it so that it can be detected and work with Windows properly.
Optionally, to manually detect a newly plugged monitor, projector or other types of displays, do the following.
Right-click anywhere on your desktop and select Display settings. Under rearrange your displays, click on Detect to tell Windows to detect any newly plugged display.
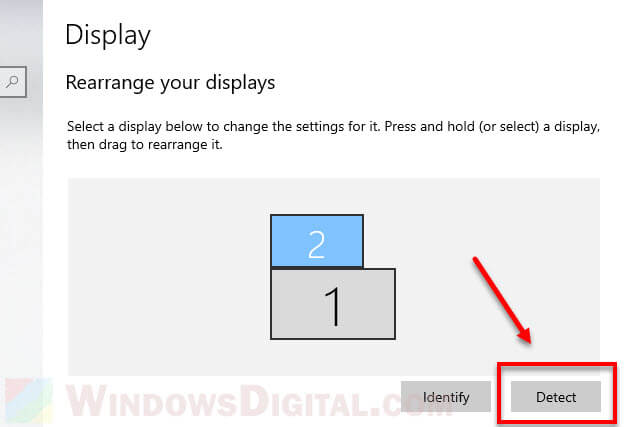
In the same window, you can drag and drop the display to any direction to rearrange them if you are to extend the display. To identify the display so that you know which number represents which display, click on Identify.
Main display accidentally switched to other display
If in any case the main display switched to a monitor, TV or projector that you do not wish to be the primary display, especially after switching back from “duplicate mode” which often causes the issue, you can change the main display back to your preferred monitor in the Display settings.
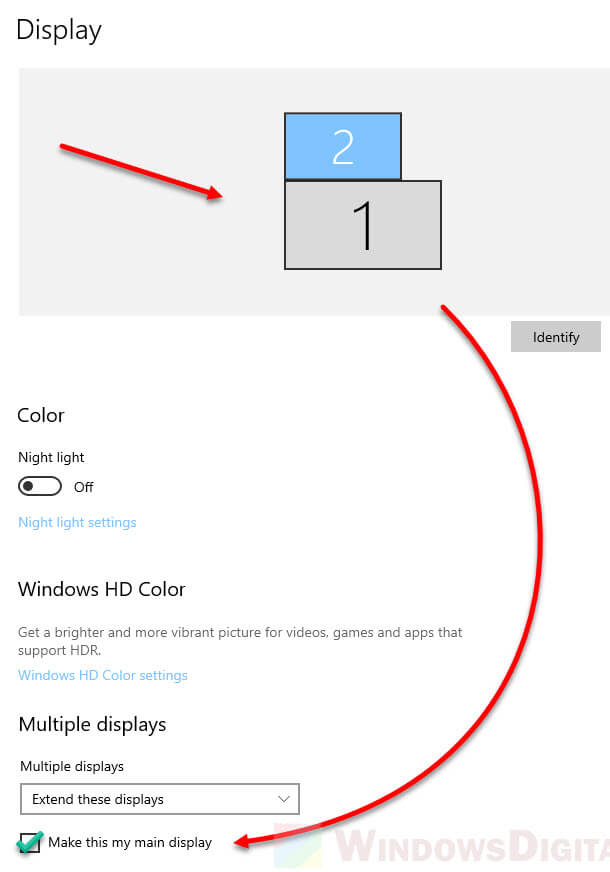
Open display settings (right-click desktop > display settings). First, select the monitor by clicking on the number that represents the monitor you want to change as main display. Then, under Multiple display, click on the “Make this my main display” checkbox. Doing so will immediately make the selected display your main display.
