Split screen on Windows is a multitasking approach where there are multiple applications displayed on a screen at once. If this is what you are trying to achieve, this tutorial will show you how to do split screen in Windows 11 or Windows 10 on a normal laptop or desktop mode, on PC with two monitors, or on tablet mode where most people have trouble trying to do split screen with.
See also: How to Split Screen Vertically in Windows 11
Page Contents
Split screen on Windows 11/10 laptop or desktop mode
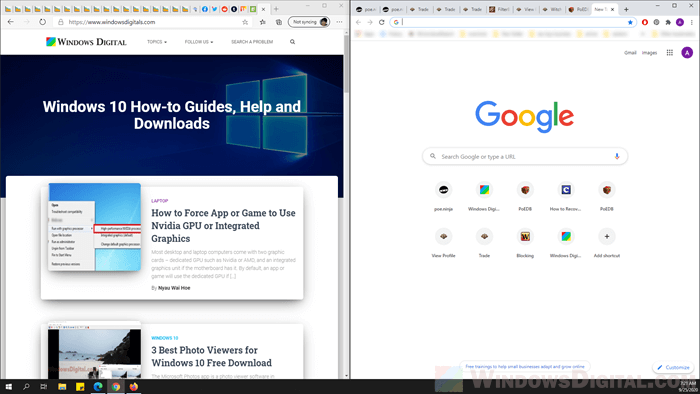
On normal desktop mode, here’s how to snap program windows into split screen on Windows 11 or 10.
- On a program’s window that you want to snap to one side of your screen, left-click and hold onto its title bar (any part at the top of the window).
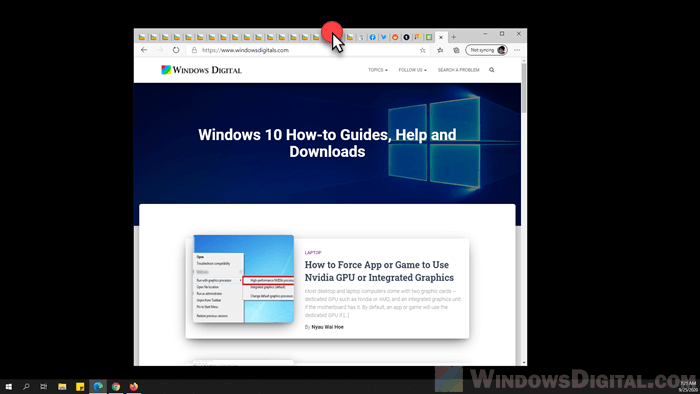
- While holding the title bar of the program’s window, move it to your preferred side of the screen. It can be left or right, or top left, top right, bottom left or bottom right if you want to do a quad apps split screen.
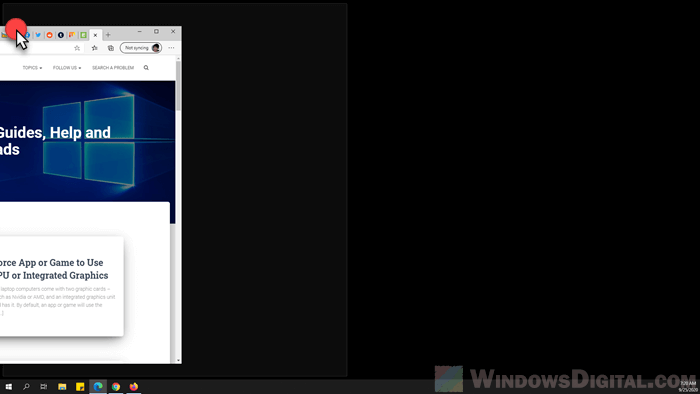
- When the window reaches the side of the screen, a light outline will appear on the edge of the screen for snap confirmation. Release your mouse button to confirm the snap and have the app’s window snap at the chosen side of the screen.
- Repeat for other apps to achieve a multi-apps split screen.
How to split screen on Windows 10/11 tablet mode
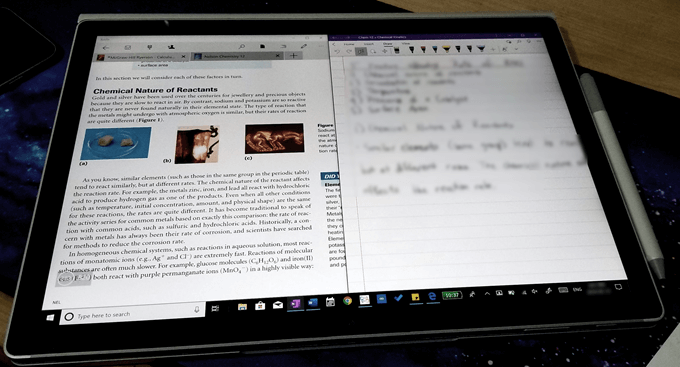
For splitting the screen on Windows 10 or 11 tablet mode, the simple drag and snap doesn’t always work. There are chances that when you try to snap an app’s window like how you would on desktop mode on a Windows tablet, it might just go back to full-screen mode as soon as you try to snap it. If that’s what’s happening, here’s a quick method you can try to achieve split-screen mode on your Windows tablet.
- While you are on full-screen of an app, swipe down from the top of the screen to the middle.
- While holding the app on your fingertip, swipe it to the left or right side of the screen.
- The app should now snap onto the side of the screen.
Demonstration on a YouTube video:
https://www.youtube.com/watch?v=PDnCHPn4MTs&feature=youtu.be&t=114
Please be aware that this method may not work on your tablet, as there are numerous models of Windows 10 tablets that operate differently from one another.
Split screen on computers with two monitors
The problem with trying to snap a window to the edge of the screen in between two monitors to achieve split screen on Windows 11 or 10 is that, most of the time, the program window would just move through the screens instead of showing the snap outline confirmation. The snapping usually works on all edges of the screens on both monitors except the edges that are in between the two monitors.
The solution, however, is surprisingly easy. The culprit that causes the app windows to go through edges of both screens instead of snapping them is that they were moved too fast across the screens. Try to move your app slowly as it reaches the edge of your screen. It should then pop the snap confirmation. Release to have it snapped on the side of your screen.
Split screen not working
If nothing works to snap apps into split screen on your Windows PC or tablet, check on the snap settings to see if they are properly enabled.
- Go to start menu or Cortana and open Settings.
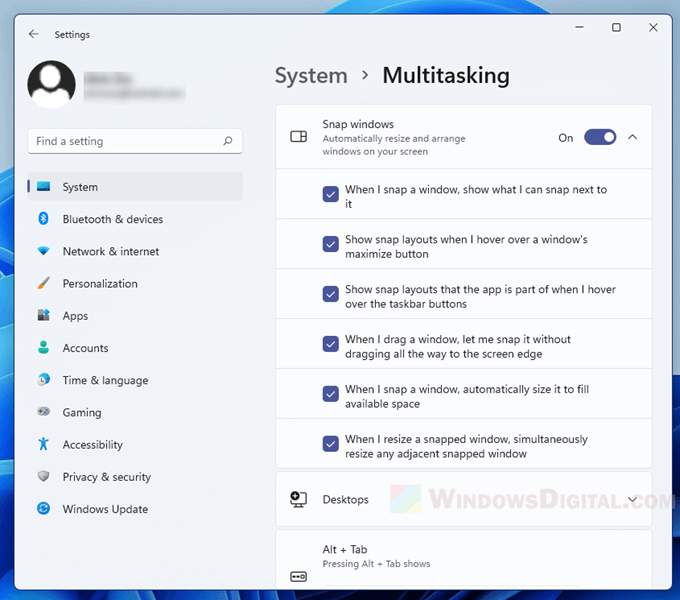
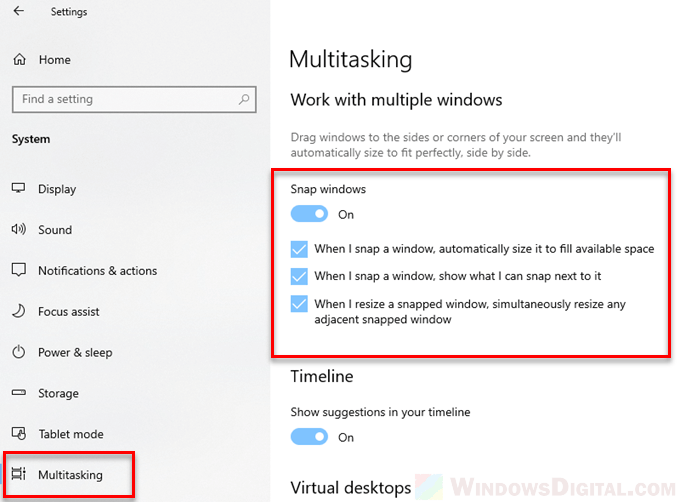
- Navigate to System > Multitasking in the Settings window.
- Make sure all options under Snap windows are On and enabled.
Windows 11
Windows 10
These options are usually enabled by default. If in any case they are disabled, the windows snapping will not work as it has been told not to. Once enabled, restart your device and try to snap any app window into split screen. It should work now.
