Many Windows users may wonder how to eliminate all sign-in options, from startup to booting into Windows 11 or Windows 10. With the introduction of “Microsoft Account” as part of Windows login, a password is the minimum requirement to access your Windows PC.
However, there’s a way to remove all password, Windows Hello PIN, Face or Finger sign-in options in Windows 11/10. You can create a local user account without a password and sign in with it instead of your Microsoft account. This guide will show you how to do that in two simple steps:
- First, create a local account with or without a password on Windows 11/10.
- Then, change your local user account to an administrator account.
Also see: How to Login Windows 11 Without Microsoft Account
Page Contents
Part 1: Create a local account without password
To create a local user account with or without password on Windows 11 or Windows 10, follow the steps below.
- Go to the “Start” menu and search for and open “Settings”.
- Select “Accounts”, then choose “Family & other users” from the left sidebar.
- In the right pane, under “Other users”, click on “Add someone else to this PC”.
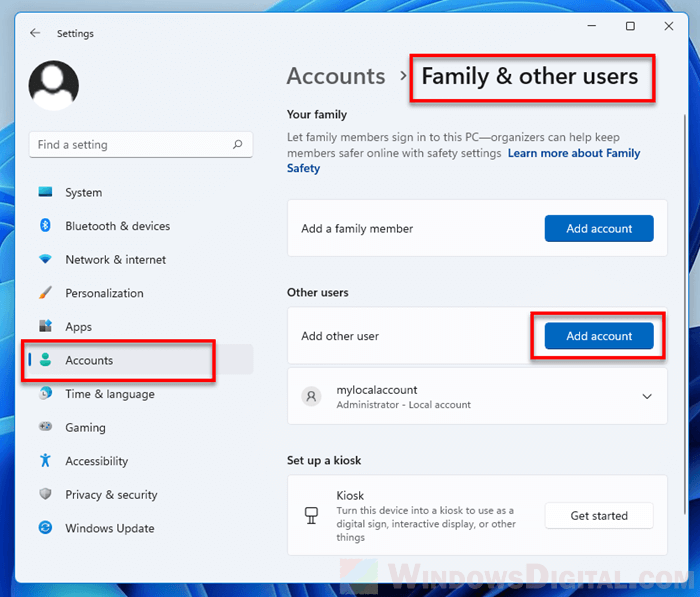
Windows 11
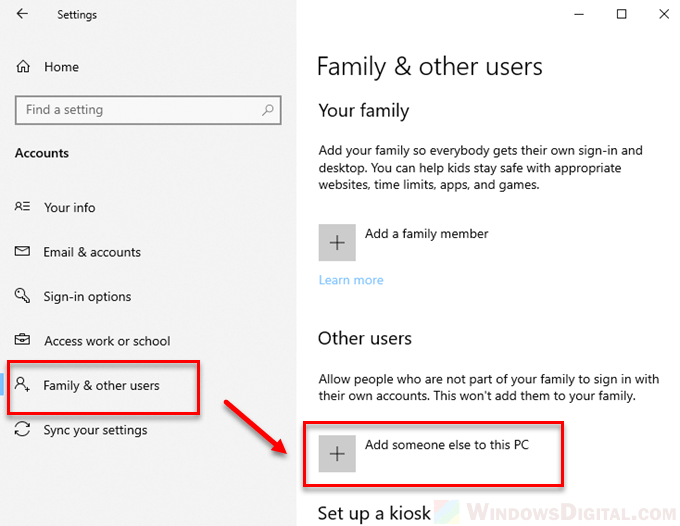
Windows 10
- When it asks for an email or phone for the new account, click on the “I don’t have this person’s sign-in information” link instead of entering anything in the field.
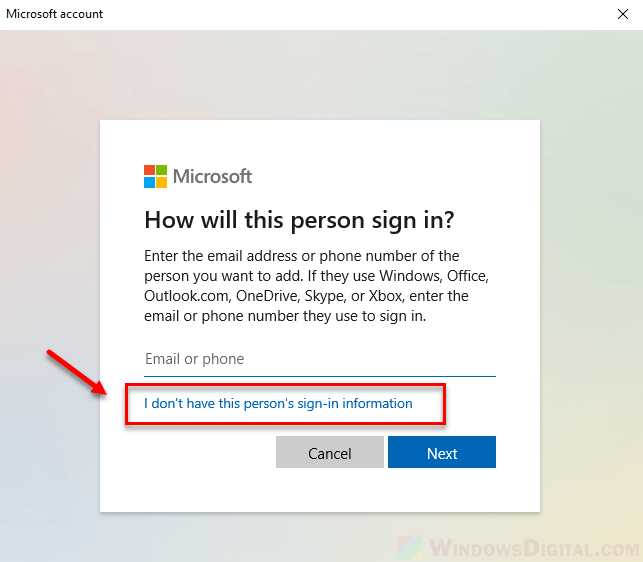
- On the next screen, click on the “Add a user without a Microsoft account” link.
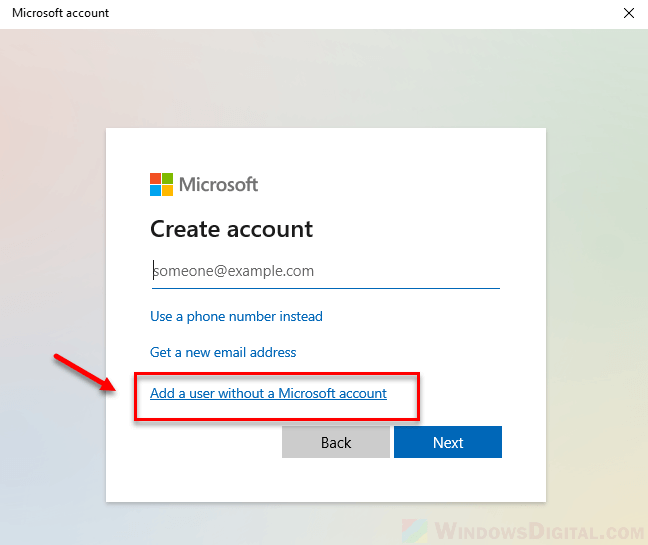
- You have two options here:
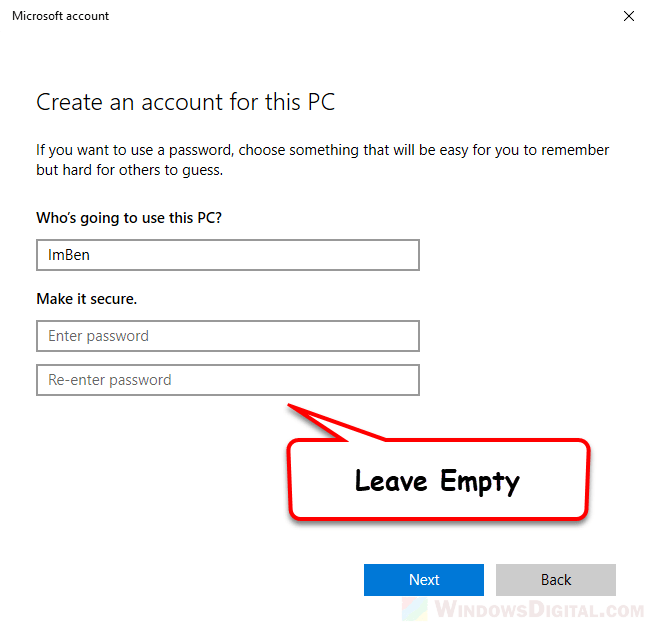
- If you don’t want any password for this local user account, enter your desired username and leave the password field empty, then click on “Next”.
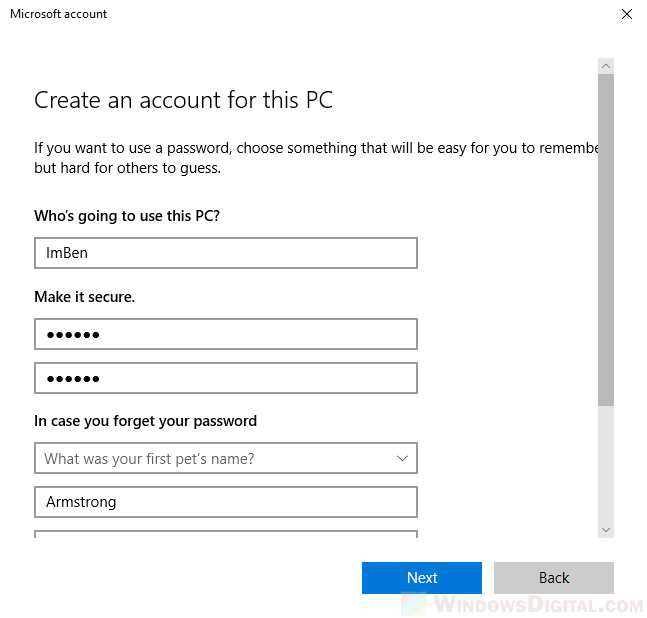
- If you want a password for this local account, complete the form by entering your desired username, password, and the three security questions. Click “Next” when you’re done.
- If you don’t want any password for this local user account, enter your desired username and leave the password field empty, then click on “Next”.
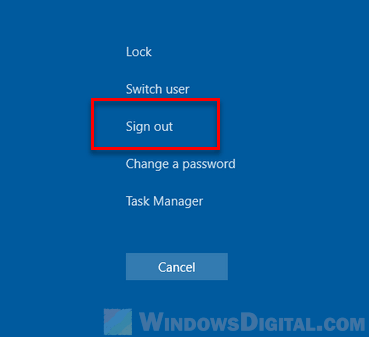
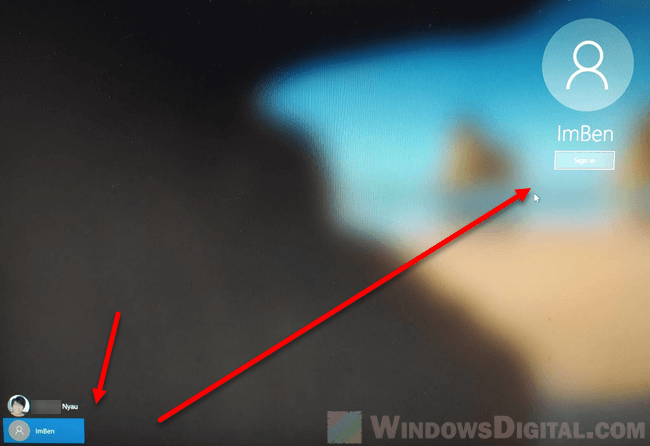
That’s it! Your new local account is now created. To log in to your newly created local account, restart your PC (alternatively, press “CTRL-ALT-DEL” keys then select “sign out”, instead of having to restart).
On the welcome screen, select your new local user account, then click “Sign in”.
Part 2: Change the local account to administrator
Optionally, you can change your new local user account to an administrator account with admin privileges. Here’s how to do it:
- Go to “Start” > “Settings” > “Accounts” > “Family & other users”.
- Click on your newly created local account, then click on “Change account type”.
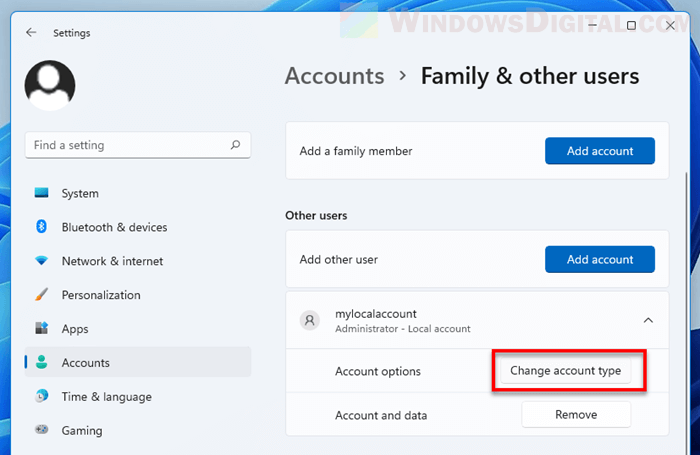
Windows 11
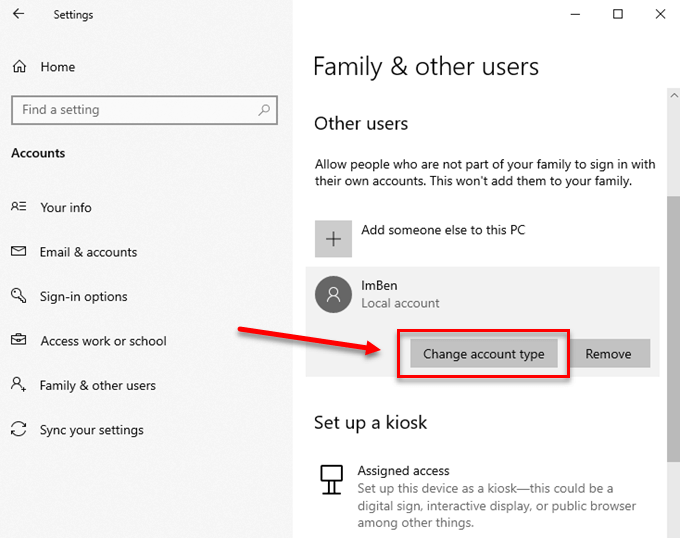
Windows 10
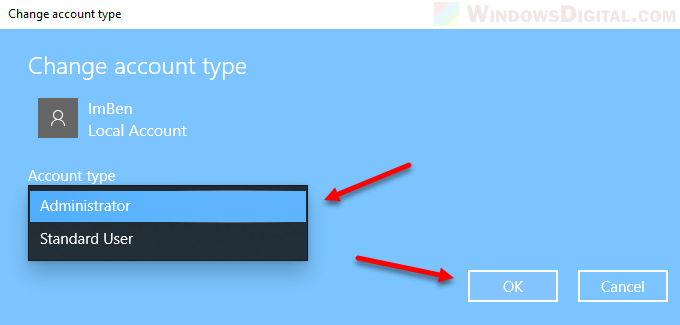
- In the “change account type” window, under Account type, click and select Administrator. Then, click OK.
If you only want to remove PIN or other sign-in options of your Microsoft account, read: How to Remove PIN Login From Windows 11/10 Startup.
Why would you want to use a local account in Windows 11 or 10?
Using a local account in Windows has its perks compared to a Microsoft account. First off, it’s great for keeping your personal information private because Microsoft won’t have access to your data and how you use your computer.
It also makes logging in faster. You don’t have to sit around waiting for your Microsoft account to sync before you can start using your computer. Plus, it cuts down on login problems since everything is stored right on your device, so you’re not at the mercy of a good internet connection to get into your account.
But, what are the risks of using a local account?
Well, first, a local account cannot sync your settings and data across your other devices because it is not an online account. If you have several Windows devices that you wish to use with synced settings, a local account may not be a good idea.
Another thing is a local account is not as secure as a Microsoft account. It doesn’t have Windows Hello features such as two-factor authentication, PIN, facial recognition, or even a password recovery option. And the most obvious drawback would be that you will not be able to enjoy some of the features that are only available when you use a Microsoft account, such as the Microsoft Store.

