Bluetooth audio devices such as a Bluetooth headphones, headset or speaker need to be paired and connected before they can be used on a Windows PC. This guide shows how to pair and connect Bluetooth headphones or speaker to Windows 11 PC.
For a Bluetooth audio device to be detected and pair-able by your PC, your PC needs to have a Bluetooth receiver or adapter. Most laptop computers have built-in Bluetooth receivers, while most desktop computers don’t. If your PC does not have a built-in onboard Bluetooth receiver, you can buy and use a simple USB Bluetooth receiver which is usually not expensive.
Also see: Bluetooth Not Detecting Devices in Windows 11
Page Contents
How to pair and connect a Bluetooth headphones in Windows 11
Before you start trying to pair and connect, make sure the Bluetooth headphones or speaker is switched on (and discoverable) and that its battery is at a sufficient level. To pair and connect a Bluetooth headphones or speaker for the first time in Windows 11, follow the steps below.
- In Windows 11, go to Start menu and select Settings. Alternatively, you can press Win + i to open the Settings app.
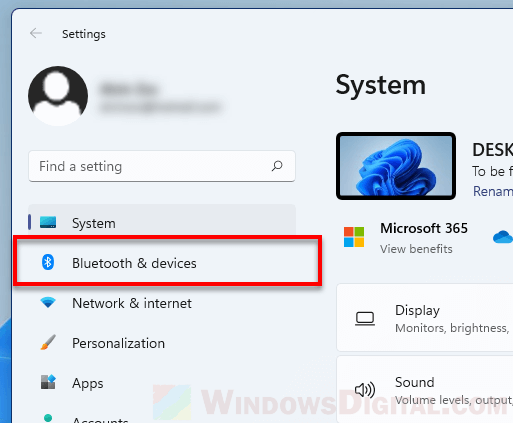
- On the left pane, select Bluetooth & devices.
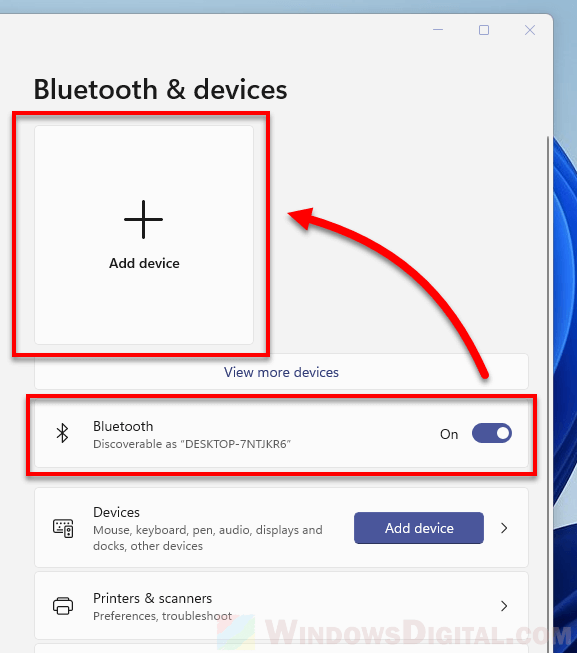
- Make sure your PC’s Bluetooth is turned on, otherwise you cannot pair any device to your PC.
- Click on Add device.
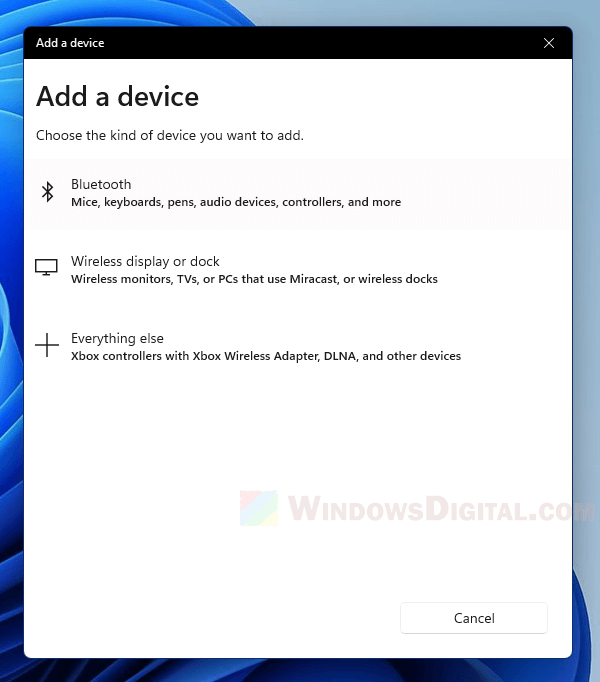
- Next, select the “Bluetooth – Mice, keyboards, pens, audio devices, controllers and more” option.
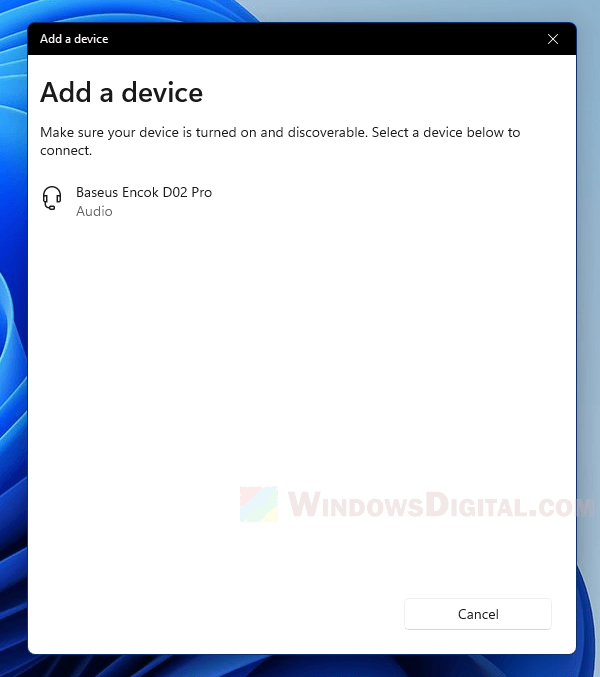
- Windows 11 will start to detect any discoverable and connectable Bluetooth device within range. Once your Bluetooth headphones is detected, click on it to pair it to your PC.
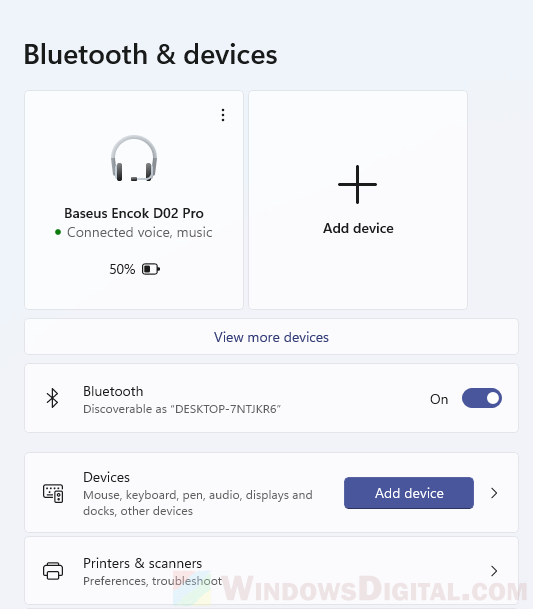
- Once the pairing and connecting is successful, it will show “connected voice, music” under your headphones.
Some Bluetooth receivers or adapters may need driver installation before they can work properly. In most cases, Windows 11 would be able to automatically detect and install the right driver for the Bluetooth adapter when your run Windows Update or restart your PC.
If the Bluetooth receiver comes with a driver installation CD, use it to install the driver. If it doesn’t have a driver CD, try to search for and download the driver from its manufacturer website. If it’s a built-in Bluetooth receiver that comes with your laptop, you may need to download the driver from your laptop’s manufacturer website.
Disconnect Bluetooth headphones from Windows 11 PC
To disconnect a Bluetooth headphones or speaker in Windows 11, go back to Settings > Bluetooth & devices. Then, click on the triple dotted icon in the same card as your Bluetooth device you want to disconnect, and select Disconnect.
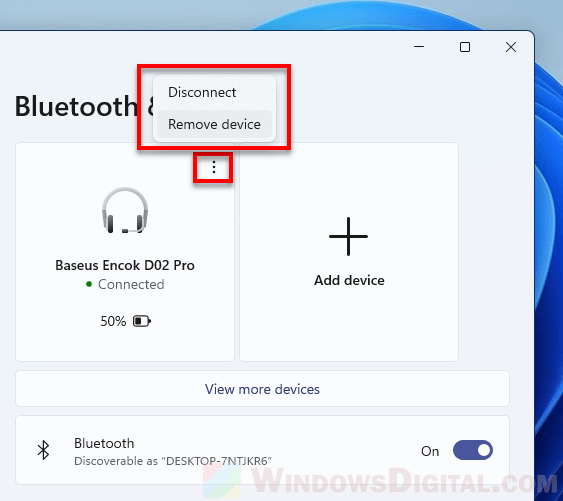
To completely remove or unpair a Bluetooth headphones or speaker, click on the triple dotted icon, then click on Remove device instead. Doing so will cause your Windows 11 PC to completely forget the device. You will need to pair your Bluetooth audio device to your PC again if you want to use it again.
If you only disconnect your Bluetooth headphones or speaker, the device will remain paired to your PC. The next time you switch on your Bluetooth headphones or restart your PC, the headphones will be automatically connected in Windows 11.
When you want to stop using the headphones, you can use this disconnect button to disconnect it from your PC or manually turn off the headphones if there is a physical switch on the headphones to allow you to do so.
Switch from Bluetooth headphones back to your wired speaker
Usually you don’t need to disconnect or unpair the bluetooth headphones from your PC just to switch back to your wired speaker. You only have to turn off the headphones and Windows should automatically switch the main output device back to your default connected wired speaker. When you turn on your Bluetooth headphones again, Windows will automatically use the headphones as the main audio output device again.
Most headphones have a manual switch which you can use to turn it on or off. It’s a best practice to turn any Bluetooth device off when you are not using it to preserve its battery life.
