Are you getting “File is too large” error when you try to send a video to someone via a sharing or social platform? Or do you just want to save your disk space by reducing the file size of your video files? This guide will show you several methods on how to compress a video to reduce its file size in Windows 11.
Page Contents
Method 1: Reduce video resolution to reduce its file size
The most common practice of reducing the file size of a video is reduce the video resolution. Raw video recorded using a camera or screen recorder usually has a very large resolution. If the video is to be seen on a rather smaller device, you can reduce its resolution to a smaller size such as 720p, 480p, etc. to significantly reduce its file size.
Some video players and apps will allow you to export a video with a different resolution. In Windows 11, you can use the built-in Photos app’s Video Editor feature to change the resolution of a video. Alternatively, you can also use a third party software such as VLC player to convert a video to a different resolution, but with much more choices of video resolutions.
Compress video using Video Editor in Windows 11
Follow the steps below to change a video resolution using Photos app in Windows 11.
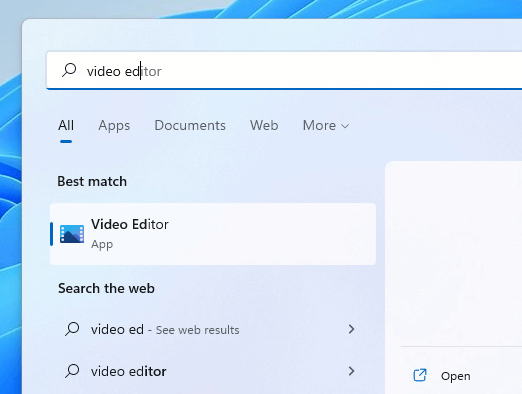
1. First, search for and open Video Editor via Start.
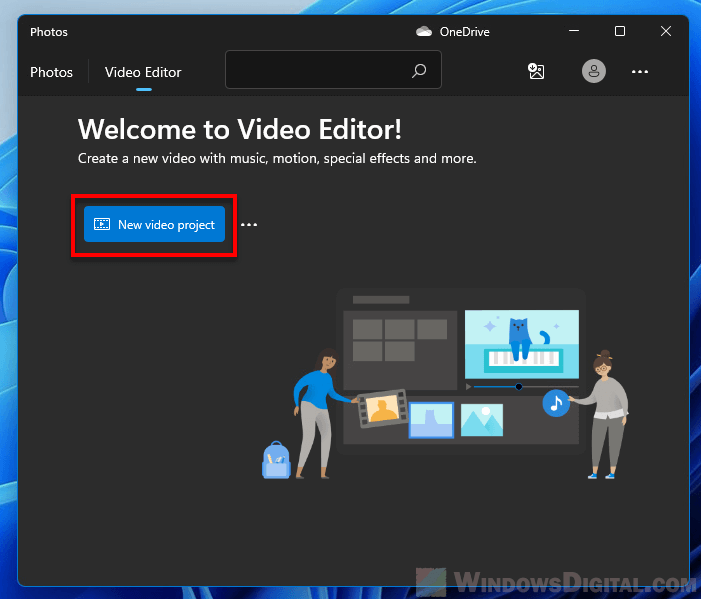
2. In the Video Editor window, click New video project.
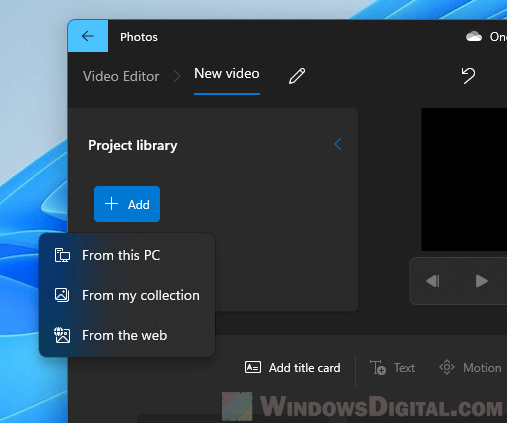
3. Next, click Add in the Project library section, select From this PC, then browse to the video file and add it to the library. Alternatively, you can drag and drop the video file directly into the Project library section.
4. To edit the video, drag the video from the Project library to the are where it says “Drag items from the project library here”.

5. Then, click Finish video.
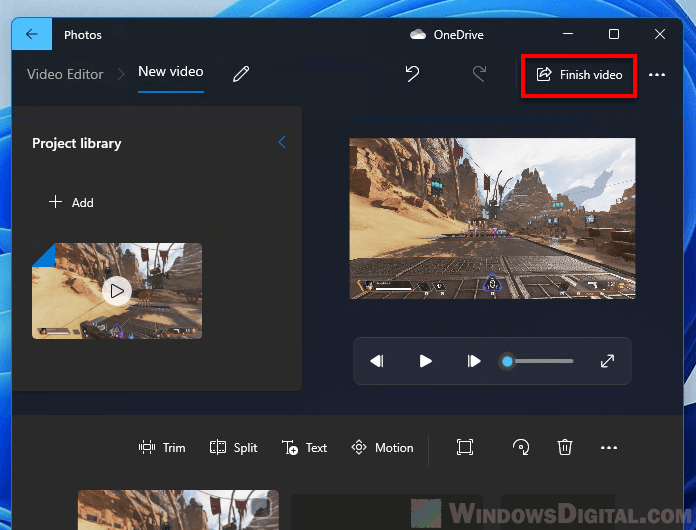
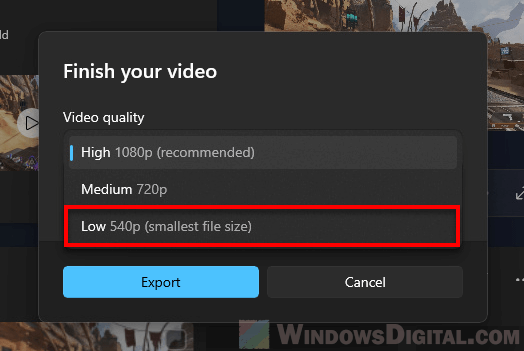
6. In the Finish your video pop up, click the drop-down menu for the Video quality option and select a video resolution you are comfortable with. The smaller the resolution, the smaller the size of the video. Then, click Export to export the video.
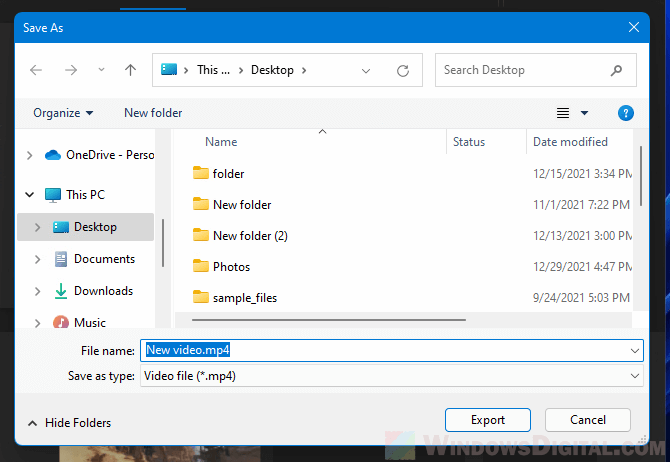
7. In the Save as window, browse to the location you want to save the converted video file. Click Export to save it. Note: Be careful not to overwrite your original video. To prevent this, give the new video a different name if you are to save it in the same directory where the original video file is.
Compress video using VLC Player
VLC media player is a popular media player that supports a wide range of audio and video formats. But did you know that you can also use VLC player to compress videos? With VLC player, you can easily compress your videos without sacrificing too much quality.
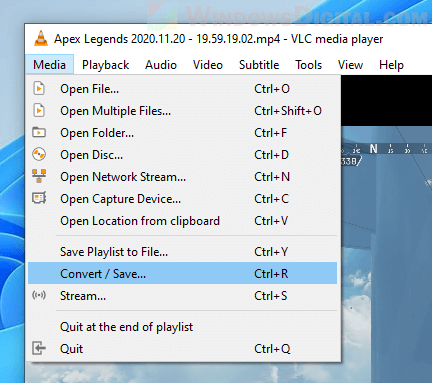
1. In VLC Player window, click Media > Convert / Save.
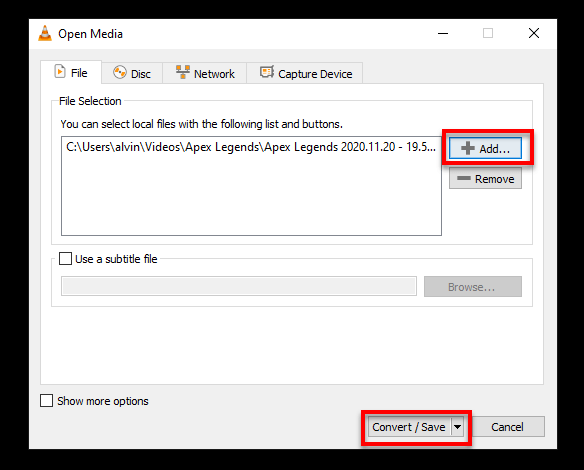
2. In the File Selection section, click Add to add your video file. Once you have added the video, click Convert / Save.
3. Next, select a Profile that best describe on what device the video will be viewed on. For example, if you select the “Video for iPod HD/iPhone/PSP” profile, VLC will convert the video to 480p along with other settings that best suited to be viewed on an iPhone, which will significantly reduce the video file size if the original resolution is rather large.
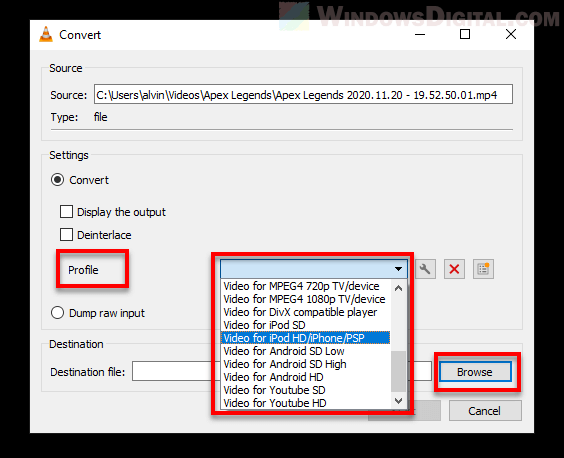
4. After choosing a profile, click Browse next to Destination file and browse to where you want to save the converted video file. Note: Give the video file a different name than the original so that you don’t accidentally overwrite your original video.
Method 2: Trim video to remove unnecessary parts
Trimming a video means to remove unwanted parts of the video to create a clip out of it. Doing so will reduce the video’s total file size as the video gets shortened. You can trim a video file using any video editor. In Windows 11, you can use the Photo’s app built-in Video Editor feature to trim a video without installing any third party software.
To learn how to do so, go to: How to edit and trim a video in Windows 11.
Method 3: Compress a video file using ZIP
ZIP is a file format that supports lossless data compression. You can compress your video files by compressing it using Zip, or other compression formats such as RAR or 7Zip.
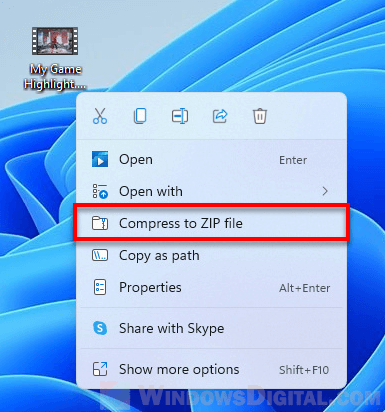
In Windows 11, to compress a video or any file, right-click the file and select Compress to ZIP file.
If you want the best compression method to further reduce the file size of your video file, try to use a compression software such as 7Zip. You can download 7-Zip from https://www.7-zip.org/.
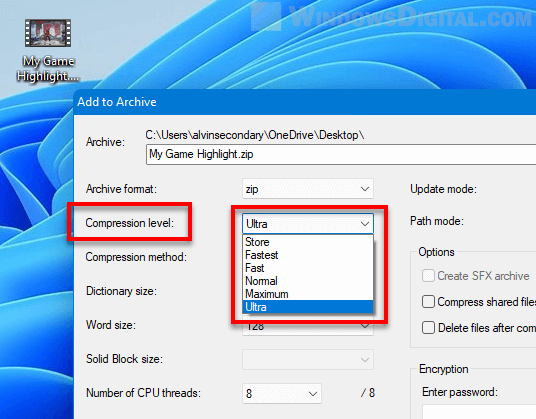
After installing 7-Zip, right-click the video file you want to compress, select Show more options > 7-Zip > Add to archive.
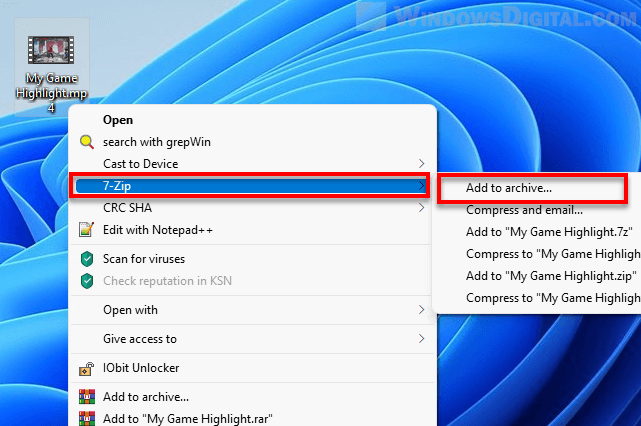
In the Add to archive window, select a compression level. The higher the compression level (“Ultra” being the highest level), the better the compression and the smaller the file size after compressed.
Tip: Send video via link instead of direct sending
If a video is too large in size that there is no way to compress it small enough to fit into the sharing platform such as Facebook, WhatsApp, etc., you can upload your video file onto a file sharing service such as Google Drive or Dropbox, and then send the video link to whoever you want to share with so that they can download it using the link.
Since the file size limit for individual file you can upload to these sharing services is usually very large, you can upload your original video or compressed video without the concern of file size limit.
Alternatively, you can also upload your video directly to YouTube and share the video only with whoever you want to share with by setting the video as “unlisted” or “private”.
