Backing up data and files is a norm in modern computing. When we backup our files and folders, we sometimes end up with two or more same folders that we are not sure which one is up to date. In such event, it is hard to decide which folder to keep and which to delete. If this happens, you can manually check the differences between two folders by comparing them using a third party tool or by using built-in commands via Command Prompt or PowerShell.
This guide will show you how to compare folders in Windows 11 using a powerful folder comparison tool called WinMerge, or using CMD, Windows Terminal or Windows PowerShell if you prefer not to install any third party software.
Related: How to Sync Files Between Two Folders or Computers in Windows 11/10
Page Contents
Compare folders in Windows 11 with WinMerge
WinMerge is an open source comparison and merging tool for Windows that let users compare files and folders and display the differences in a visual form that is easy to understand and manage. Below is a step-by-step guide on how to use WinMerge to compare two folders in Windows 11.
1. Download WinMerge from https://winmerge.org/downloads/. We recommend to download the portable version (ZIP format) so that you don’t have to install the software.
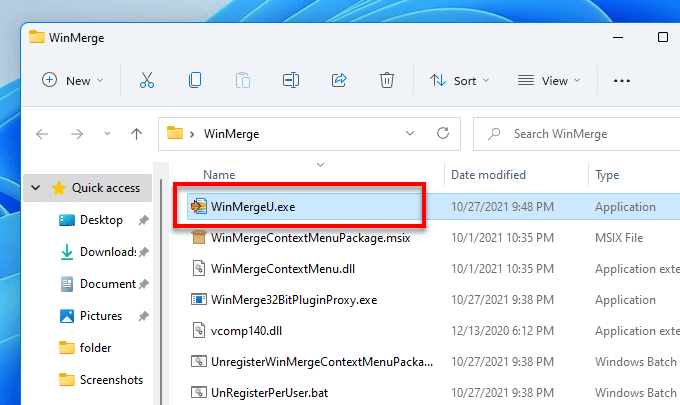
2. If you download the installer version, run the setup and follow the on-screen instruction to install the software. If you download the ZIP version (portable), unzip the folder to anywhere you like and run the WinMergeU.exe from the extracted folder.
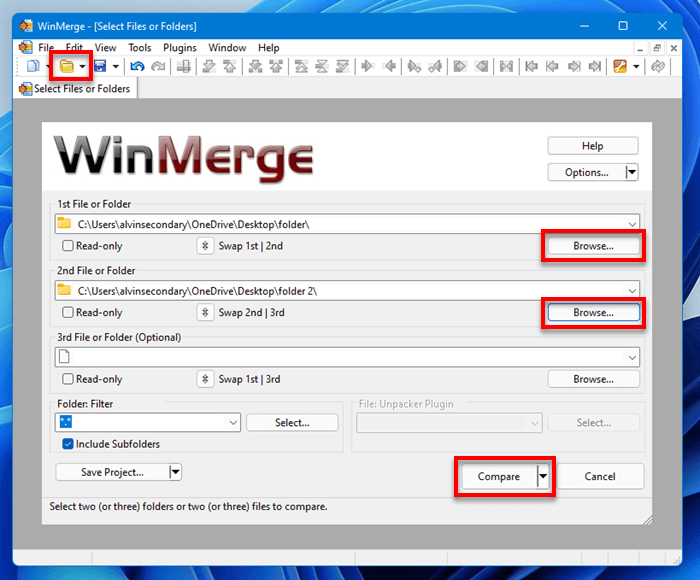
3. In WinMerge window, press Ctrl + O or click File > Open. Under 1st File or Folder, click Browse and browse to the first folder you want to compare. Do the same for 2nd File or Folder.
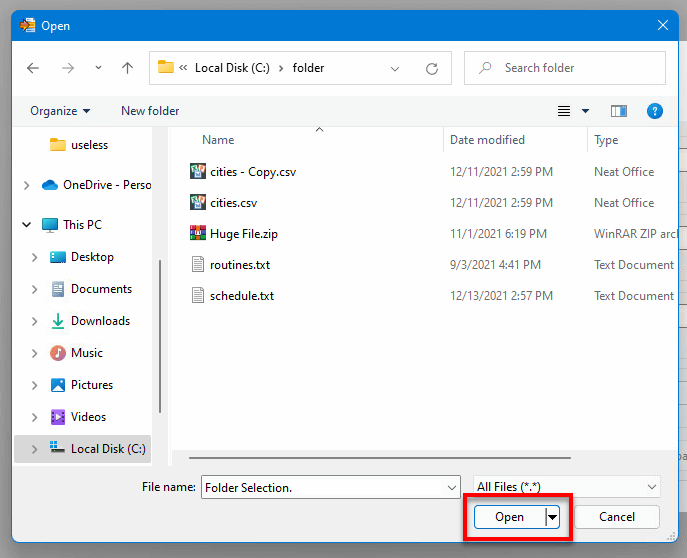
Tip: When you browse, click Open when you are in the folder you want to compare. You don’t have to select any file in the folder. You can also manually enter the path to the folder instead of browsing it. Alternatively, you can add a third folder to compare.
Once at least two folders are selected, click Compare to compare them.
4. WinMerge will then show the comparison result in a new tab. It will tell you which files are different and which file are newly added, etc.
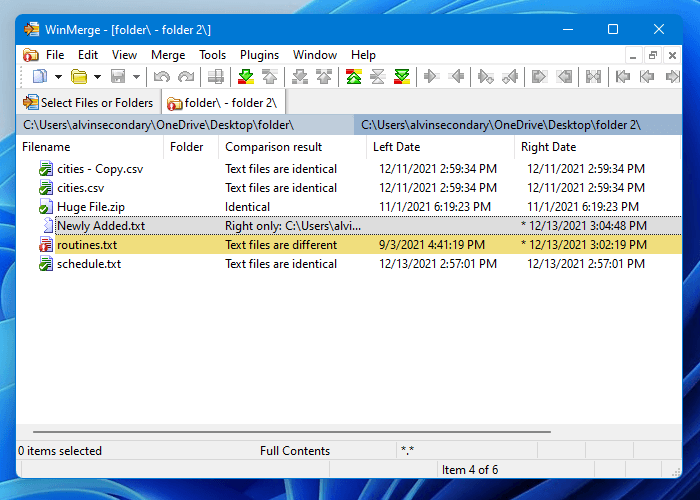
5. Other than just comparing the differences of the availability of files in the two folders, WinMerge also lets you view the actual differences of some supported file formats such as text files, and allows you to edit the files directly from the app.
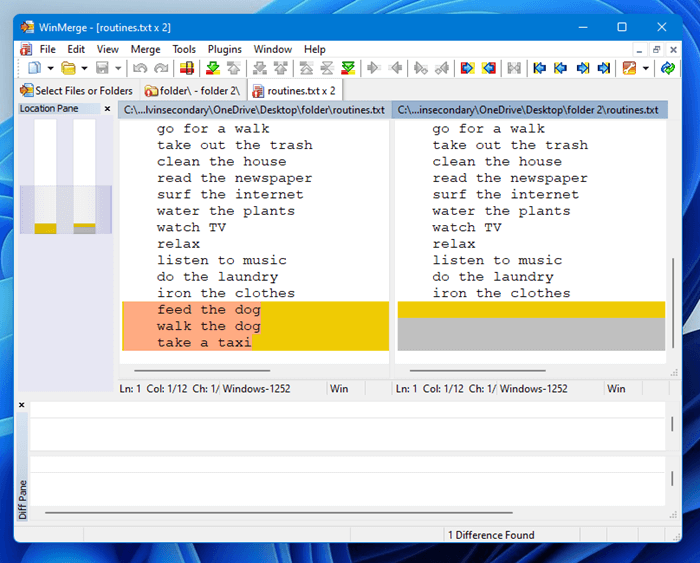
To view the differences of a file, double-click the file in the comparison result tab. WinMerge will then open the selected files from the two folders and compare them in a new tab. From there you can view the differences between the two files and edit them as you wish.
Tip: How to Sort Folders by Size in Windows 11 / 10
Compare two folders using Command Prompt
If you prefer not to install anything, you can compare two folders using a built-in robocopy command tool via Command Prompt or the new Windows Terminal in Windows 11.
This method will tell you which file is different (newer or older) in the two folders, which file is newly added and which file is missing. It can’t show you detailed comparisons such as the actual differences of two different text files.
To compare folders using Command Prompt or Windows Terminal in Windows 11, follow the steps below. We will be using Windows Terminal instead in the guide below, but the same commands will work in Command Prompt as well.
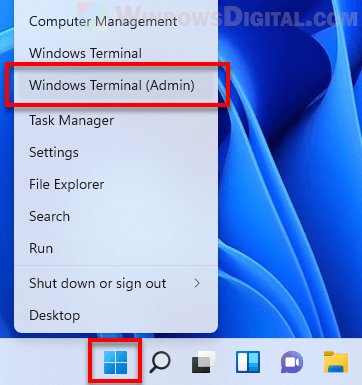
1. Right-click on Start and select Windows Terminal (admin), or search for “command prompt” via Start and run it as administrator.
2. In Windows Terminal, enter the following command. Replace the paths to folders with the actual locations of the two folders on your computer that you want to compare.
robocopy "path to first folder" "path to second folder" /L /NJH /NJS /NP /NS
For example:
robocopy "C:\folder" "C:\folder 2" /L /NJH /NJS /NP /NS
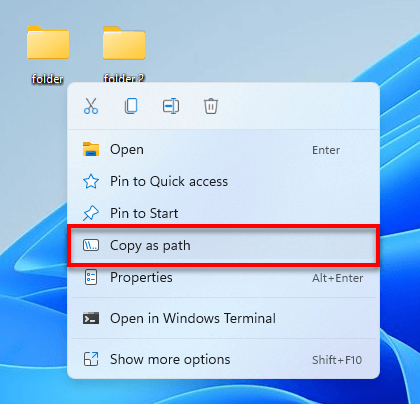
Tip: If you have a complicated folder structure which makes it difficult to manually enter the folder paths in the terminal, you can right-click the folder and select Copy as path to copy the full path to the folder. You can then paste the folder path into the Windows Terminal by right-clicking in the terminal window.
3. The terminal will then show you the differences of files in the two folders if there is any.
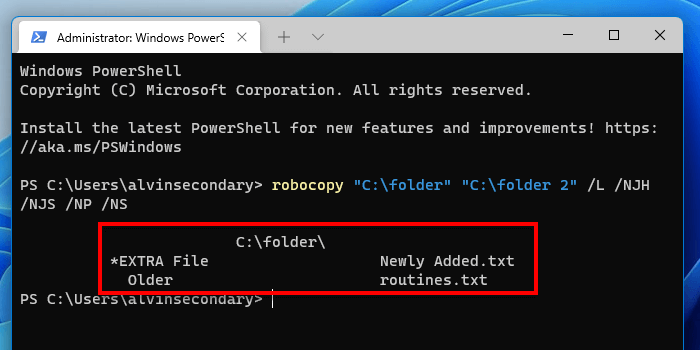
For example, if there is a file that exist in folder1 but not in folder2, it will show *Extra File or New File next to the name of the file. If two files of the same name is different from each other, it will show either Older or Newer next to the name of the file.
Compare two folders using Windows PowerShell
To compare two folders using a script in Windows PowerShell, follow the steps below. This method does not check the differences of files with the same name. It only compare the availability of files in the two folders.
Click Start, search for Windows PowerShell and run it as administrator.
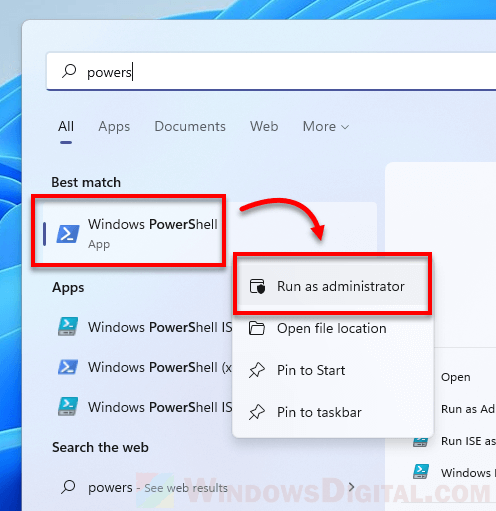
In the elevated PowerShell window, enter the following commands in the order shown. Press Enter after each line of command. Replace the folder paths with the actual locations of the two folders on your computer that you want to compare.
$fso = Get-ChildItem -Recurse -path "C:\folder"
$fsoBU = Get-ChildItem -Recurse -path "C:folder 2"
Compare-Object -ReferenceObject $fso -DifferenceObject $fsoBU
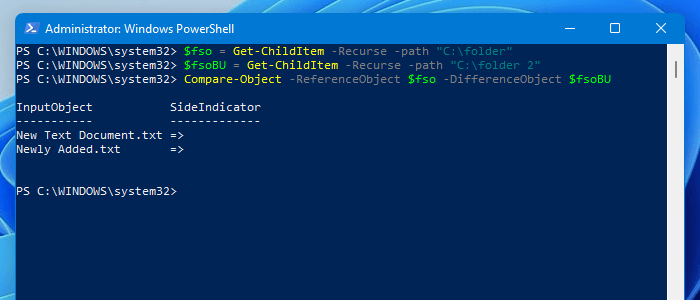
PowerShell will then show the output of the comparison by listing the files that it finds to be missing from either folders.


