This guide explains what DirectX Shader Cache is, what it does, in what situation should you clear it, how does clearing the shader cache help, and 2 methods on how to clear DirectX Shader Cache in Windows 11.
Also see: How to Clear RAM Cache in Windows 11
Page Contents
What is DirectX Shader Cache?
Like other cache system, DirectX Shader Cache is a cache of DirectX shaders that are used to improve the performance of games and software. Since the games can use the shader cache instead of regenerating the game shaders each time they are needed, the time needed to render images and videos on the screen can be significantly reduced while loading the games.
Should I clear DirectX Shader Cache?
As you load and run games from time to time, the DirectX shader cache your computer accumulate will build up. This can take up a lot of storage space. If you are running out of storage space on your system drive, you may want to consider clearing the DirectX Shader Cache to free up some space.
Other than that, another common reason to clear the DirectX Shader Cache is when your games suddenly start to act strangely, causing lag and stuttering in game. The shader cache can sometimes get corrupted and causes issues when they are loaded. This is especially the case if you have recently installed a game patch or applied a major Windows Update.
Thus, clearing the DirectX Shader Cache often helps to solve these random game lagging and stuttering issues. After clearing the shader cache, the game will then be able to regenerate the shader cache from scratch.
Related issue: Game Stuttering and Lag on Dual Monitor
How to Clear DirectX Shader Cache in Windows 11
There are generally 2 ways to clear DirectX Shader Cache in Windows 11 – via the Disk Cleanup utility tool or through the new Windows 11 Settings interface.
Disk Cleanup
To clear DirectX Shader Cache in Windows 11 via Disk Cleanup, follow the steps below.
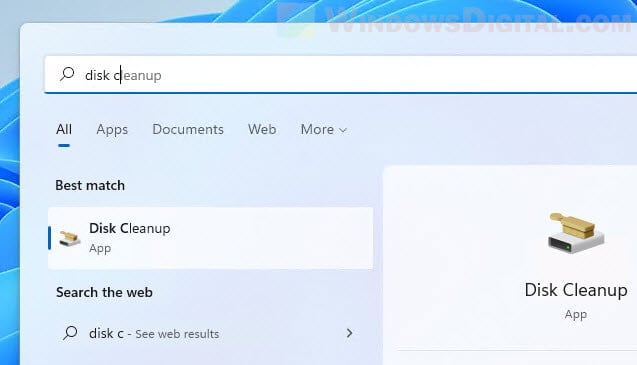
- Click Start and search for “Disk Cleanup“. Select the Disk Cleanup from the search result to open it.
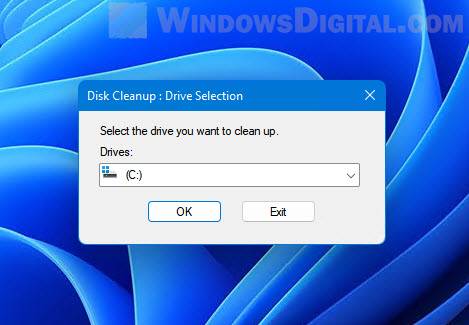
- You will be prompted to select the drive you want to clean up. As DirectX Shader Cache is usually stored in the system drive (the drive where your Windows was installed), select your system drive, usually the C: drive.
- It may take a while for Windows to calculate the data you can delete. Once the Disk Cleanup window is opened, select “DirectX Shader Cache” in the “Files to delete” section. Then, click OK to clear it.
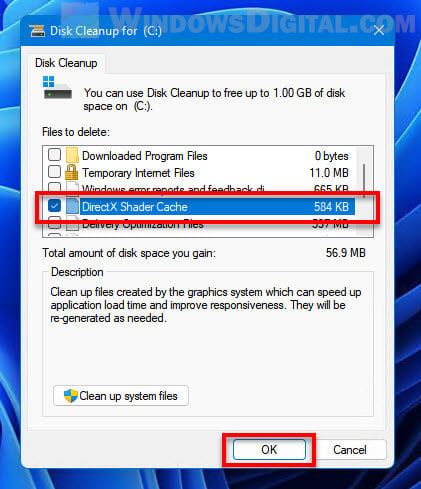
For optimal clearing, you should close your all your games and programs before clearing the DirectX Shader Cache. This is to make sure the cache is not in used by any game or program during the clearing process.
After clearing the shader cache, it’s better to restart your computer first before relaunching any game to regenerate the shader cache.
Related: Game Lag When Watching YouTube or Twitch on Chrome
Windows Settings
To clear DirectX shader cache via Windows 11 Settings, follow the instructions below.
- Press Win + i keys to open Settings.
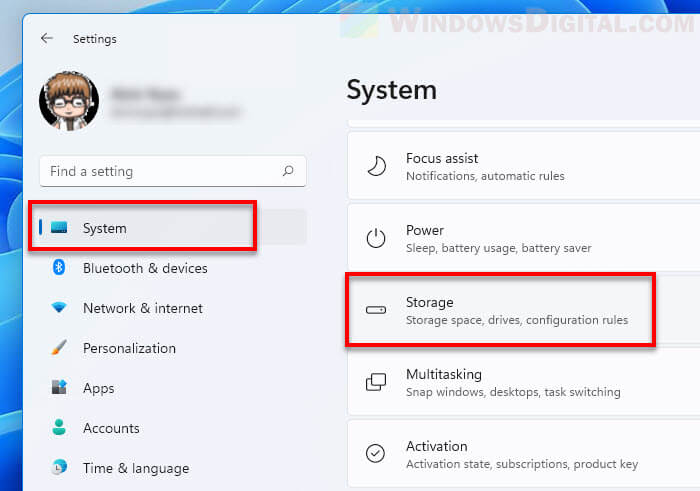
- Next, select System from the left pane, and then select Storage on the right.
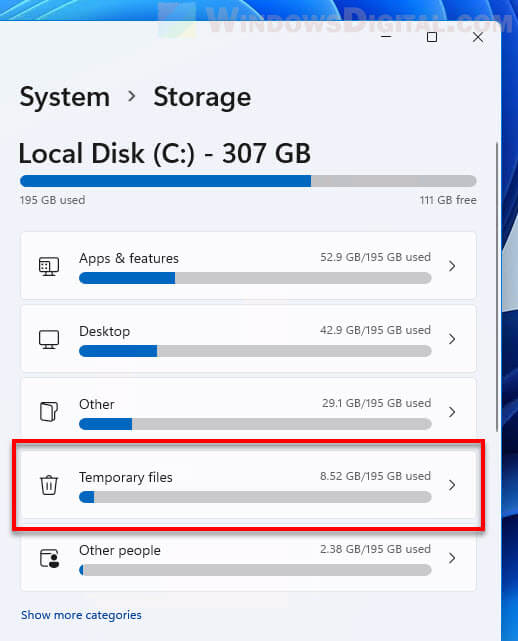
- In the Storage settings, select Temporary files under your system drive.
- In the Temporary files section, scroll down and select the DirectX Shader Cache checkbox.
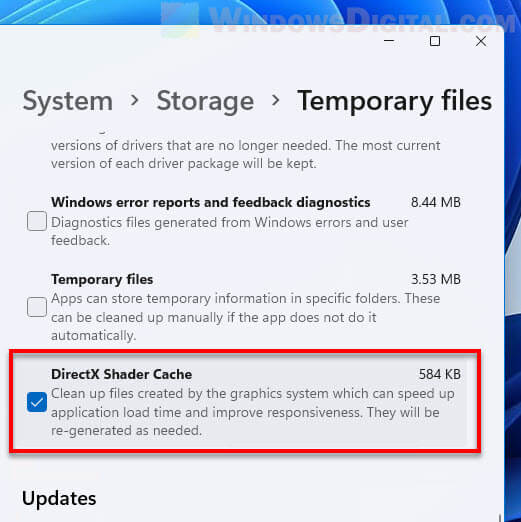
- Then, scroll back up and click the Remove files to delete the DirectX Shader Cache.
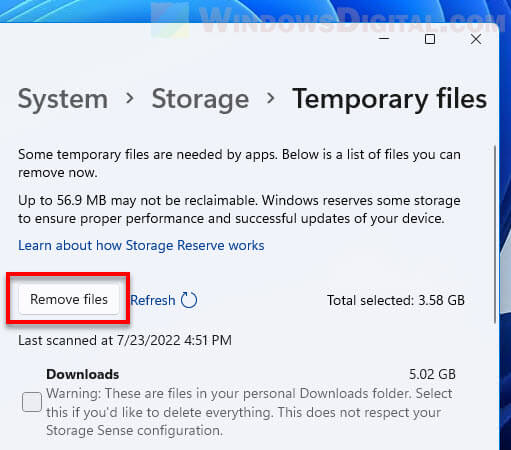
Tip: Since you are there, you may also want to clear other temporary files to free up more space on your drive.
If the checkboxes are greyed-out in the Temporary files settings, it’s usually because Windows is still calculating the amount of data for each categories that you can delete. It may take a while depending on the size of the data that needs to be calculated. Once the calculation process is completed, you can then select whichever temporary files you want to delete.
