When your printer starts producing random smudges and lines in the print results, it’s a symptom that signal a clogged print head nozzles and that a printer head cleaning is needed to fix the issue. This guide will show you how to clean the printhead of your printer in Windows 11.
Page Contents
Clean Print Head in Windows 11
The print head cleaning button is usually accessible under Maintenance settings in the Printing preferences which can be accessed through Windows 11 Settings. Below is a detailed step-by-step guide on how to access the print head cleaning option in Windows 11 (for most printers).
1. First, press Win + i keys to open Settings. On the left pane, click Bluetooth & devices.
2. Next, select Printers & scanners.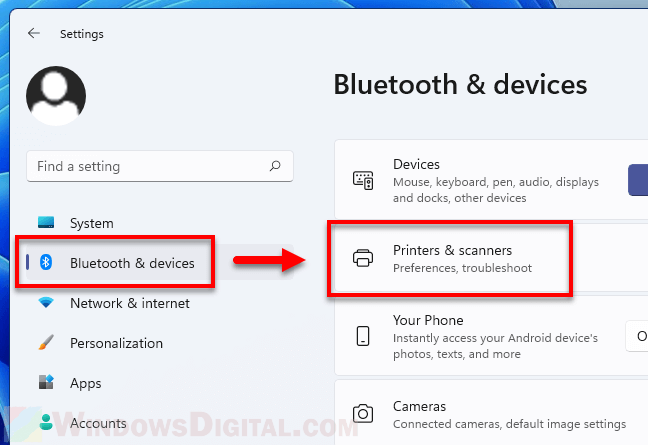
3. In the list of printers, select the printer whose printhead you want to clean.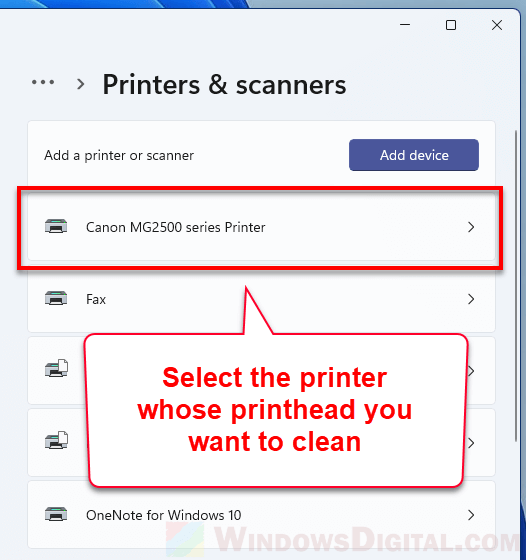
4. Then, click on Printing preferences.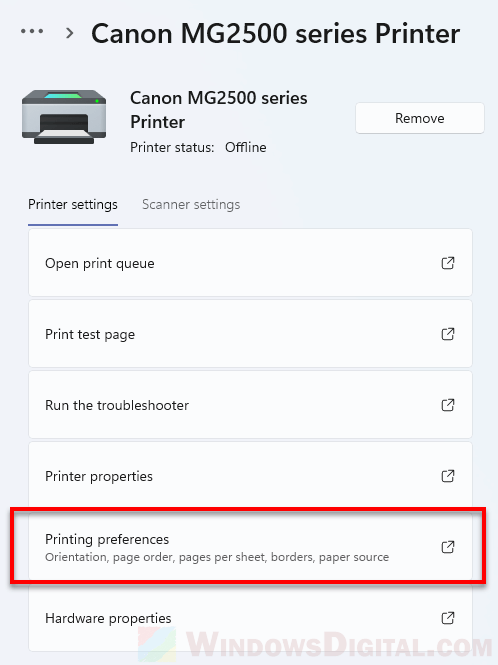
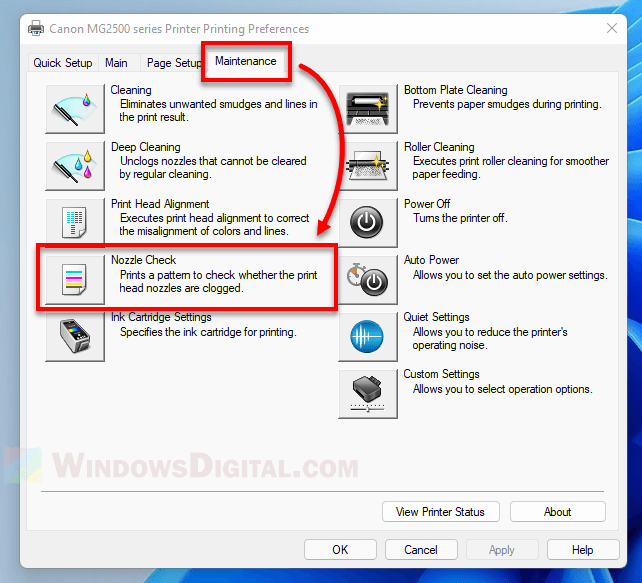
5. In the printing preferences window, click on Maintenance tab. From there, you should be able to see the cleaning options such as “Head Cleaning“, “Cleaning” or “Deep Cleaning” depending on what printer you have. Click on the Cleaning option.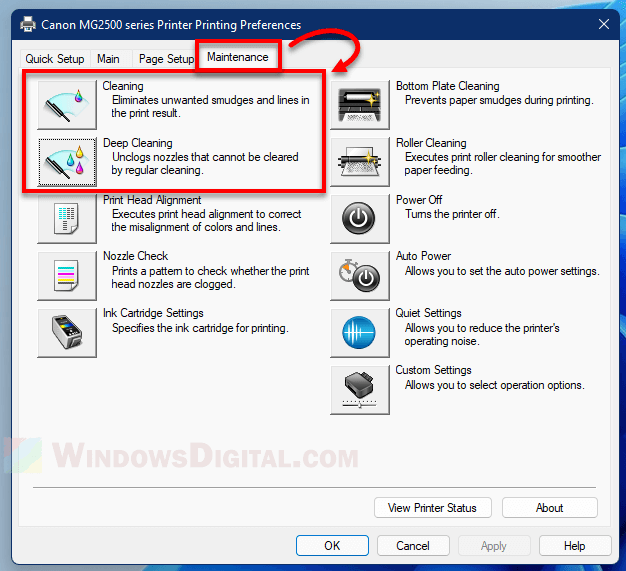
6. Depending on what printer you have, you may be asked to select the ink group you want to clean. Select an ink group and click Execute to proceed. If you’re not sure which ink group you should clean, you should run a nozzle check first.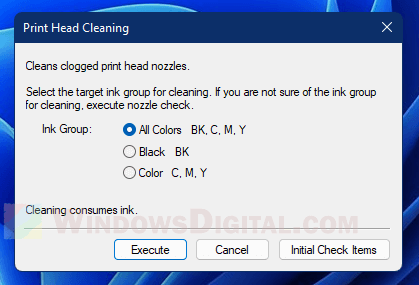
7. You will then be lead through a series of on-screen instructions to complete the print head cleaning.
The printer used in the guide above is a Canon MG2500 series printer. As for printers of other brands such as Epson and HP printers, though the settings may look different depending on what printer you have, the print head cleaning option can usually be found in the same settings window – Printing preferences > Maintenance.
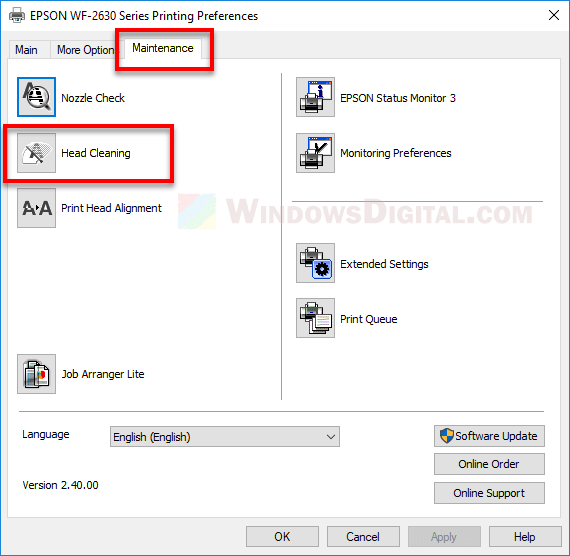
Epson printer’s Printing preferences > Maintenance > Head Cleaning
Note that not all printers have the print head cleaning function, but most modern printers have it. If there is no button or whatsoever related to print head cleaning under the Maintenance tab in your printer’s printing preferences, it may indicates that the printer does not have the feature.
Also, different printers may have different print head cleaning option(s) which work differently depending on the printers. For example, the Canon MG2500 series has both the casual cleaning and deep cleaning options for print head cleaning, while my Epson WF-2630 only has the head cleaning option.
How to run a nozzle check on Windows 11
When you execute print head cleaning, the system will usually ask which ink group you want to clean, whether you want to clean all colors ink group, black only or color only ink group. If you are not sure which ink group for cleaning, you should execute a nozzle check first to see which ink group(s) produces symptoms of a clogged nozzle.
To run a nozzle check for your printer on Windows 11, follow the step 1-4 in the instruction above to open the Printing preferences of your printer in Windows 11.
Then, go to the Maintenance tab, and select the Nozzle Check option.
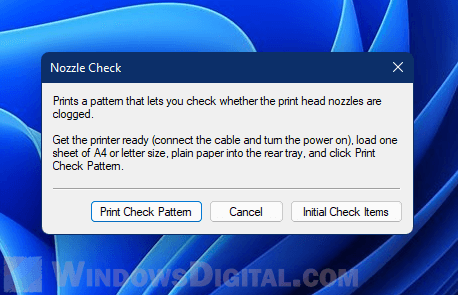
Click on Print Check Pattern to print a pattern that lets you see whether the print head nozzles are clogged. Follow the rest of the on-screen instruction to complete the nozzle check.
If print results display any of the following symptoms, you may need to run a printhead cleaning for the printer.
- Smudges and lines appear randomly on the print results.
- The printer did sound and look like it was printing but you only get a blank page instead.
- Black, or one or more other colors are missing from the print.
- Gaps in print.
