In most modern Windows 10 and Windows 11 laptops, tablets, and desktop computers, the screen brightness is usually set to be adaptive and automatically adjusted based on changes in ambient light. However, if you want to manually adjust your screen brightness, The following are a few methods to do so.
Recommended read: How to Turn On G-Sync or FreeSync in Windows 11
Page Contents
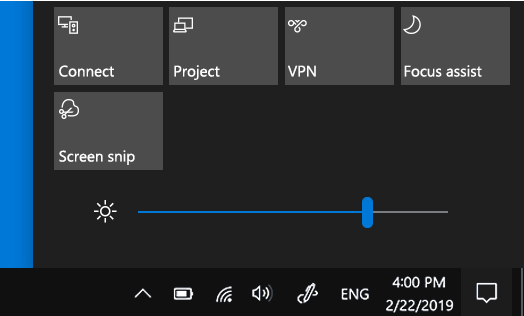
Use the brightness slider in Action Center
The easiest and fastest way to adjust the brightness on your Windows 10 or 11 device is by using the brightness slider in the Action Center.
- On the Windows desktop screen, click on the Action Center icon (a speech bubble icon) that can be found on the right end of the taskbar.
- Use the brightness slider that appears in the Action Center to adjust the brightness to your preference.
Change brightness through Settings app
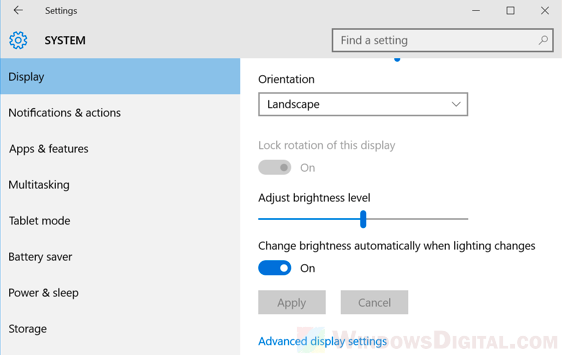
Alternatively, you can adjust the brightness of your screen via the Settings app in Windows 10 or Windows 11.
- Go to start menu or Cortana. Search and open Settings (or click on the gear icon in the start menu).
- Navigate to System > Display.
- Use the “adjust brightness level” slider to change the brightness of your screen.
Use the Fn (Function) key on your laptop keyboard
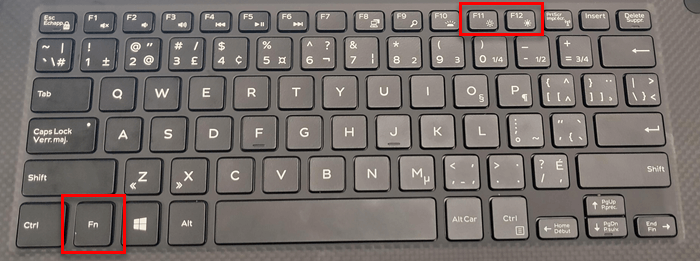
If your laptop supports it, you can change the brightness of your laptop screen by simply pressing the function (FN) key + brightness up or down keys.
Different laptops have different brightness up and down keys. Look for the keys that have obvious brightness-related icons on them. They usually look like a bright sun and a dim sun that indicates more brightness and less brightness, respectively. For example, the brightness adjustment keys on my Dell Inspiron are located on the F11 and F12 keys, while on other laptops they may be located on the arrow up and down keys.
Please note that the previously mentioned methods only work for the monitor screen built into your device. If you have an external monitor connected to your laptop or desktop as a secondary monitor, the Windows brightness settings will not have any effect on the brightness of the external monitor. In this case, you will need to use the brightness adjustment buttons on the external monitor itself to adjust its brightness.
Why don’t I have a brightness slider in Windows 11 or 10?
If you are unable to see the brightness slider on your desktop PC, it’s likely because your monitor doesn’t have a built-in brightness sensor, which means that Windows cannot adjust the brightness automatically. In such cases, you will need to use the monitor’s built-in controls to adjust the brightness.
Also, if you are using an external monitor or other kind of display like a projector with your desktop PC, it might not be possible to adjust the brightness using Windows settings. You generally need to use the monitor’s own controls to change the brightness. However, if your PC has a NVIDIA graphics card, you can use the NVIDIA Control Panel instead to adjust the brightness, which we’ll show you in the next section.
Lastly, make sure that your display drivers are up to date because outdated or missing drivers can cause issues with the brightness slider. You can check for and update the display drivers via the Device Manager to resolve the issue.
- In the Start menu or search bar, search for and open Device Manager.
- In the device manager window, expand Display adapters.
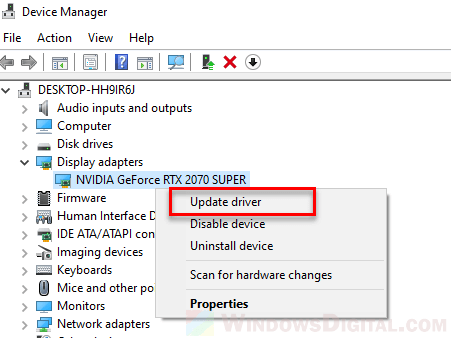
- Right-click on your display adapter, and select Update driver.
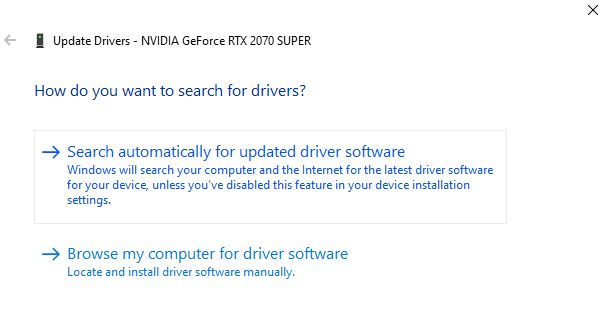
- On the next screen, select Search automatically for updated driver software. This will allow Windows to automatically search for the latest driver for your graphics card and install it on your PC.
- Once the installation is completed, restart your PC and check if you can see the brightness slider now.
Adjust brightness on Windows PC using the controls on your external monitor
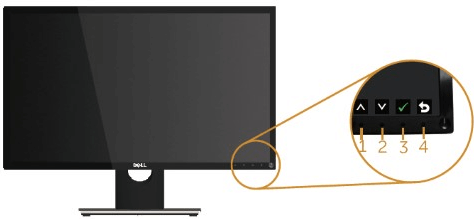
Windows 10 and Windows 11 only allow you to adjust the brightness on monitors that are built into the computer like a laptop or tablet device. For computers with an external monitor, projector, or TV, use the brightness adjustment buttons on the hardware itself.
Change brightness using NVIDIA control panel
If you have a NVIDIA graphics card running in your PC, you can use the NVIDIA Control Panel to adjust the brightness of your monitor. The NVIDIA Control Panel provides advanced display settings that allow you to change many things, such as the brightness, contrast, and gamma of your screen.
- Go to Start menu, search for and open NVIDIA Control Panel.
- In the control panel window, navigate to Display > Adjust desktop color settings.
- Under “Choose how color is set” option, use the Brightness Slider to adjust the brightness of your screen. You can also adjust the Contrast and Gamma settings to fine-tune the display.
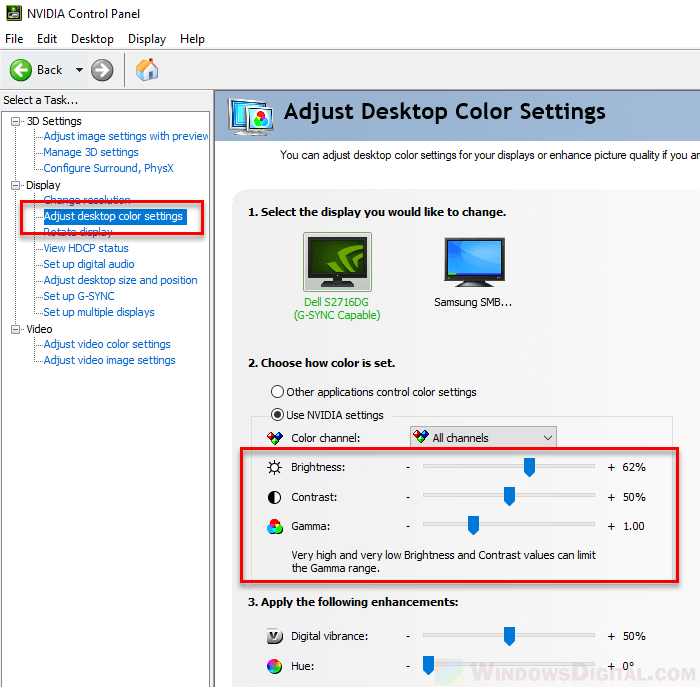
Note: The NVIDIA Control Panel is only available if you have a NVIDIA graphics card installed. If you have an AMD video card, you will need to use its own companion software called AMD Radeon Software instead.
