In Windows 11, you can show more than just one clock of a time zone on the taskbar. You can add up to two additional clocks of different time zones to be displayed when you click on the date and time on the taskbar. This short tutorial will show you how to add multiple time zone clocks in Windows 11.
Also see: How to Show Seconds in Windows 11 System Clock
Page Contents
How to add multiple clocks of different time zones in Windows 11
Adding multiple clocks of different time zones doesn’t affect your main clock displayed on the taskbar. The additional clocks will only be added and displayed in the date and time widget upon clicking it on the taskbar. Below are the steps on how to add up to two additional clocks of different time zones in Windows 11.
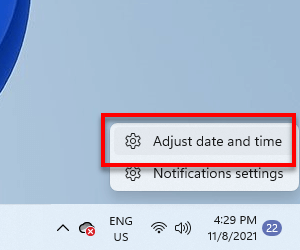
- On Windows 11 desktop, right-click on date and time on the rightmost corner of the taskbar.
- Then, select Adjust date and time option from the context menu.
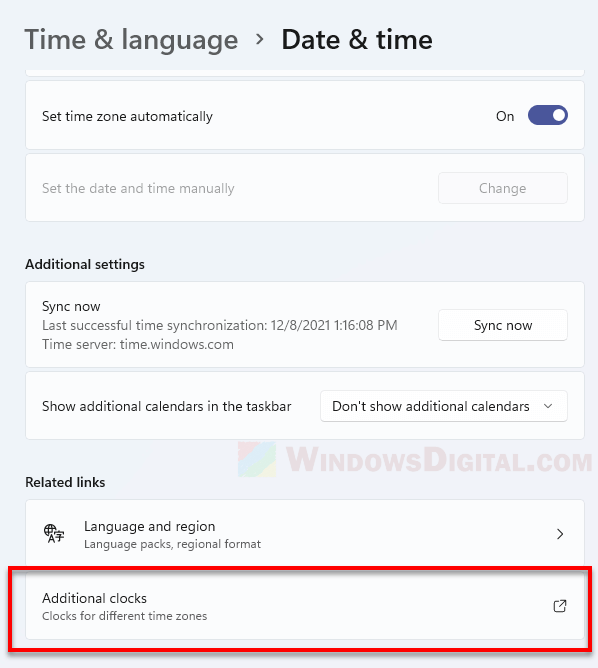
- In the Date & Time settings, scroll down and click on Additional clocks under Related links. This will open another Date and Time settings window.
- To add an additional clock, click to enable “Show this clock“.
- Next, select your preferred time zone for the new clock.
- Enter a display name for the clock which will be displayed alongside the clock.
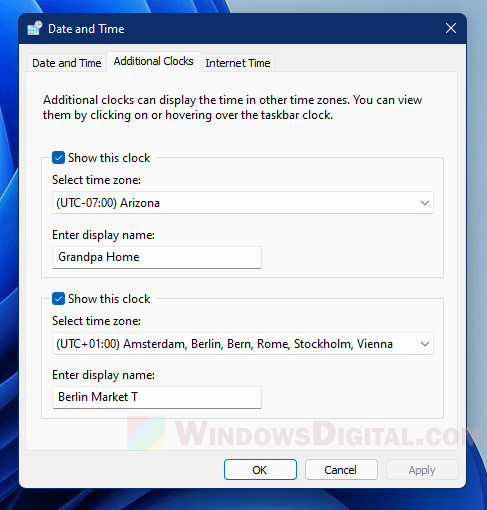
- Click OK to save the changes.
You can add only one additional clock by enabling only one “Show this clock” in the settings window and leave alone the other one. If you need to add two additional clocks, simply enable the second “Show this clock” and configure the time zone and display name to your preference.
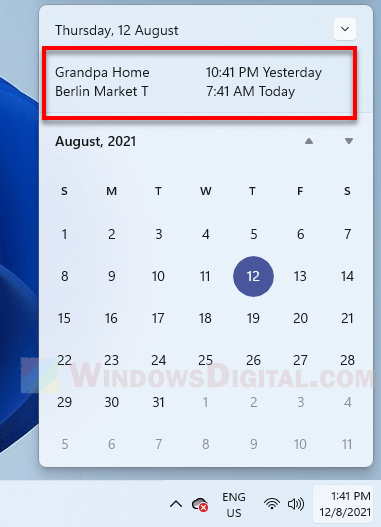
Once you’ve done setting up multiple time zone clocks, click on the date and time on the taskbar. You should be able to see two additional clocks in the widget now.
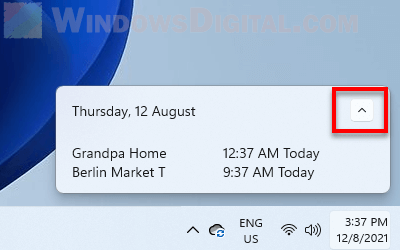
To view a simplified date and time widget without the calendar, click on the arrow down button at the top right corner of the widget to collapse the widget into showing only the date and the additional timezone clocks you’ve setup earlier.
How to add more than 2 additional clocks in Windows 11
The default Windows 11 date and time only allows up to two additional time zone clocks. To add more than 3 clocks (including the main clock), you need to use a different app.
Fortunately, there is a built-in Windows app that is able to show as many time zone clocks as you want – the Alarms & Clock app. Thus, you don’t need to install any third party app just to view clocks from different time zone.
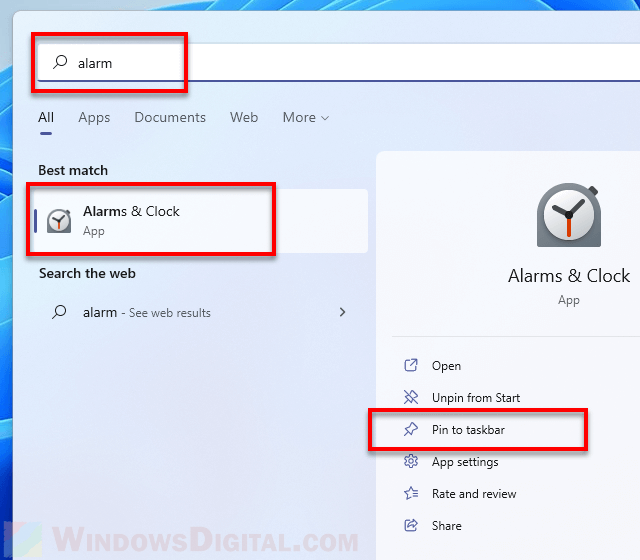
You can search for and open Alarms & Clock app via the Start menu or Search. Alternatively, to open the app quickly next time, you can pin the app to your taskbar by right-clicking the Alarms & Clock app from the search result and select Pin to taskbar.
In the Alarms and Clock app, on the left pane, click on World Clock. To add a clock of a time zone or city, click on the “Add new city” button.
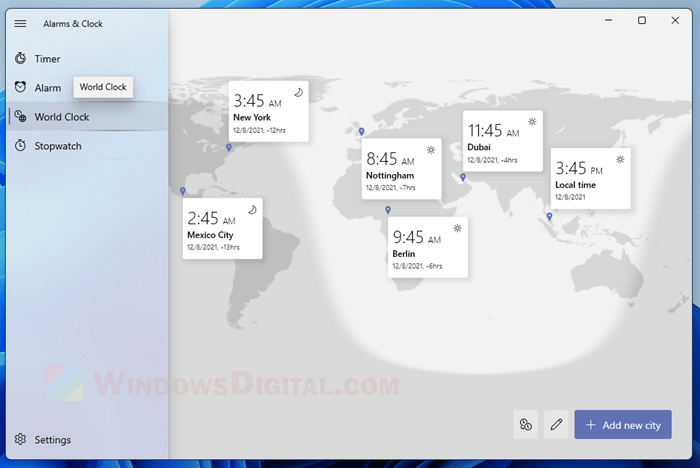
In the search bar, enter the city name to search for the city you want to add to the world clock. Click on the city name from the search result to add its time zone clock to the world map.
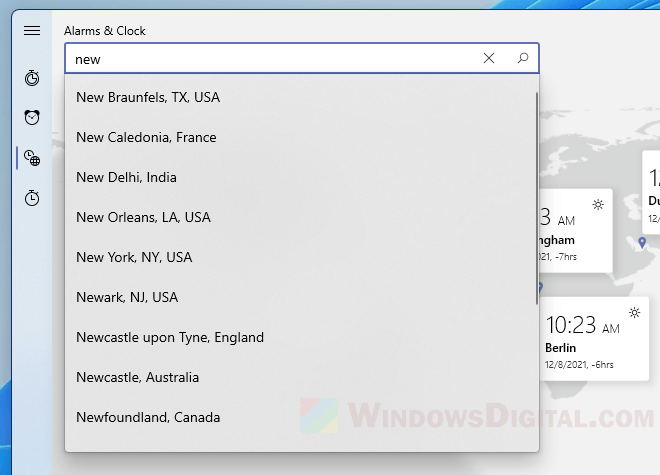
You can add as many clocks of different locations and time zones as you want to the app. The added clocks will be saved. After closing the app, to view the world clocks again, simply open the Alarms & Clock app again.
