This tutorial will show you how to add a second keyboard language to Windows 11, how to add the keyboard layout options to the taskbar (or quick settings) in Windows 11, and how to switch between keyboard language inputs using keyboard shortcut keys.
During Windows 11 setup, there is an optional step where you can add a secondary keyboard layout of any language. If you have skipped that part during the initial setup, don’t worry. You can add as many keyboard languages as you want via the Windows settings.
See also: How to Remove Keyboard Layout From Windows 11
There are three parts in this guide:
Page Contents
How to add a keyboard layout of any language in Windows 11
If you haven’t already added the keyboard language you need in Windows 11, here’s how to do so.
- In Windows 11, click on Start menu and select Settings. Alternatively, you can press Win + i keys to directly open Settings.
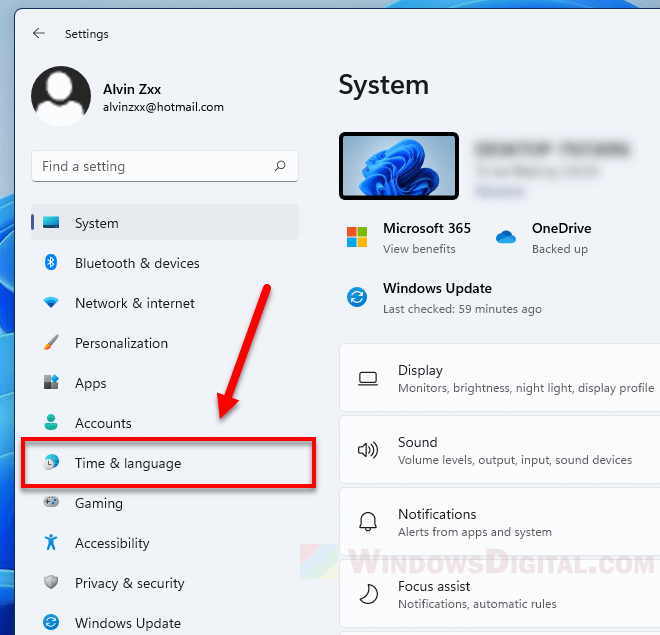
- In Settings app, on the left pane, select Time & Language.
- Then, on the right pane, select Language & region.
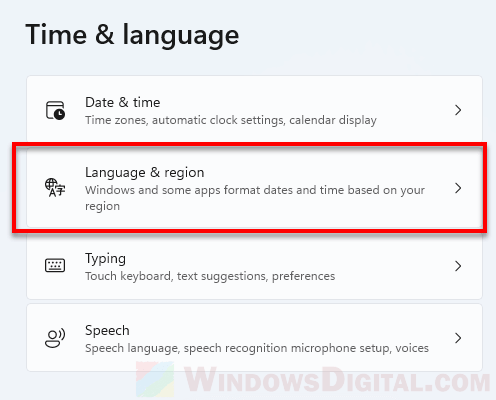
- Under Language, click on the Add a language for the Preferred languages option.
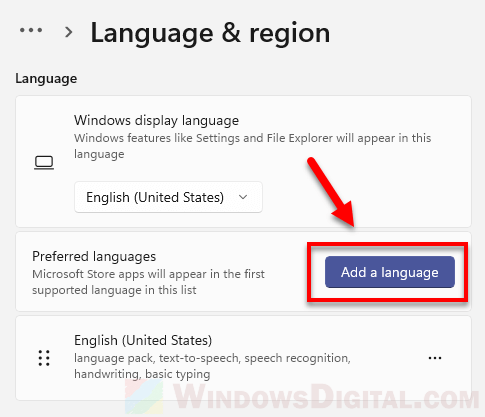
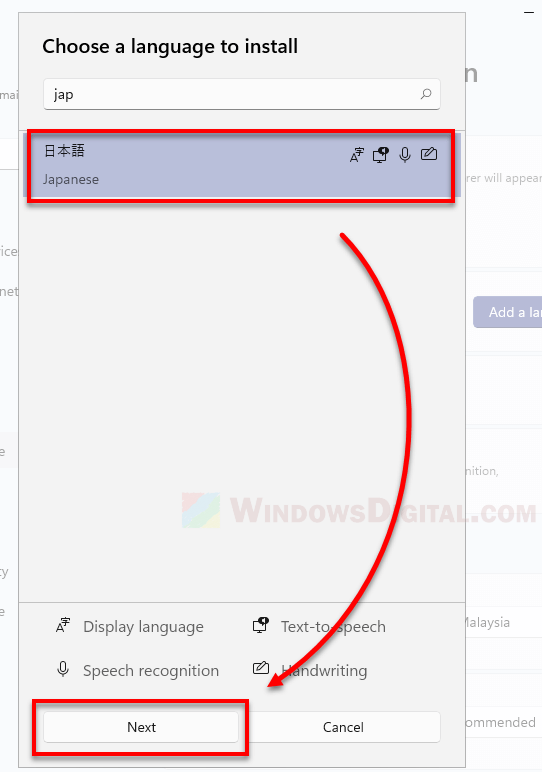
- In the “Choose a language to install” pop up, search for the language you want to add. Select it and then click on Next.
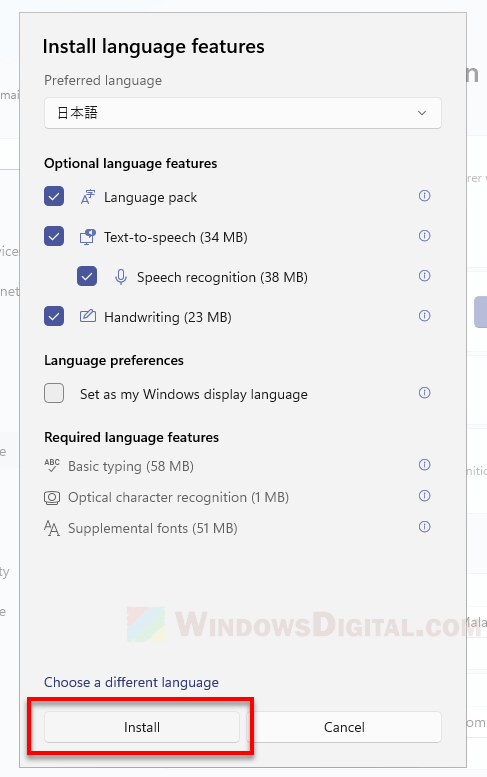
- Next, select the optional language features you want to install or leave them as default. Click Install to proceed.
- It may take a few minutes for Windows to complete the installation of the new language pack.
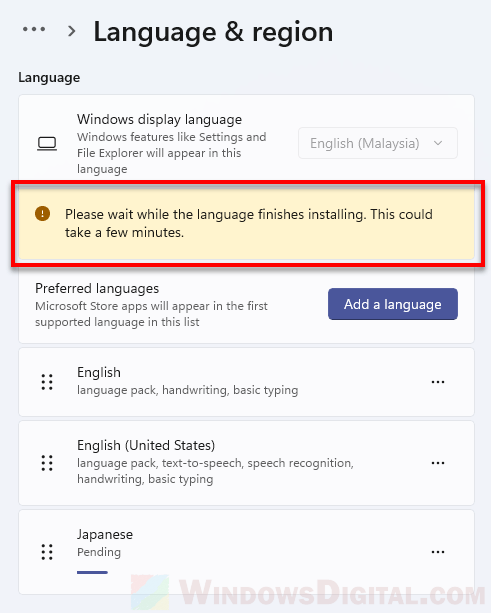
- Once the installation is completed, you will be asked to sign out of Windows for the changes to take effect. Do so by clicking on the “Sign out” button to sign out of Windows, then sign back in again.
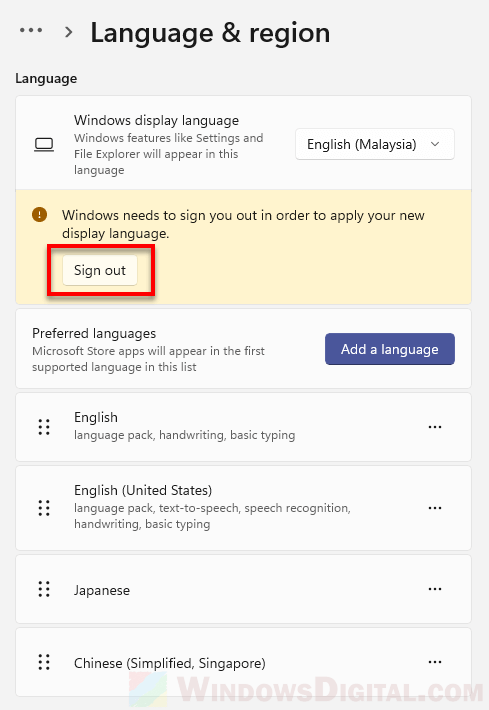
- Once the new language is successfully install, its keyboard layout will then be ready to use. Go to the next section in this guide to learn how to switch between keyboard layouts via taskbar or keyboard shortcuts.
Optionally, during step 6, if you want to switch the Windows main language to this new language you’re adding, enable the checkbox for “Set as my Windows display language“.
The screenshots above are examples of adding the Japanese language pack and keyboard layout in Windows 11. The same steps also apply to any keyboard language you want to add (such as Chinese, Arabic, Hindi, etc) in Windows 11.
Add the keyboard language layout to taskbar in Windows 11
In Windows 11, the keyboard language layout buttons on the taskbar will only appear when you have two or more keyboard layouts installed.
If you have only one default keyboard language, you need to add a second keyboard language in order for the keyboard layout button to appear on the taskbar.
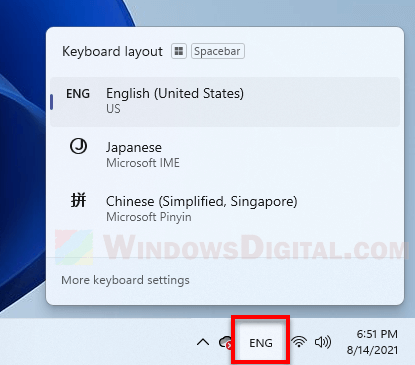
Follow the instruction above to add a second keyboard language.
After you’ve added at least one additional keyboard language in Windows 11, you should then be able to see the keyboard layout button on the taskbar.
Alternatively, you can also add a keyboard layout button to the quick settings area on the taskbar in Windows 11.
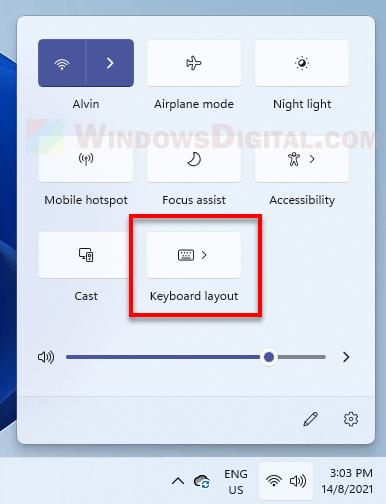
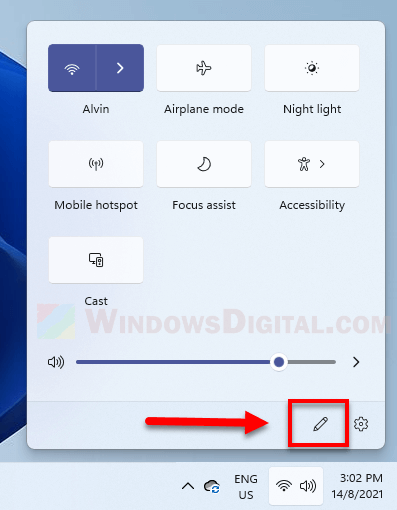
To do so, open the quick settings by clicking on either the volume or network (or WiFi) button. Then, click on the “Edit quick settings” button (pen icon).
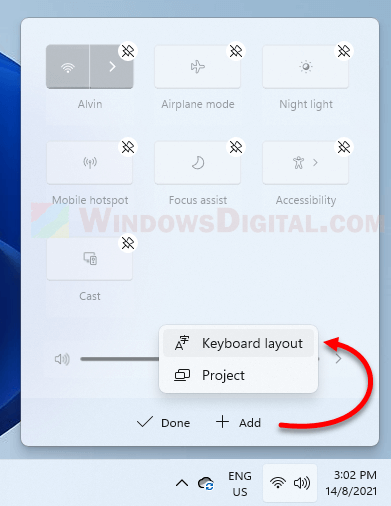
Next, click on Add and then select Keyboard layout to add it to the quick settings area.
2 keyboard shortcuts to switch between keyboard layouts
To quickly switch between your added keyboard language inputs in Windows or from within an app or game, we recommend using keyboard shortcuts instead to instantly switch to your desired keyboard layout.
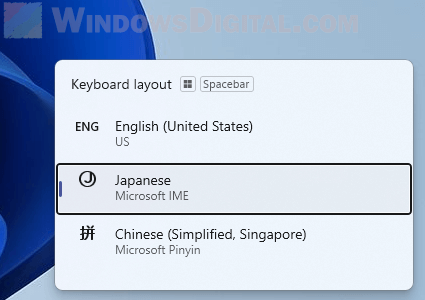
- Win + Space – While holding the Windows key, repeat pressing the Space key to switch between your keyboard layouts
- Alt + Shift – Similar to Win + Space, while holding ALT, repeating pressing Shift to switch between your added keyboard language inputs.
