Hibernate is one of the power options in Windows to put your computer in a state where your works, open apps and documents, etc. are saved in your hard disk instead of RAM. When you wake your PC from hibernation, everything will be right where you left off, including running applications, open documents, etc. Unlike sleep mode, after hibernating your computer, you can cut the power off entirely and your PC will still be able to wake from hibernation after that.
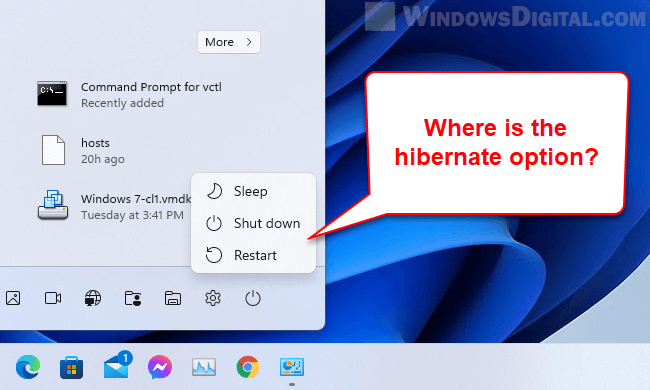
By default, the hibernate option is disabled in most desktop computers, and enabled in most laptop computers. However, it is not always the case that a laptop computer will always have the hibernation option. If you have manually reinstalled Windows before on your laptop PC, the hibernation option may sometimes disappear.
This guide will show you two methods on how to add the hibernate option back to the Start menu in Windows 11, regardless of whether it’s a laptop or desktop PC. If the first method to configure hibernate via Control Panel doesn’t work because the hibernate option checkbox is not visible, try the second method instead – enable hibernate through Command Prompt.
Enable hibernate power option in Windows 11
Page Contents
Method 1: Add hibernate option via Control Panel
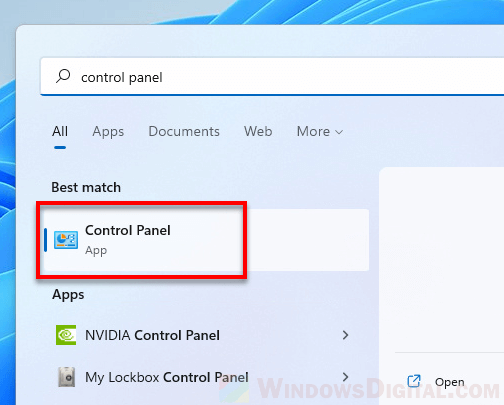
1. In Windows 11, search for and open Control Panel via Start.
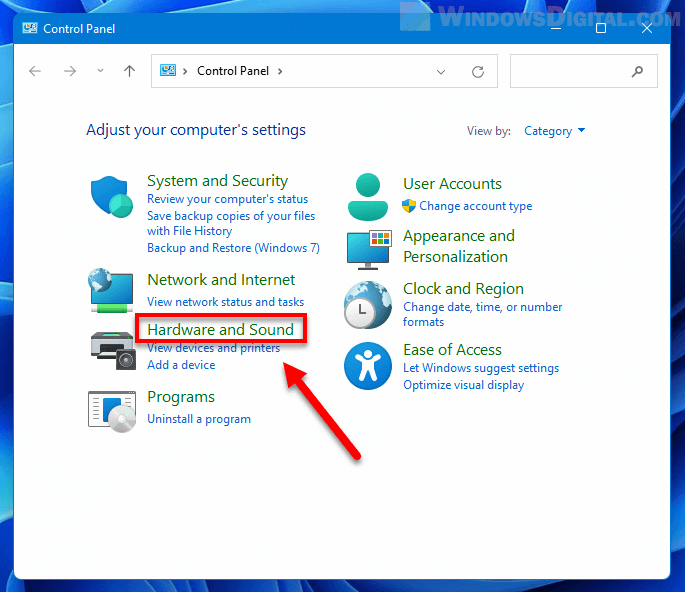
2. Next, click Hardware and Sound in the Control Panel window.
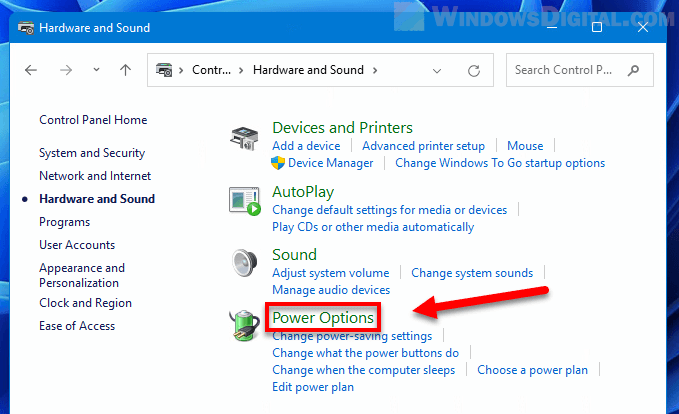
3. Then, select Power Options in the right pane.
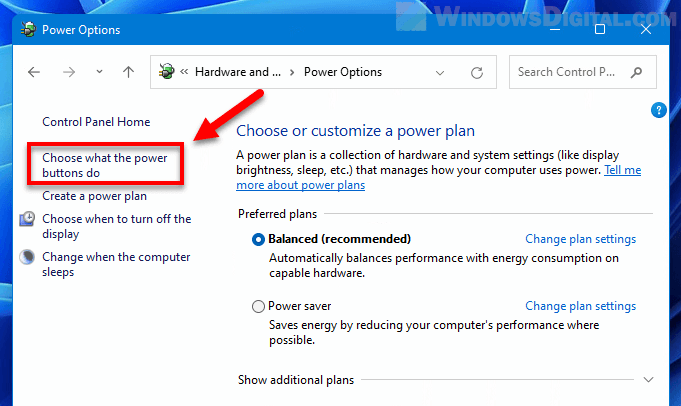
4. In the Power Options settings window, click Choose what the power buttons do on the left pane.
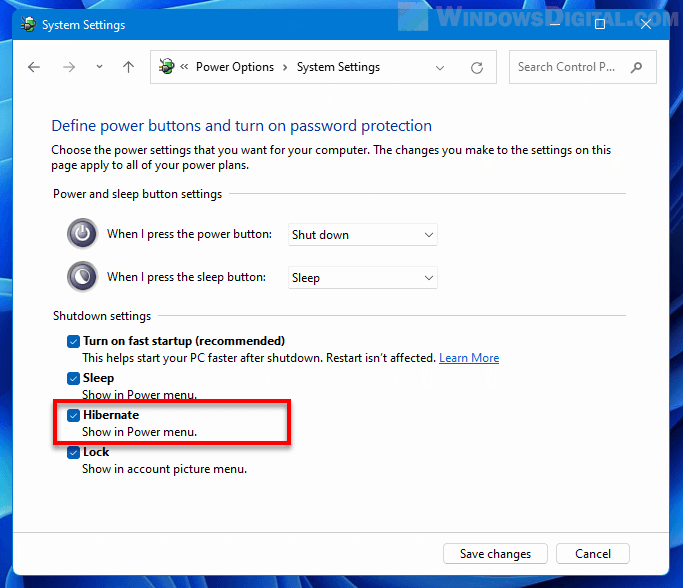
5. Now, you should be able to see the Hibernate option checkbox under Shutdown settings. However, the hibernate and other shutdown settings checkboxes are disabled by default (greyed-out and not clickable). To make the hibernate checkbox available and clickable, you need to first click the Change settings that are currently unavailable. This action requires your current user account to have administrative privileges. When UAC (User Account Control) asks for permission, click Yes to proceed.
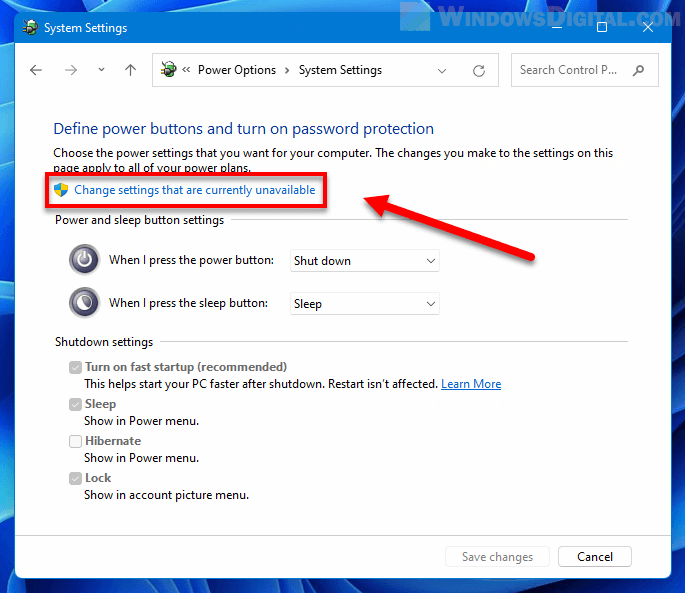
6. When the shutdown settings become available, enable the Hibernate checkbox to make it show up in the Power menu.
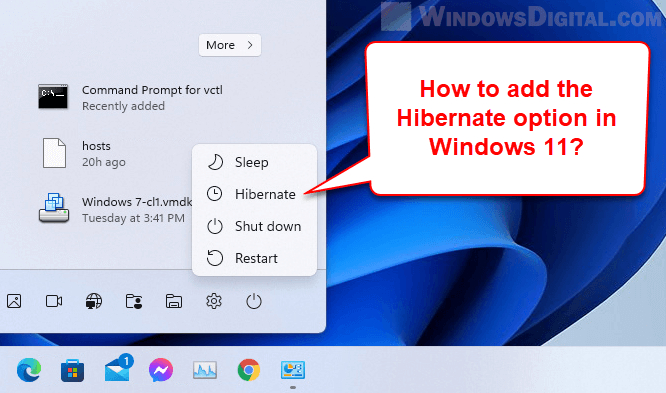
After following the steps above, you should then be able to see the Hibernate option when you click the Power menu via Start.
Tip: To learn the difference between Sleep vs Hibernate, we recommend to read: What is the difference between Sleep and Hibernate in Windows 11/10.
Method 2: Enable hibernate using CMD
If there is no hibernate checkbox under the “Shutdown settings” in the Power Options Control Panel in Windows 11, or if the hibernate option suddenly disappeared or went missing after several uses, it likely means hibernation is disabled at the operating system level on your computer. To re-enable hibernate in Windows 11 to make the hibernate checkbox available in the Power Settings again, follow the steps below.
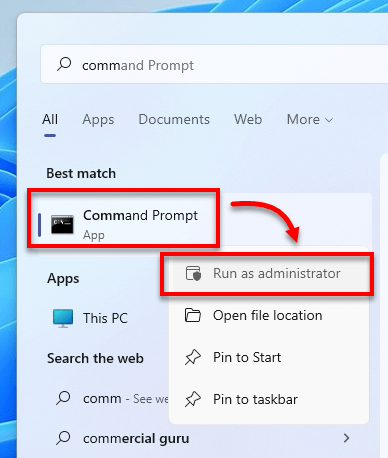
1. First, click Start and search for “Command Prompt” or “CMD”. Right click the first result – Command Prompt, and select Run as administrator. It’s important to run CMD as admin because the following command line requires administrative privileges to be executed.
2. In the Command Prompt window, enter the following command.
powercfg /h on
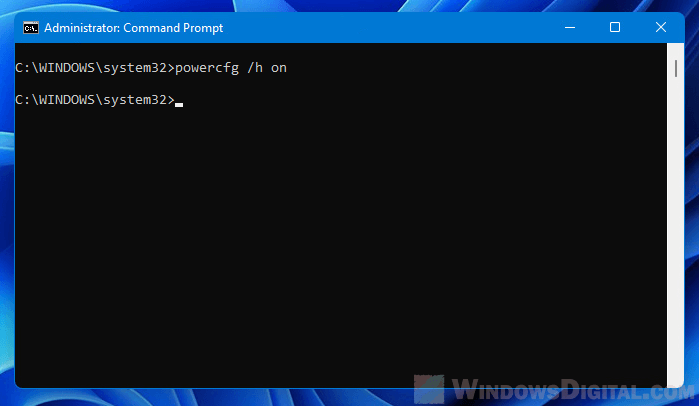
The powercfg command is a command-line utility used to control all configurable power system settings in Windows, including configurations that are not usually configurable through the Control Panel, such as the hibernate option. The “/h” parameter means hibernation, and the “on” means to turn it on. Thus, the whole command line means to turn on Hibernation through power configuration command-line utility.
On the contrary, if you want to disable hibernation entirely in Windows 11 to remove the hibernate option from both the Shutdown settings and the Power menu, enter the following command instead in the elevated Command Prompt.
powercfg /h off

