If you have a Meta (Oculus) Quest 3 VR headset and want to take a screenshot, there are times when you might want to take a quick screenshot to save a moment or to share it with your friends. The problem is that most guides will show the same steps where you will have to use the Meta button and the trigger button on your right controller, but it won’t really work if it’s not done correctly. This guide will show you the proper steps to take screenshots on your Quest 3 headset.
Also see: How to Enable File Transfer Between Quest 3 and PC
Page Contents
The proper steps to take a screenshot on Quest 3
The buttons that you should press to take a screenshot on your Oculus Quest 3 headset are to first press the Meta button and then press the Trigger button. However, when you do so, you will notice the headset starts a video recording instead of taking a screenshot. And if you press too fast, nothing happens. So, how do you actually take a screenshot with these two buttons?
- First, on the screen where you would like to take a screenshot, press and HOLD the Meta button on your right controller.
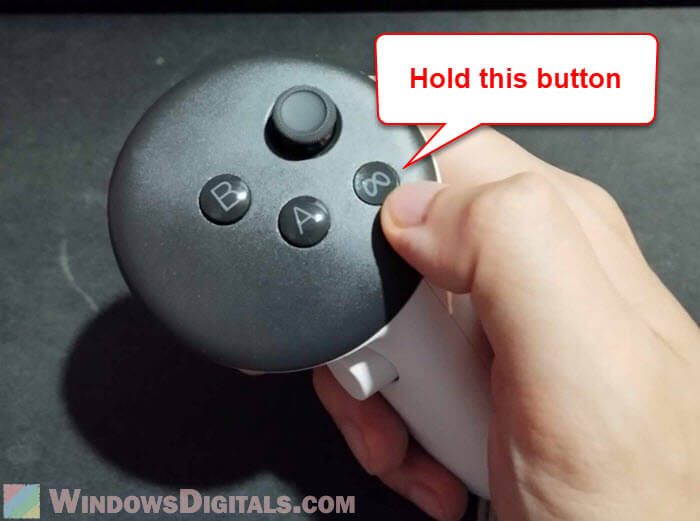
- Then, quickly press and release the Trigger button WHILE still holding the Meta button.
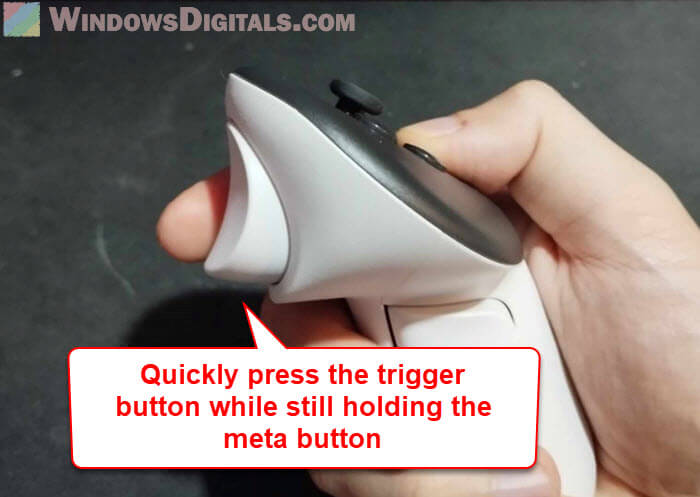
- You will hear a click sound that indicates the screenshot has been taken.
Usually, users are confused because they release the Meta button together with the trigger button, which results in nothing happening. If they press and hold these buttons for too long, it will trigger video recording instead.
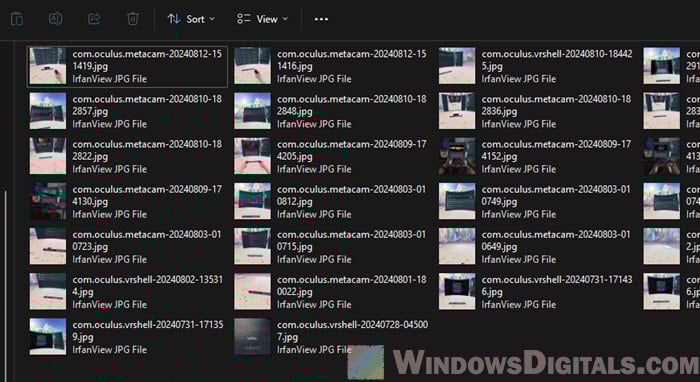
To share or browse your saved screenshots (or recorded videos), check out this guide: Where are Quest 3 Screenshots and Videos Stored?
Take a screenshot using voice command
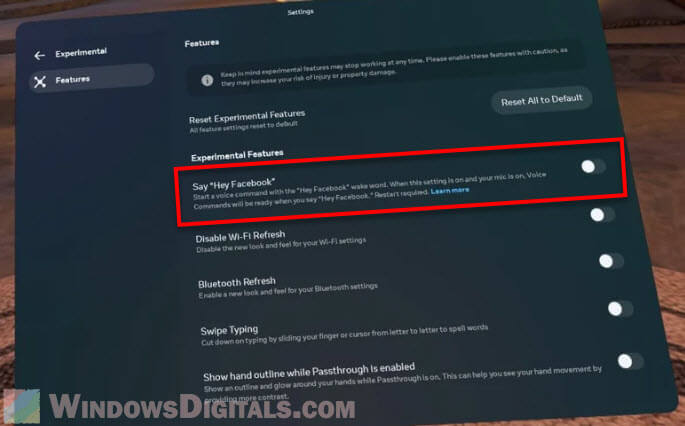
If you’re in the United States and are using the English language on your Oculus Quest 3, you will be able to use the Experimental voice command feature. This will allow you to do a lot of things with just your voice, including taking a screenshot. Note that devices outside of the U.S. will not be able to use this feature until it is out of the experimental stage and beta, and has become an official feature.
You can enable the voice command feature by going to Settings (on your headset), System Settings, and then “Voice Commands“. Or, go to Settings, and then select “Experimental“.
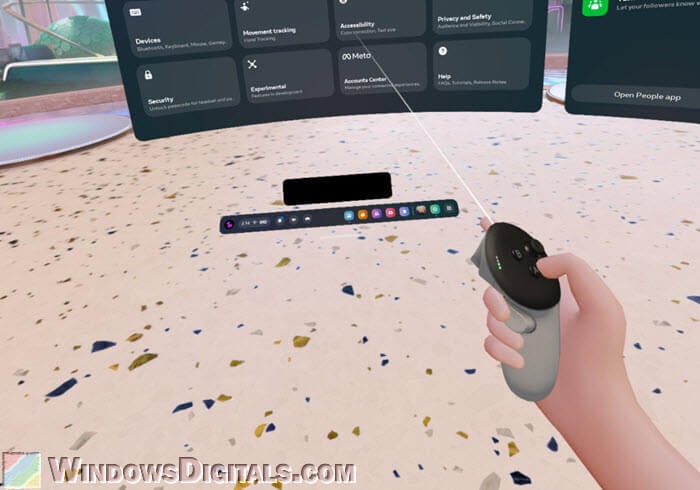
- To use voice command to take a screenshot on your Quest 3, double-press the Meta button on your right controller.
- Select the Voice Commands button.
- Say “Hey Facebook” (wake word) to start the voice command.
- Then, speak the command: “Take a photo“. It will then take a screenshot of whatever you’re looking at on your Quest 3 headset.
For a list of voice commands you can use, you can check out this page: https://www.meta.com/help/quest/articles/in-vr-experiences/oculus-features/what-you-can-say-with-voice-commands/.
Linked issue: Quest 3 Passthrough Looks Blurry or Has Glare?
Be aware of your limited storage space
Screenshots don’t take up much storage space, but video recordings do. If you’ve accidentally taken quite a number of video recordings that you didn’t originally intend to, you might want to delete them from your device to free up unnecessarily occupied storage space. You can check this guide on how to find the screenshots and recorded videos on your Quest 3, and delete them if they are not needed.
This is especially important if you have the smaller storage (128GB) model. Recorded videos can occupy from hundreds of MBs to several GBs depending on the resolution set and duration of the video. Delete those you no longer need, or copy them off and then delete them from your headset, so you have more space for other things like local VR games.