Like Google’s dominating web search, its Reverse Image Search is also the most popular image search engine in the world. Google reverse image search, also known as Google Search by Image, allows you to upload a photo or picture and search for contents and images related to it, rather than using written or spoken search query.
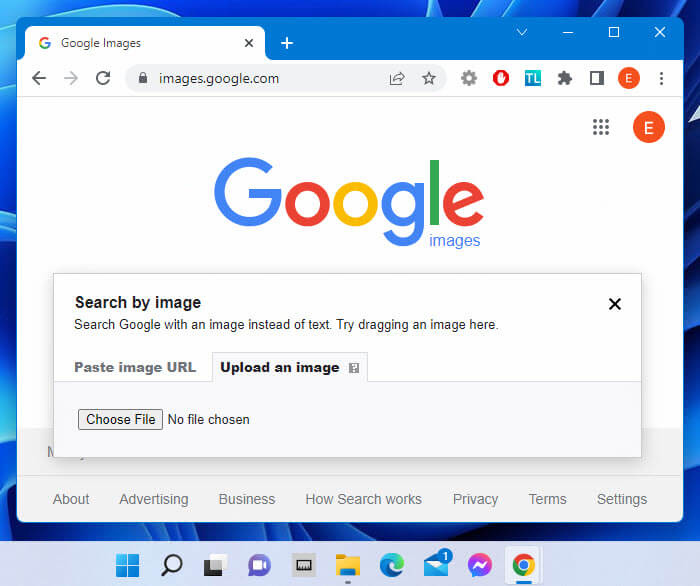
You can do a reverse image search via images.google.com on a web browser in Windows 11. On the search engine page, you can either upload an image by clicking the browse button and select the image from your computer, or you can paste the image URL if it’s an online image that’s already been uploaded elsewhere.
However, there is a much easier way to do a Google reverse image search on Windows 11 without going through a browser and manually upload your image. To reduce the hassle, you can add a “Search on Google Images” option to the context menu in Windows 11.
After doing so, you can quickly perform a reverse image search by simply right-clicking the picture on Windows 11 desktop or File Explorer and select “Search on Google Images” directly from the context menu. Windows will then open the Google reverse image search result on a browser automatically, skipping the step where you have to manually open Google Reverse Image Search on a web browser and upload the image onto the image search bar.
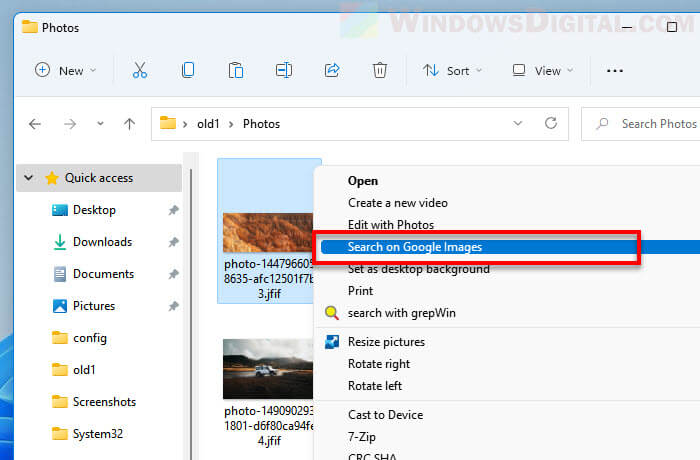
The screenshot above shows how it looks like when you right-click an image, picture or photo after adding the Search on Google Images option to the context menu in Windows 11.
Also see: Change Windows 11 Start Menu Search to Google
Page Contents
Google Reverse Image Search on Windows 11
To add the Google reverse image search option to the context menu (only when you right-click a supported image format file) in Windows 11, follow the steps below.
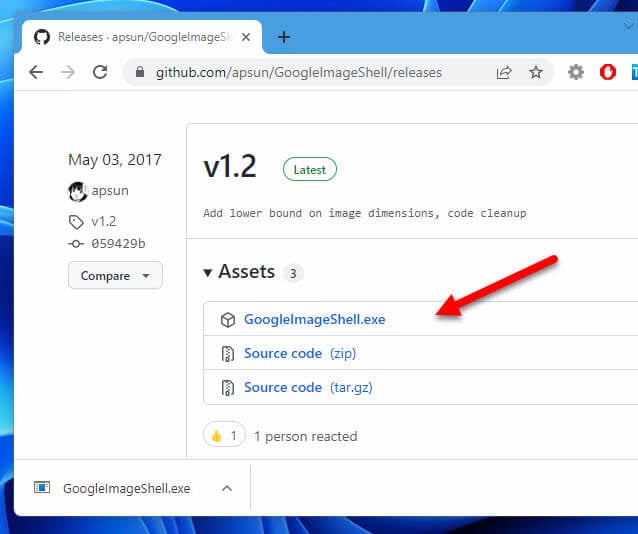
1. Download GoogleImageShell from the following GitHub page. On the GitHub page, look for the post marked as Latest, and then select the executable file under Assets to download it.
https://github.com/apsun/GoogleImageShell/releases
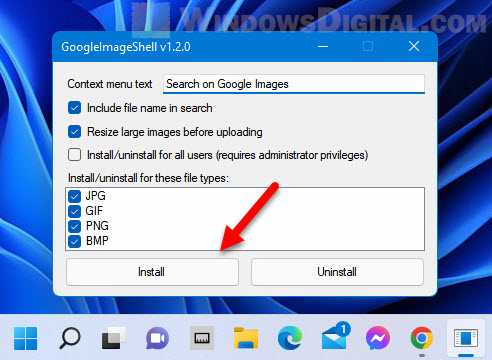
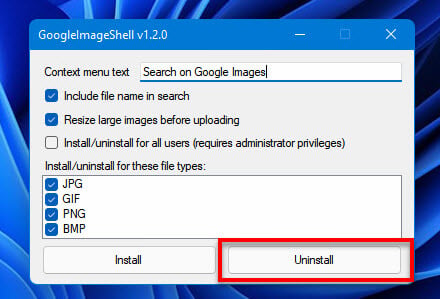
2. Run the GoogleImageShell.exe file. On the installer window, you can change the context menu text to any other phrase you want or leave it as the default “Search on Google Images“. This is the text that will appear on the context menu after it’s installed.
- The “include file name in search“, when enabled, will include the file name in the search query along with the image.
- “Resize large images before uploading“, when enabled, will force resize large images before uploading it to the search engine.
- “Install/uninstall for all users“, when enabled, will install the “Search on Google Images” option to the context menu for all user accounts in your Windows. This action requires administrative privileges. If disabled, Google Image Shell will only install the context menu option for your current user account.
- The “Install/uninstall for these file types” section allows you to choose which file type you want to add the context menu option to when right-clicked. It supports JPG, GIF, PNG and BMP image formats.
- After you have done choosing the options, click Install to install it.
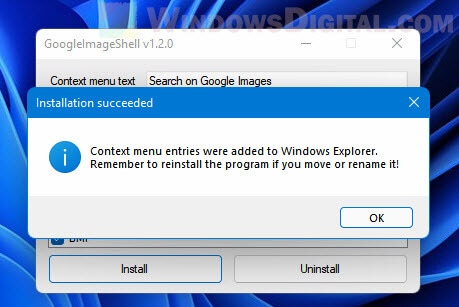
3. When the installation is completed, it will prompt a message that says “Installation succeeded – Context menu entries were added to Windows Explorer“.
Related: How to Resize Multiple Images At Once in Windows 11
How to Reverse Image Search on Windows 11
1. Once installed, you can right-click any photo or image (in a supported file format) from the desktop or via File Explorer, and select Show more options.
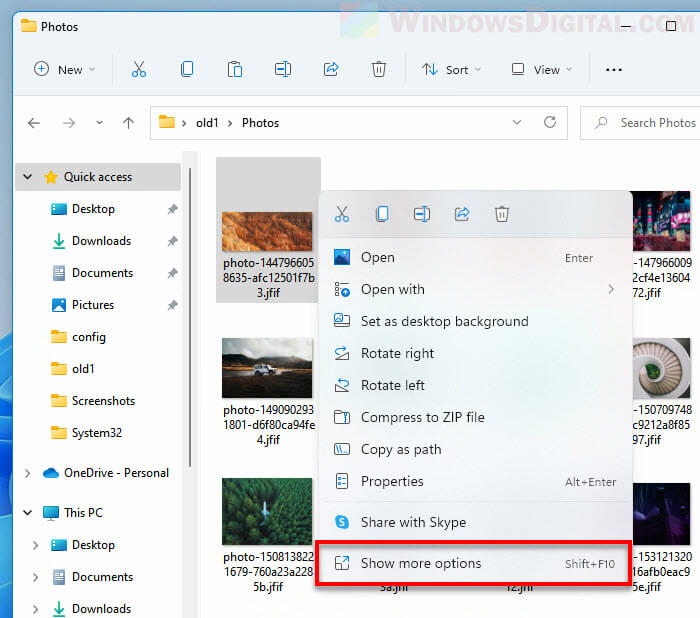
2. Then, select “Search on Google Images” from the context menu to perform the reverse image search on Google.

3. Windows 11 will then automatically open your default web browser, upload the selected image (and resize if it’s too large and if the resize option is selected during the installation earlier) to Google Search for Image, and return the search result instantly.
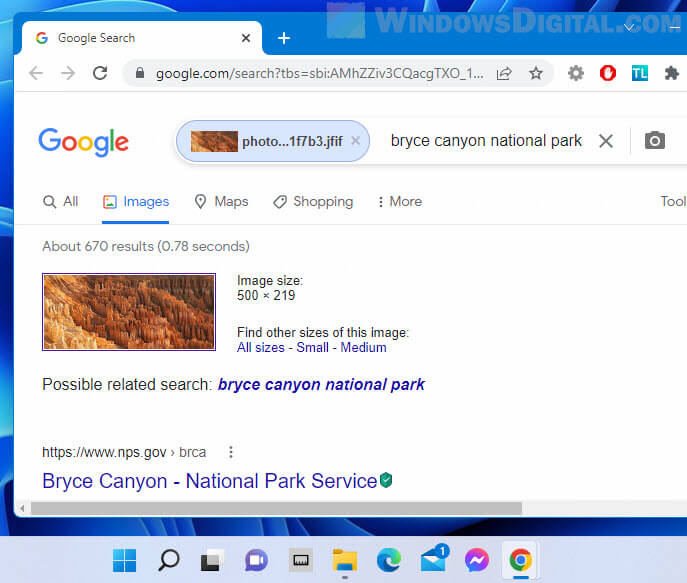
Read: How to Preview Images and Videos in File Explorer on Windows 11
How to remove “Search on Google Images” from the context menu in Windows 11
To uninstall GoogleImageShell in Windows 11, simply rerun the GoogleImageShell.exe file again. Then, click the uninstall button to uninstall it. Restart your computer and the “Search on Google Images” option will disappear from the context menu.
Tip: Reverse image search with Google Lens on Chrome
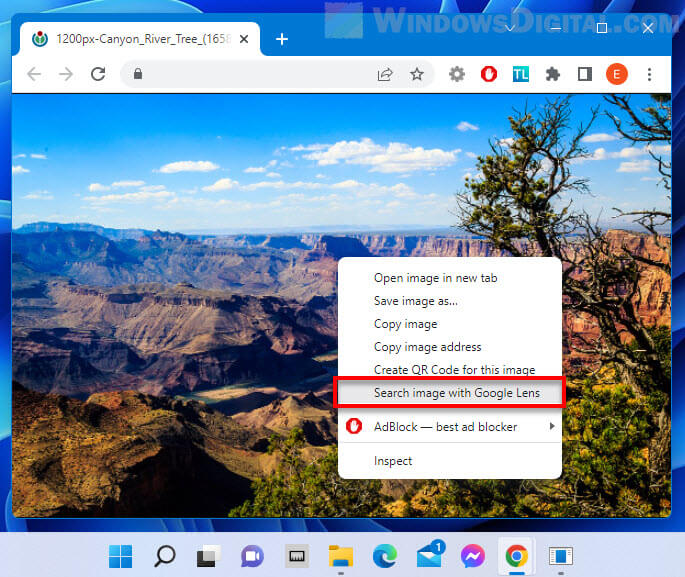
Though not many people know about this feature, if you are using Google Chrome, you can actually reverse search any online image from any website by right-clicking the image and select “Search image with Google Lens”. It works for all kinds of images.
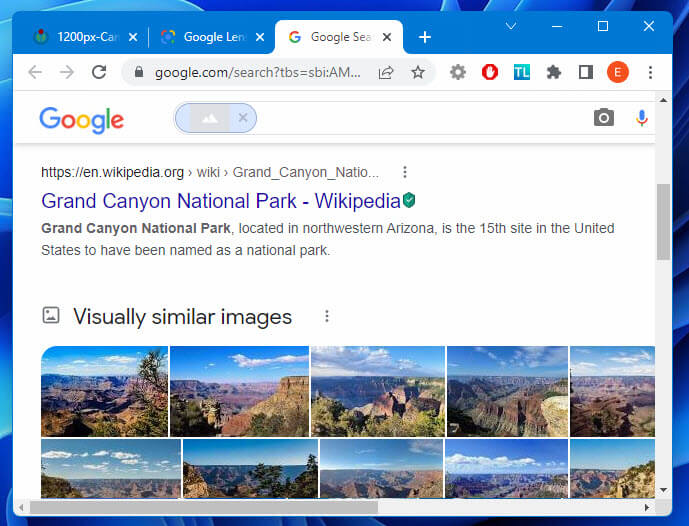
After selecting the search image with Google Lens option, Chrome will open a new tab on Google Lens with the selected image. It will show you a “Find image source” button and a “Visual matches” section where other similar images will be shown.
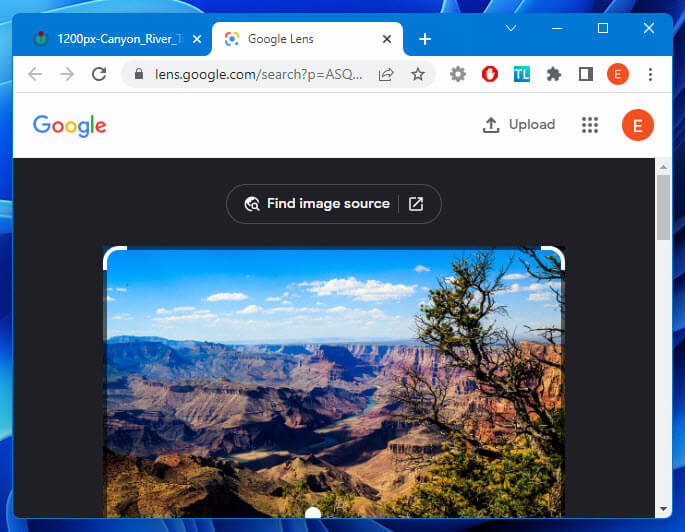
If you click the “Find image source” button, Google Lens will try to find the source of the image (similar to reverse image search) and return the search result right away.
If the image can’t be right-clicked, you can right-click anywhere on the webpage and select “Search image with Google Lens”. Then, drag over any image on the screen you want to search with Google Lens.
