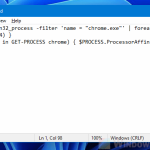
If you experience lags or poor performance in game specifically while watching YouTube or Twitch on Chrome at the same time, here are two tips on how to reduce game lags while Chrome is opened in Windows 10 (also works for other browsers such as Firefox or Edge).
Though I believe this guide may help to reduce some lags in game while Chrome is running, the performance of the game as a whole still depends on how powerful your PC is. There is no guarantee that the tips below will significantly help improve the performance of your game when you try to run multiple apps such as watching YouTube simultaneously if your PC is not strong enough.
Also see: High GPU Usage While Watching YouTube Videos
Page Contents
Reduce game lag when YouTube or Twitch is opened on Chrome
The key to this tip is to set Chrome’s process priority to low so that Windows will prioritize the game first when it comes to managing CPU resources, and to set Chrome’s processor affinity to limit the number of CPU cores it’s allowed to use.
Lower Chrome’s process priority in Windows 10
To configure a Chrome’s process priority in Windows 10, follow the steps below.
Open Task Manager by pressing CTRL + Shift + Esc keys, or by right-clicking the taskbar and select Task Manager.
In Task Manager, click on Details tab.
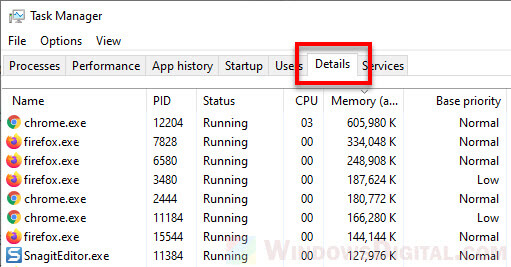
Since Google Chrome usually have multiple chrome.exe processes running depending on how many tabs you’re opening right now, the best way to identify the chrome.exe that uses the most resources is by clicking on the Memory column to sort the processes by amount of memory used.
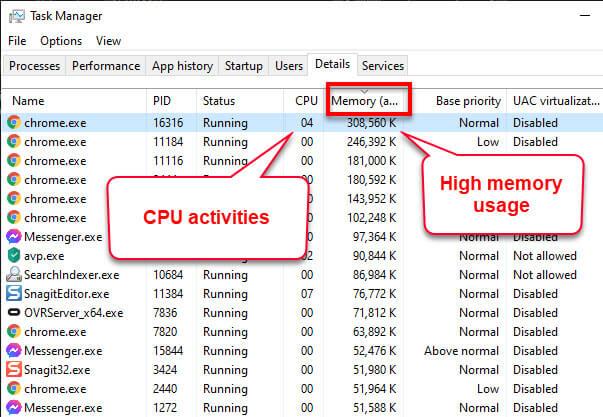
If YouTube is playing on one of Chrome’s tabs, it is usually the one that consume the most memory and have the most CPU activities among all other chrome.exe processes.
To lower the priority of a chrome.exe process, right-click on the chrome.exe, select Set priority > Low or Below normal. As long as the chrome’s priority is lower than that of the game’s process, Windows will prioritize the game first when distributing CPU resources.
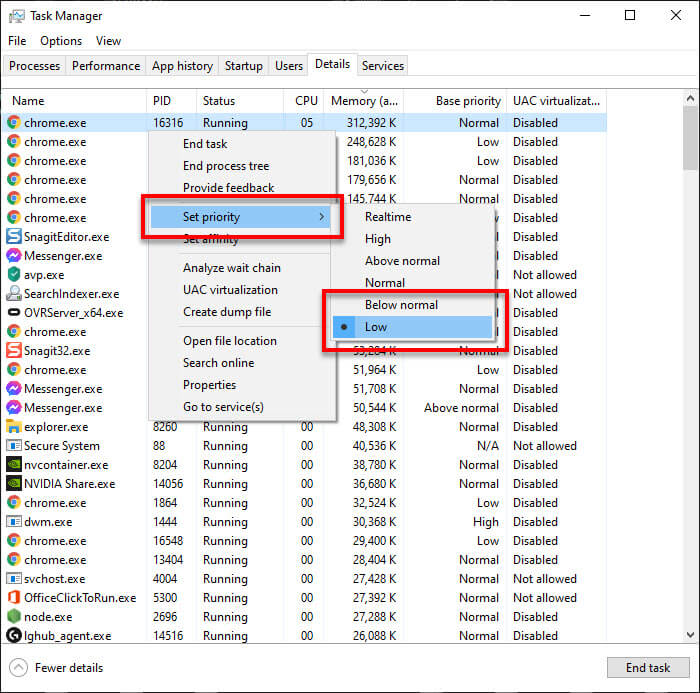
If you have multiple heavily running Chrome tabs, you may want to repeat the process for other chrome.exe processes that have high CPU activities.
To undo the changes, simply close Chrome and reopen it. All set priorities will revert back to normal upon restart of the app.
Pro tip: How to Limit CPU Usage of a Process in Windows 11
Set Chrome’s processor affinity in Windows 10
Usually setting the process priority should be sufficient to help significantly reduce game lag that caused by inefficient distribution of CPU resources when a heavy task such as YouTube or Twitch is running. However, to further smooth things out, you can force chrome process to use only certain CPU cores, so that it won’t affect the distribution of resources from other CPU cores.
To set the processor affinity for a chrome process, right-click on the chrome.exe process, and select Set affinity.
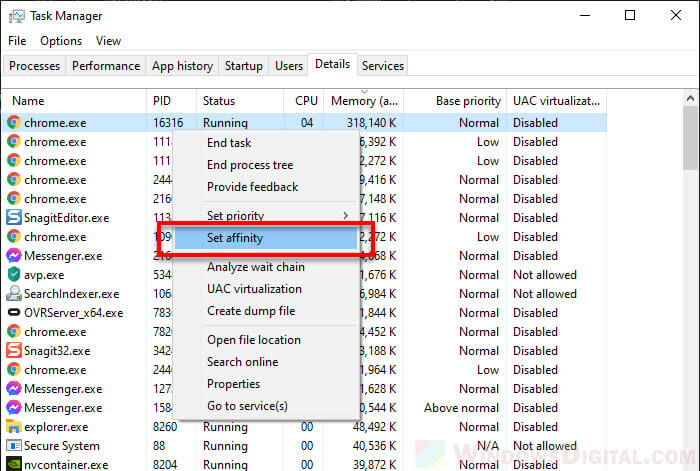
In the Processor affinity window, by default, all CPU cores are enabled. Uncheck all CPU cores first, and then select only one or two cores for the process.
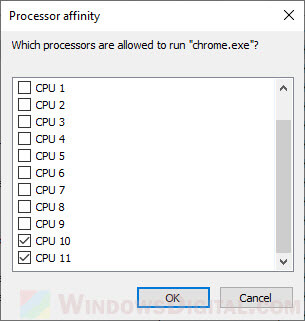
It’s up to you how many cores you want to allow the selected chrome.exe process to run. It also depends on how powerful your CPU cores are. If you have a high-end CPU, a single core should be enough to run YouTube or Twitch on high quality. Experiment it yourself by selecting any number of CPU cores allowed to run the chrome process and see if it helps reduce lag in your game.
The processor affinity setting for any process will be reverted to its default (all CPU cores allowed) upon restart of the app. To revert the changes back to its default, simply close Chrome and reopen it.
Note that setting Chrome’s affinity will significantly affect how the tab on chrome that had been restricted to limited CPU cores would perform. If you have a rather slow CPU, heavy running Chrome tab such as YouTube may start to lag or even crash if it doesn’t have enough CPU resources to run it. If the chrome tab gives you problems, you can experiment it by gradually increase the number of CPU cores allowed for the chrome process.
