If you see that everything in Windows 11, including the background or wallpaper, interfaces, windows, buttons, taskbar, and basically the entire desktop, is all black and white, right after you get past the login screen, you might have some options accidentally turned on. This guide will show you several things you should look into to fix the problem.
Also see: Ideas to Fix Blurry and Washed Out Graphics in Games

Page Contents
Check if you’ve accidentally turned on “Color filters”
Sometimes your screen might start looking black and white like an old movie because of a simple setting. In Windows 11, there is a “Color filters” option designed to help people who have trouble seeing colors. If this setting is turned on by mistake, your screen will change to black and white. To turn it off, follow the steps below.
- Press the Win key to open the Start menu search, type “Color filters“, and press Enter. This will take you directly to the Color filters section in the settings. You can also go there manually by going to “Settings > Accessibility > Color filters”.
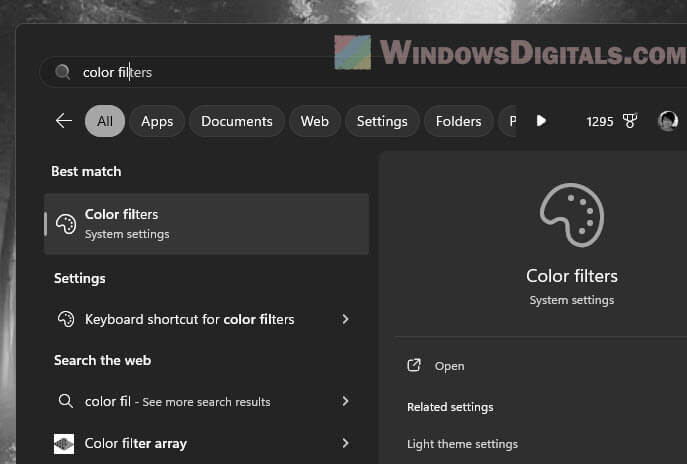
- On the Color filters page, look for the switch labeled “Color filters“. If this switch is on, it’s probably why your screen is black and white.
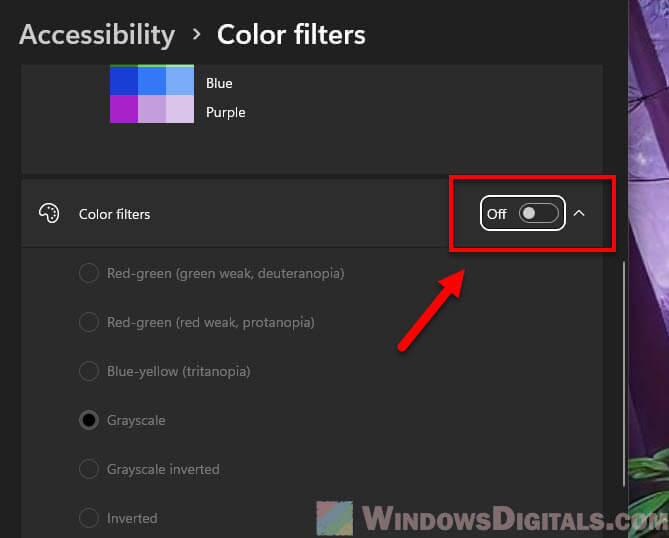
- Click on the switch to turn it off. Your screen should show colors again right away.
After doing this, see if your screen colors look normal again. If they do, you’ve fixed the issue. If not, there might be other settings messing things up.
Suggested read: GPU Artifacting Examples, How to Test, and Fixes
Check the graphics card settings as well
Another possible reason why everything looks black and white could be other color settings in your graphics card software. Sometimes, these settings can override the system settings without you noticing.
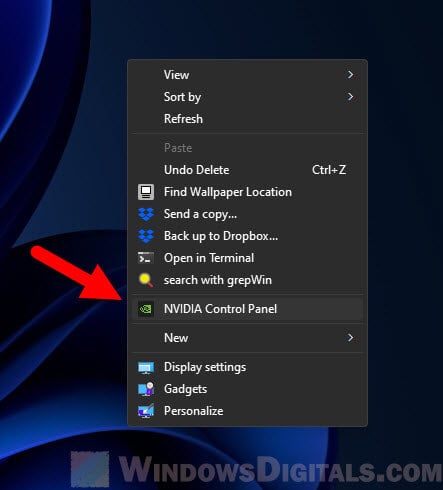
- Right-click on an empty part of your desktop and choose “Show more options“.
- If you see options for your graphics card like “NVIDIA Control Panel” or “AMD Radeon Settings“, click on them.
- You might need to find options like “Change resolution” or “Adjust color settings” inside the graphics card settings.
- Check for any settings that mention color changes, grayscale, black and white, or even the “Hue” slider. Set them to normal or color.
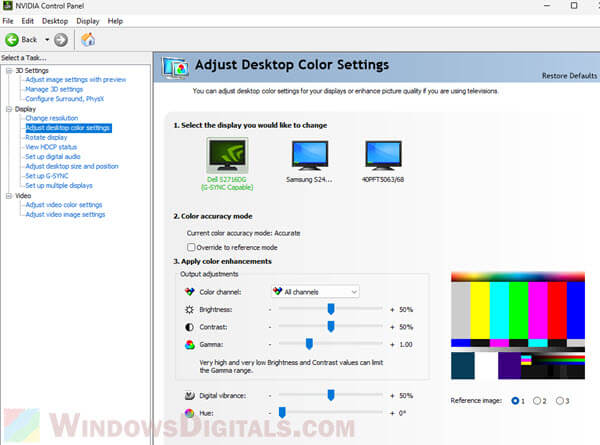
- If you change anything, click “Apply” to save your settings and see if the color comes back to your display.
Pro tip: Force App or Game to Use Nvidia GPU or Integrated Graphics
Try turning off the Night Light settings
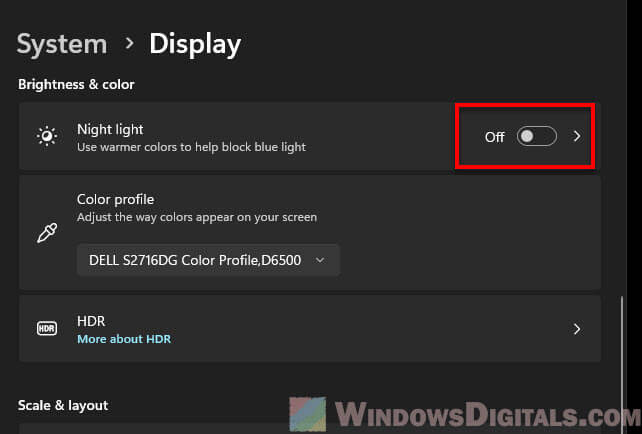
Night Light is a feature that changes the color scheme to reduce blue light, especially at night. It usually adds an orange tint, but if it’s set wrong, it could mess up your display colors.
Just go to your display settings by right-clicking on the desktop, select “Display settings“, and make sure that the “Night light” feature is turned off.
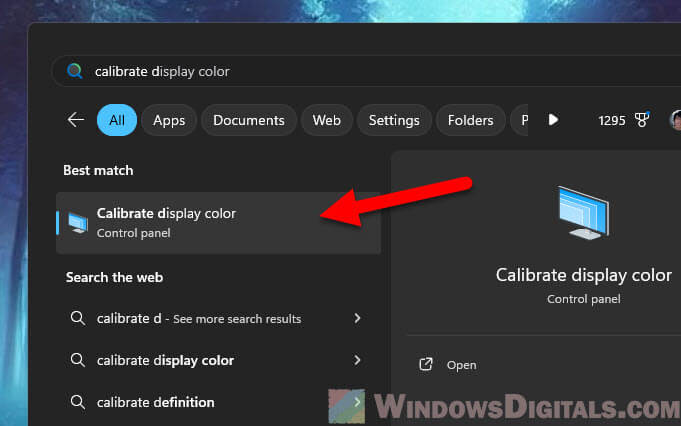
Calibrate display color
If the colors still look off, you might need to recalibrate your display. Go to the Start menu or Search, type “calibrate display color“, and hit Enter.
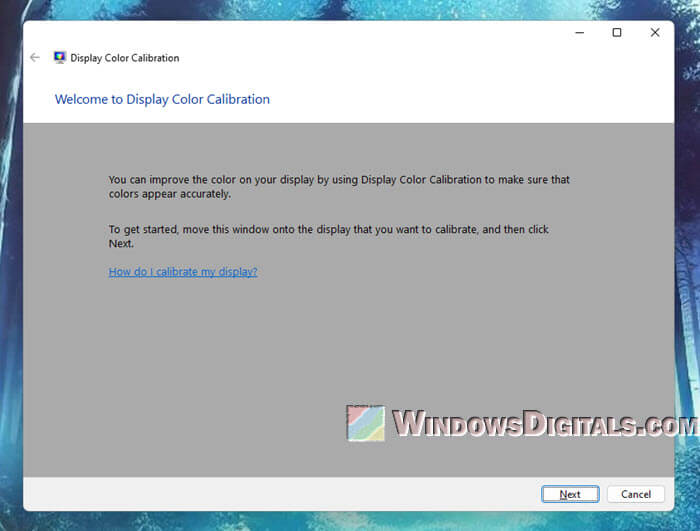
Follow the instructions to adjust the gamma, brightness, and contrast settings. Remember to save the calibrated profile as the default to keep these settings after you reboot your PC.
Check high contrast and other grayscale settings
If your screen is still black and white in Windows 11, High Contrast mode could be the cause. This feature makes the display easier to see but can make your screen look kind of black and white if it’s set to use a high contrast theme.
- Right-click on your desktop and choose “Personalize“.
- From the menu on the left, select “Colors“.
- Scroll down and select the “Contrast themes” setting.
- Make sure that no contrast theme is selected. The option should be set to “None“.
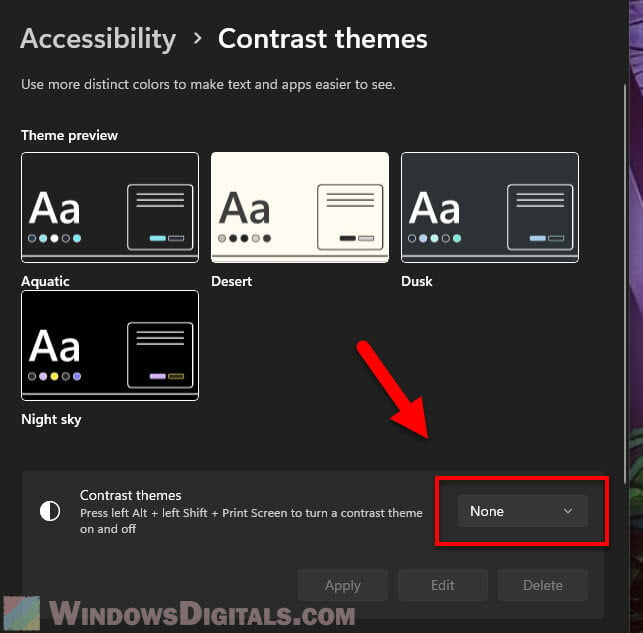
This adjustment should help if the black and white issue is related to an accessibility setting that was changed by accident.
Might be useful: How to Turn Brightness Up or Down on Windows 11 or 10
Check for accidental keyboard shortcuts
Sometimes, hitting the wrong keys can turn on color filters without you realizing it. The shortcut for enabling or disabling color filters in Windows 11 is “Win + CTRL + C“. If you think this might have happened by accident, try the following steps.
- Press Win + CTRL + C to see if it changes the color back to normal.
- This can quickly turn off any color filter that might have been activated by mistake.
Reset Windows 11 visual effects
If the above methods haven’t worked and your desktop screen still look entirely black and white, you might want to try resetting the visual effects in Windows 11. Sometimes, problems with these settings can cause your screen to go black and white.
- Press the Windows key to open the Start menu, search for “Adjust the appearance and performance of Windows” and select it from the search result. This opens the Performance Options window.
- In the Performance Options window, go to the “Visual Effects” tab.
- Try selecting “Adjust for best performance” to turn off most visual effects, and then re-select “Let Windows choose what’s best for my computer” to reset to the default settings.
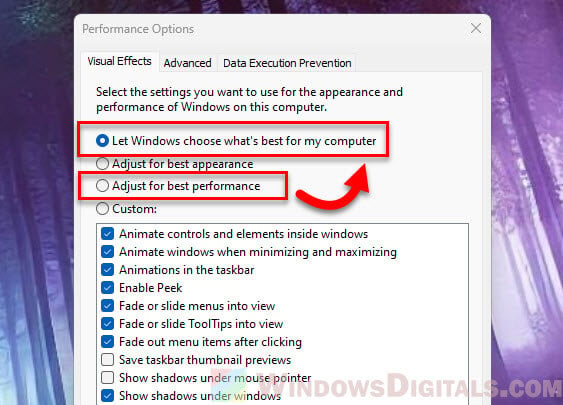
- Click “Apply“, then “OK” to save the changes.
Resetting these settings can sometimes fix display issues caused by errors in the visual effects settings. After making these changes, check if your display color looks normal again.
Try to update or reinstall your display driver
Sometimes, an update can inadvertently change settings or introduce bugs that affect display colors. Try to manually update your graphics card driver, which means downloading the driver from the manufacturer’s website instead of relying on Windows Update.

If updating it doesn’t work, you should also try to reinstall it. Uninstall the driver first, and then install the latest driver you downloaded.
Related guide: How to tell if it’s your Monitor or GPU that is dying?
It might be a hardware issue
It’s not uncommon to see a “black and white” (grayscale) issue on a monitor that’s going to fail. It could also be caused by a failing GPU as well. You can test your monitor or GPU on a different computer and see if they are also showing black and white. If it shows the same problem, then you might have a broken monitor or GPU.


