This guide shows you a simple AHK (AutoHotkey) script that I made with a friend’s help. It makes a sound when it spots changes on part of your screen. It can be very useful for keeping an eye on work tasks or during gaming. The script is simple to use and tweak for different needs. We’ll explain how the script works, how to set it up, and some ways you might use it.
Also see: Starting an AutoHotkey Script on Windows 11/10 Startup
Page Contents
A simple AHK script to monitor and detect screen changes with sound alert
Just copy and paste the script, save it with a .ahk extension, and start using it right away. Be sure to read the next section to learn what it does and how to actually use it.
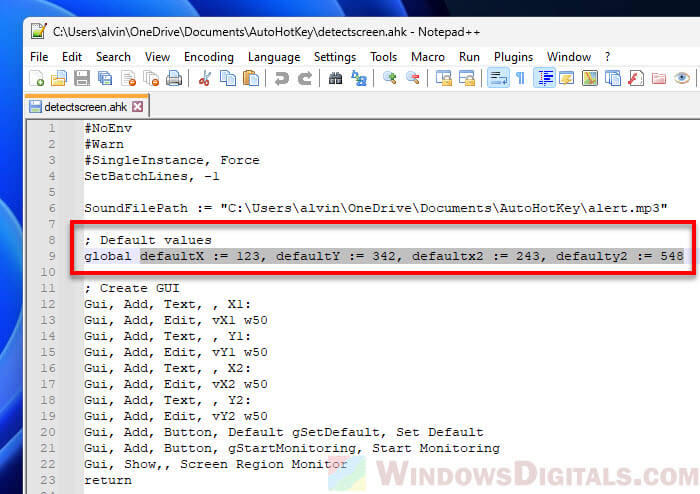
#NoEnv
#Warn
#SingleInstance, Force
SetBatchLines, -1

SoundFilePath := "C:\alert.mp3"

; Default values
global defaultX := 123, defaultY := 342, defaultx2 := 243, defaulty2 := 548

; Create GUI
Gui, Add, Text, , X1:
Gui, Add, Edit, vX1 w50
Gui, Add, Text, , Y1:
Gui, Add, Edit, vY1 w50
Gui, Add, Text, , X2:
Gui, Add, Edit, vX2 w50
Gui, Add, Text, , Y2:
Gui, Add, Edit, vY2 w50
Gui, Add, Button, Default gSetDefault, Set Default
Gui, Add, Button, gStartMonitoring, Start Monitoring
Gui, Show,, Screen Region Monitor
return

SetDefault:
    GuiControl,, X1, %defaultX%
    GuiControl,, Y1, %defaultY%
    GuiControl,, X2, %defaultx2%
    GuiControl,, Y2, %defaulty2%
return

StartMonitoring:
    Gui, Submit  ; Get values from GUI
    global x1 := X1, y1 := Y1, x2 := X2, y2 := Y2
    global w := x2 - x1, h := y2 - y1
    Gui, Destroy  ; Close the GUI
    Loop {
        If (ScreenCompare(x1, y1, w, h, 0x0, [5000, 200]*)) {
            SoundPlay, %SoundFilePath%
            MsgBox, 4, , Screen Region Change Detected!`nContinue monitoring?
            IfMsgBox, No
                break
        }
    }
return

GuiClose:
ExitApp

ScreenCompare( X, Y, W, H, Hwnd:=0x0, Sleep* )  {
Local
Global A_Args
  Sleep[1] := Sleep[1]="" ? 100 : Format("{:d}", Sleep[1])
  Sleep[2] := Sleep[2]="" ? 100 : Format("{:d}", Sleep[2])

  VarSetCapacity(BITMAPINFO, 40, 0)
  NumPut(32, NumPut(1, NumPut(0-H*2, NumPut(W, NumPut(40,BITMAPINFO,"Int"),"Int"),"Int"),"Short"),"Short")

  hBM := DllCall("Gdi32.dll\CreateDIBSection", "Ptr",0, "Ptr",&BITMAPINFO, "Int",0, "PtrP",pBits := 0, "Ptr",0, "Int",0, "Ptr")
  sDC := DllCall("User32.dll\GetDC", "Ptr",(Hwnd := WinExist("ahk_id" . Hwnd)), "Ptr")
  mDC := DllCall("Gdi32.dll\CreateCompatibleDC", "Ptr",sDC, "Ptr")
  DllCall("Gdi32.dll\SaveDC", "Ptr",mDC)
  DllCall("Gdi32.dll\SelectObject", "Ptr",mDC, "Ptr",hBM)
  DllCall("Gdi32.dll\BitBlt", "Ptr",mDC, "Int",0, "Int",H, "Int",W, "Int",H, "Ptr",sDC, "Int",X, "Int",Y, "Int",0x40CC0020)

  A_Args.ScreenCompare := {"Wait": 1},   Bytes := W*H*4,  Count := 0
  hMod := DllCall("Kernel32.dll\LoadLibrary", "Str","ntdll.dll", "Ptr")
  While ( A_Args.ScreenCompare.Wait && (Count<2) )
  {
      DllCall("Gdi32.dll\BitBlt", "Ptr",mDC, "Int",0, "Int",0, "Int",W, "Int",H, "Ptr",sDC, "Int",X, "Int",Y, "Int",0x40CC0020)
      Count := ( (Byte := DllCall("ntdll.dll\RtlCompareMemory", "Ptr",pBits, "Ptr",pBits+Bytes, "Ptr",Bytes) ) != Bytes )
               ? (Count + 1) : 0
      Sleep % (Count ? Sleep[2] : Sleep[1])
  }   Byte +=1
  DllCall("Kernel32.dll\FreeLibrary", "Ptr",hMod)

  SX := (CX := Mod((Byte-1)//4, W) + X),    SY := (CY := (Byte-1) // (W*4)   + Y)
  If (Hwnd)
    VarsetCapacity(POINT,8,0), NumPut(CX,POINT,"Int"), NumPut(CY,POINT,"Int")
  , DllCall("User32.dll\ClientToScreen", "Ptr",Hwnd, "Ptr",&POINT)
  , SX := NumGet(POINT,0,"Int"),  SY := NumGet(POINT,4,"Int")

  If (Wait := A_Args.ScreenCompare.Wait)
      A_Args.ScreenCompare := { "Wait":0, "CX":CX, "CY":CY, "SX":SX, "SY":SY }
  DllCall("Gdi32.dll\RestoreDC", "Ptr",mDC, "Int",-1)
  DllCall("Gdi32.dll\DeleteDC", "Ptr",mDC)
  DllCall("User32.dll\ReleaseDC", "Ptr",Hwnd, "Ptr",sDC)
  DllCall("Gdi32.dll\DeleteObject", "Ptr",hBM)
Return ( !!Wait )
}
How the script actually works to monitor your screen
The script uses AutoHotkey, a scripting language for Windows, to watch a specific area of your screen for changes. When it detects a change, it will play a sound file to alert you. The following is what the script does.
- The script sets up the environment and makes sure it only runs one instance at a time.
- At the start of the script, you set a path for the sound file. This file is played as an alert when a change is seen.
- The script sets up a simple graphical user interface (GUI) where you put in and adjust the coordinates of the area to be watched.
- You define a rectangular area on your screen by entering coordinates. The script keeps an eye on this area for changes.
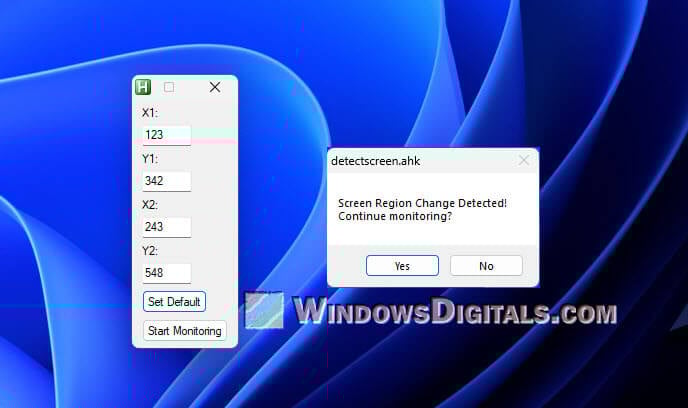
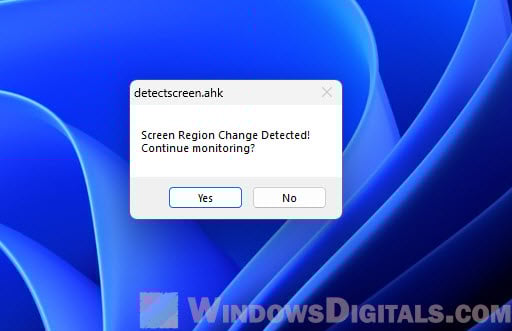
- After you start monitoring, the script keeps comparing snapshots of the specified screen area. If it finds a difference between snapshots, it sounds the alert.
- After the alert sounds, a message box will pop up asking if you want to keep monitoring. This lets you pause or stop the monitoring as you like.
This script is pretty efficient and light on resources (won’t use too much CPU or RAM), as it only focuses on a specific area you choose instead of the whole screen.
Related resource: How to Auto Set Priority and Affinity in Windows 11/10 with Script
How to run the AHK script (for beginners)
Getting this AutoHotkey script up and running is not too difficult, as everything is already set up. You just need to let it know what sound file it should play and input some coordinates it should watch.
- If you haven’t done so yet, download and install AutoHotkey from its official site.
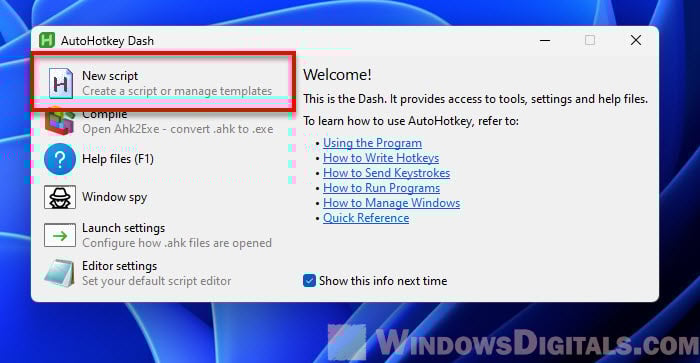
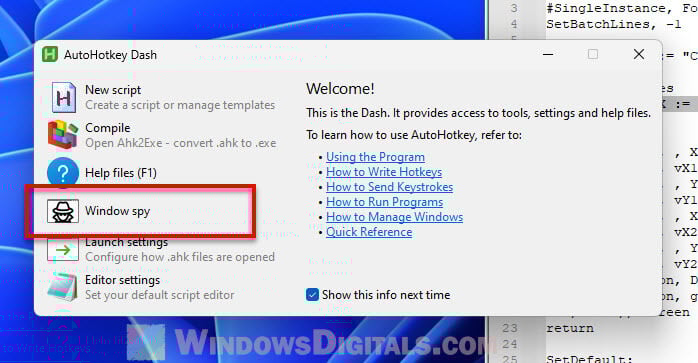
- Open “AutoHotkey Dash” and pick “New script”. Name it whatever you like, like “ScreenChangeDetector.ahk”.
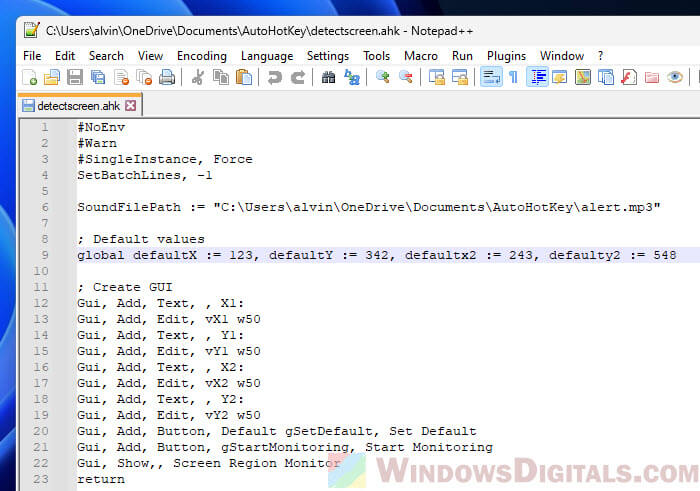
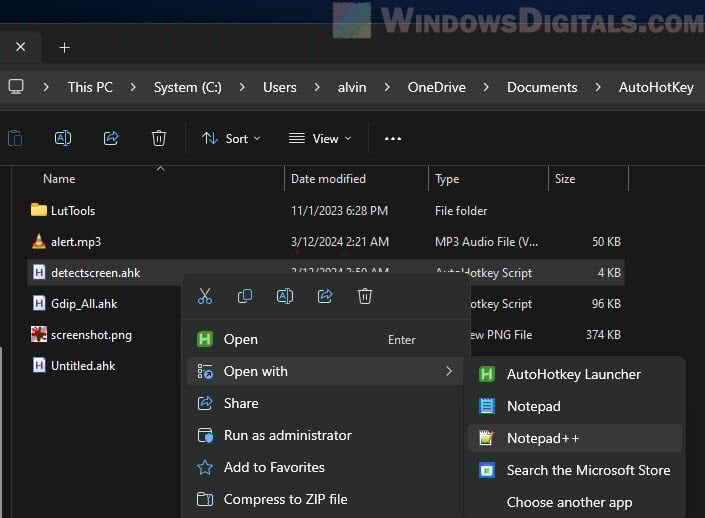
- Right-click the new script file and open it with any text editor. Copy and paste the script above into this file.
- In the script, find the line that starts with
SoundFilePath :=. Change the example path to the path of the sound file you want to use as an alert.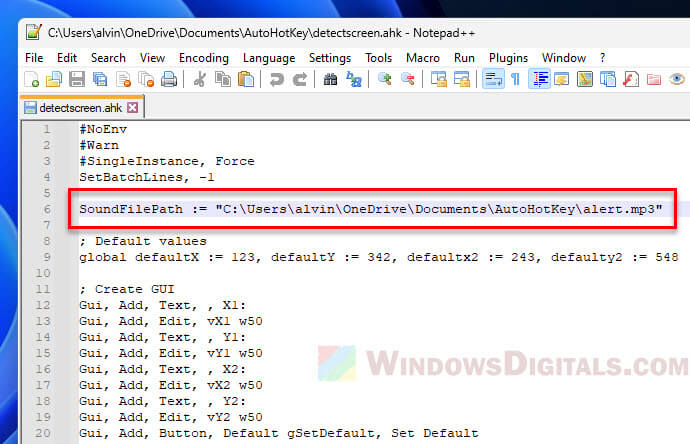
- Run the script by double-clicking it. Use the GUI to put in the coordinates of the screen area you want to watch. If you’re not sure about the coordinates, look at the next section below, where I’ll show you how to use AHK Windows Spy to find them.
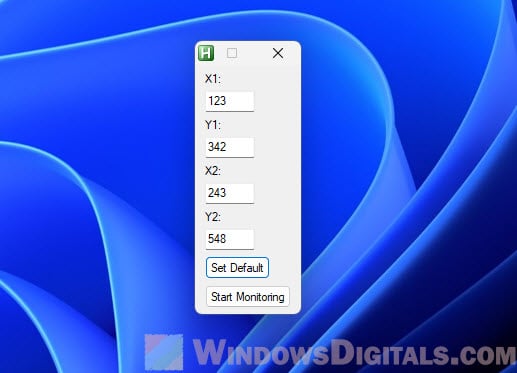
- Hit the “Start Monitoring” button in the GUI. The script now actively watches the chosen area for changes.
- The script will show a message and play the sound alert when a change happens.
- The script includes default coordinates for the area to watch. You can change these in the script itself to fit your usual needs, saving you time when setting up future monitoring sessions.
You can stop the script anytime by right-clicking the AutoHotkey script icon in the taskbar and picking “Exit.”
Practical uses of the script
I first made this AHK script for gaming purposes, but below are some other ways you might use it as well.
Automate your work
Keep an eye on parts of your screen for changes that show a task is done, like a progress bar in a video editing program or a status update in a long-running data analysis. The sound alert lets you move on to the next step in your work without needing to keep watching the screen.
Check for changes in your game
Let the script alert you to specific happenings in a certain part of your game screen. For example, it can tell you when a resource is ready to collect or when you’ve got a game invite. 
Stock trading (not recommended)
Watch a specific stock ticker or a set of financial indicators on your trading platform. The script can alert you to sudden changes.
Monitor changes on a webpage
Keep tabs on parts of a webpage for updates without the need to keep refreshing the browser all the time. This is very useful for ticket sales pages, online auctions, or any site where you’re waiting for new content to pop up (like social media).
How to find the coordinates, width, and height with “Windows Spy”
To accurately set the screen area for the script to keep watching for, you can use Windows Spy. It is a simple tool that comes with AutoHotkey. Windows Spy can let you easily figure out the coordinates, width, and height of any screen region.
- Start AutoHotkey and select “Window Spy.”
- Bring up the window or focus on the screen area you want to monitor. Then, carefully place your mouse over the starting point (top-left corner of the area). Windows Spy will show the current position of your mouse cursor as X and Y coordinates.
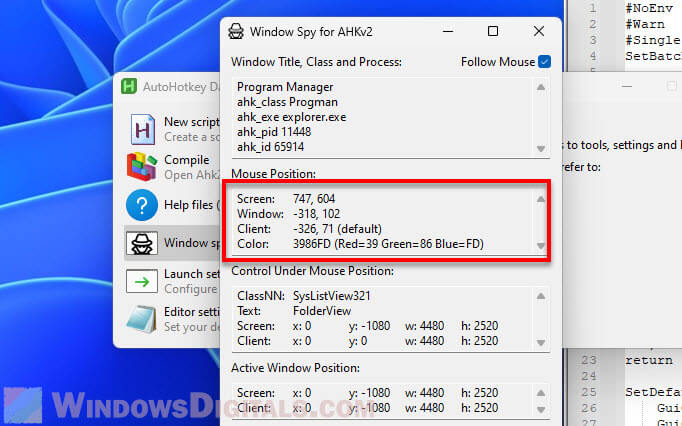
- Write down the X and Y values displayed in Windows Spy. These will be your starting coordinates (X1, Y1).
- Then, move your mouse to the other end of the area you want to monitor (bottom-right corner). Subtract the starting X from the ending X to figure out the width. Do the same for the Y coordinates to get the height.
- Enter these starting coordinates, width, and height into the GUI provided by the script to set up the area you want it to watch.
One last thing
I made this script to help me keep an eye on changes on my game screen without the need to constantly watch it. It can be very tiring to keep looking at a screen for changes, for example, checking for new items in the auction house in a game. It’s very helpful as it alerts me with a sound when something changes on the screen (you can set this of course).
But know that this script is quite sensitive. It will pick up even minor changes, like a single dot moving on the screen. Thus, if the area on your screen that you’re monitoring has other changes that don’t matter to you, this script will still trigger the alert.